XL110 – Temperature Sensors
XL110 – Temperature Sensorsis a temperature sensor using ESP32 as its microcontroller and DS18B20 as its sensor. This device is able to read data from 36 sensors. The device already tested for indoor use.
Here are the steps to install the firmware on the XL110 – Temperature Sensors
1. Connect the XL110 to the PC.
2. Download and extract the firmware from this link:
3. Open the file and click Run.
4. Once inside the setup menu, enter the COM port name, then press Enter.
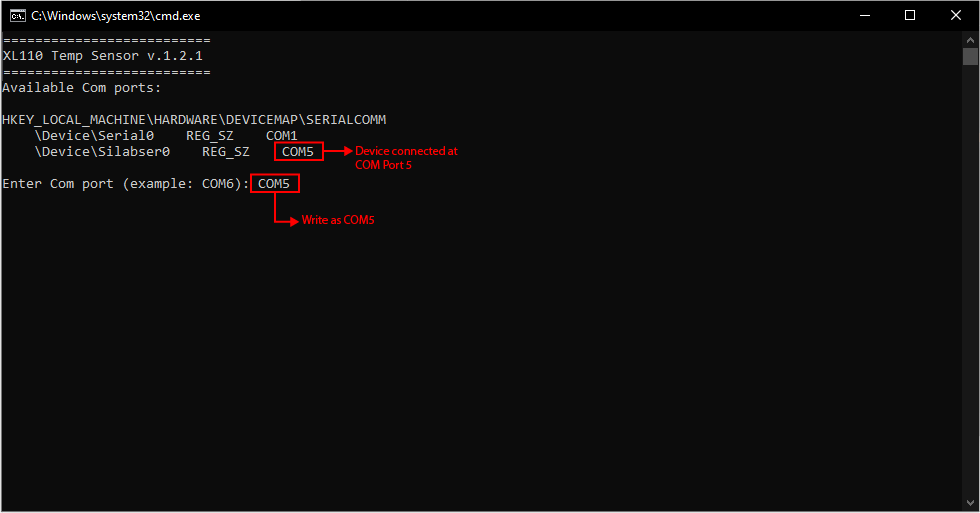
Type the COM port
5. Type 1 as Upload Program, and press Enter
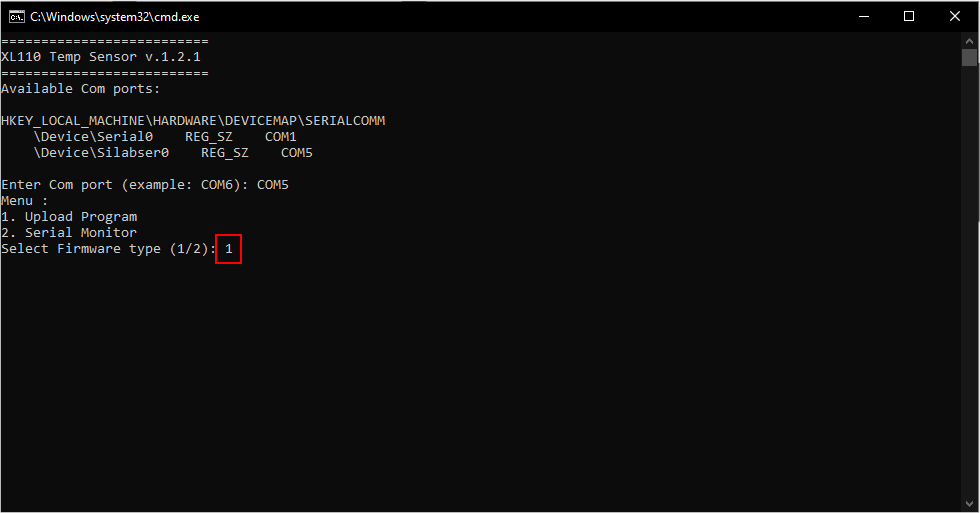
Type 1 as Upload Program
6. The system will erase and uploading the firmware into the device.
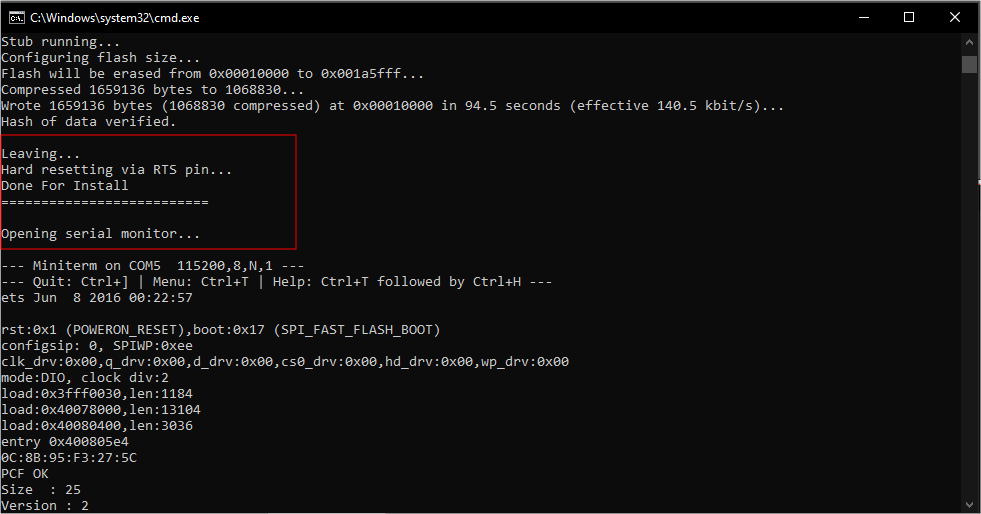
Installation Done
7. The Command Prompt will tell that the device set in BLE mode.
*Note: The LORA’s LED will blink 2 times.
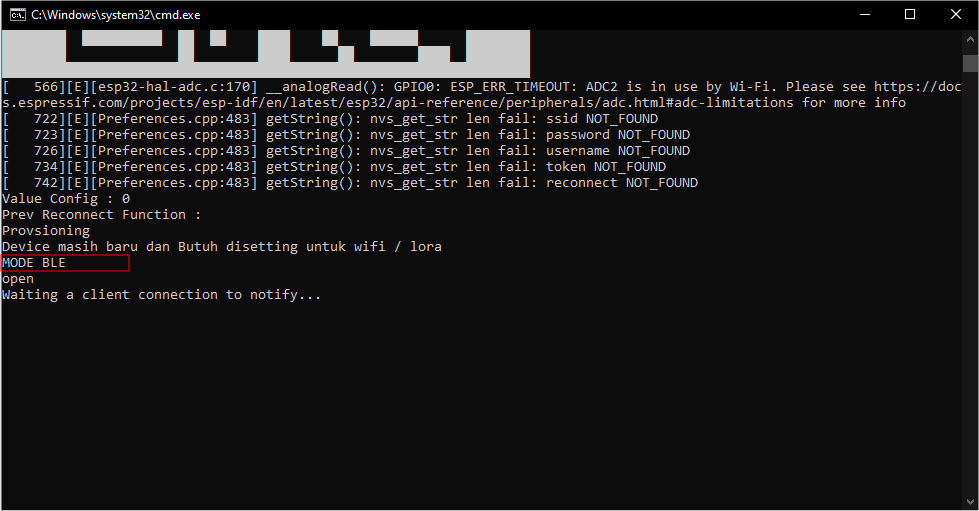
BLE Mode
8. On the XL110, push the RESET button 2 times to set as Access Point mode
*Note: The LORA’s LED will blink 3 times.
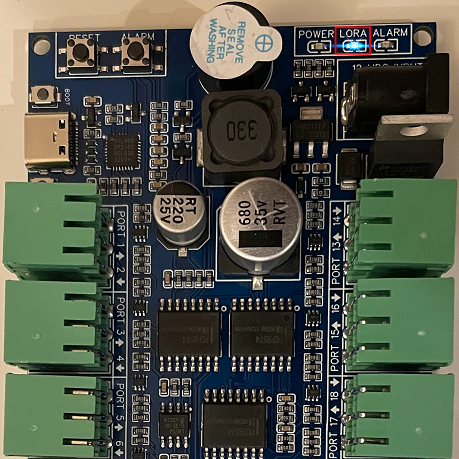
LORA’s LED
9. Go to your PC and connect to XL110’s Access Point (XL110-275C)

Connect to Device’s AP
10. Once connected, go on to your browser, and type 192.168.4.1
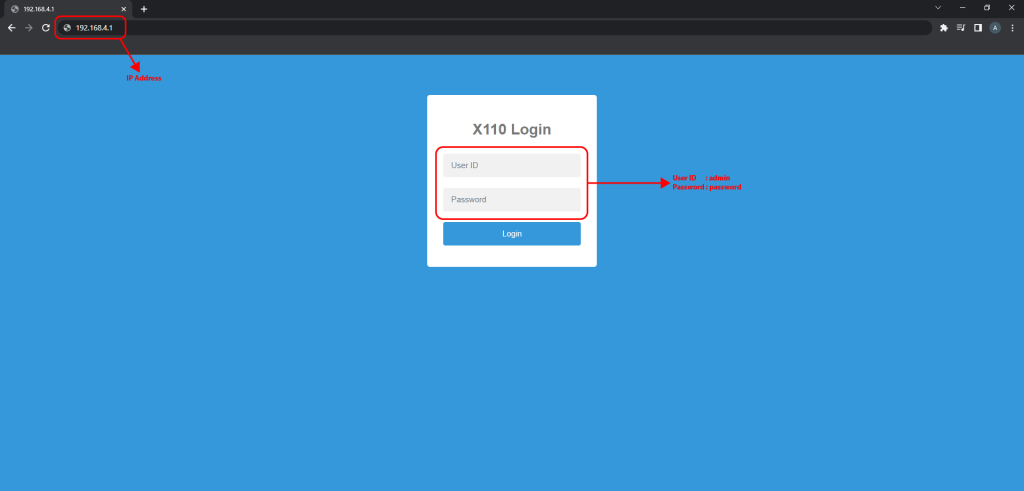
AP Configuration Page
11. Fill the User ID and Password
User ID : admin
Password : password
12. Click Login
13. Once inside the web server, fill the Wi-Fi Name and Wi-Fi password with the available Wi-Fi in your room.
14. Copy the DevEUI: A1100C8B95F3275C
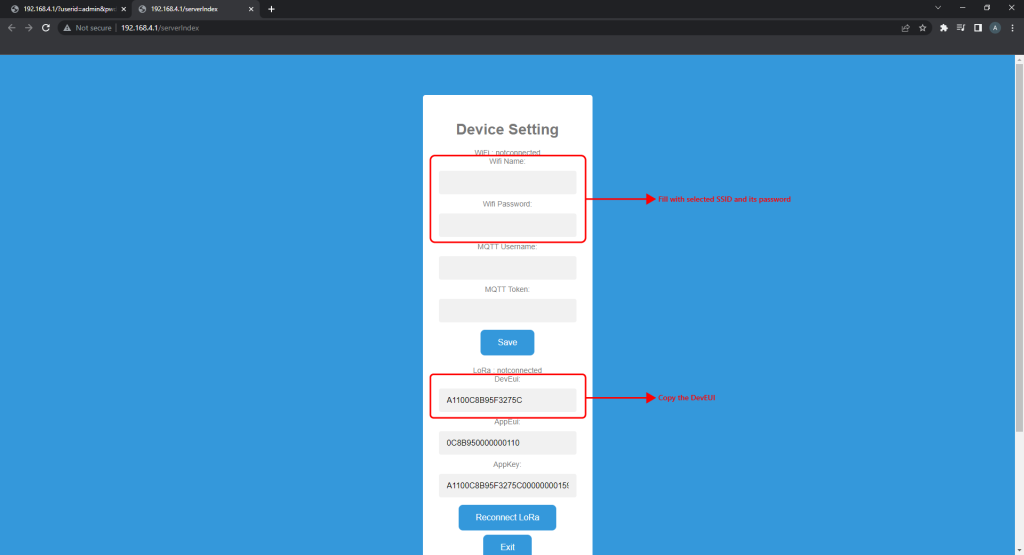
Web Server Page
15. Another way to get the DevEUI address is by scanning the QR code on CMD.
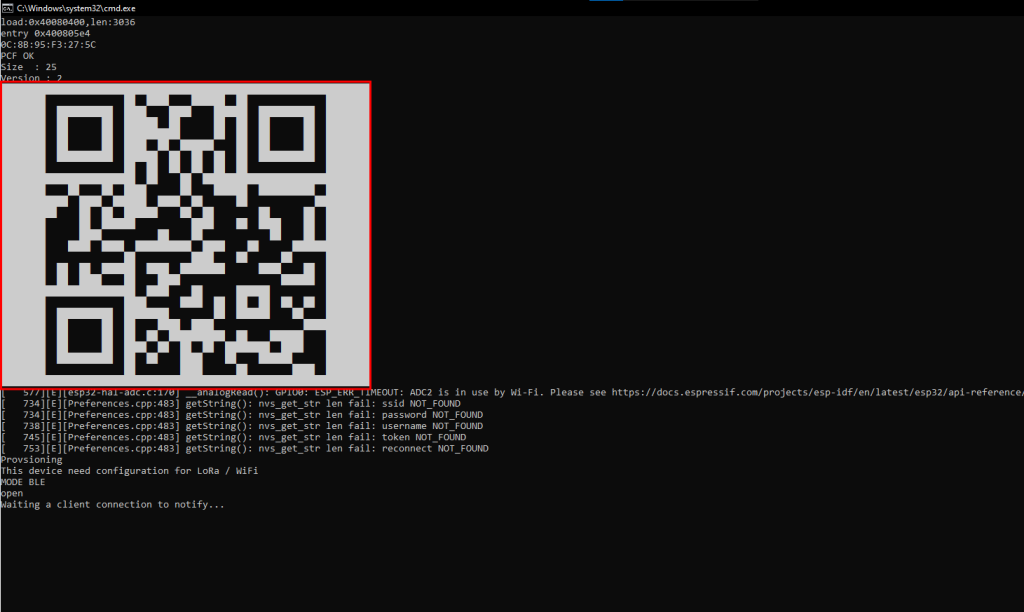
QR Code
After this step, go on IoT Stadium and Login.
The goal of this process is to add the device into the platform and to get the Device ID and Access Token, so the device has its unique authenticator.
1. Go on Device menu
2. Click on New Device.
3. Give the name and description for the device
4. Select the Connectivity Type as LoRaWAN
5. Select the Device Network as The Things Stack V3
6. Paste the DevEUI from the web server on DevEUI empty field.
*Example: A1100C8B95F3275C
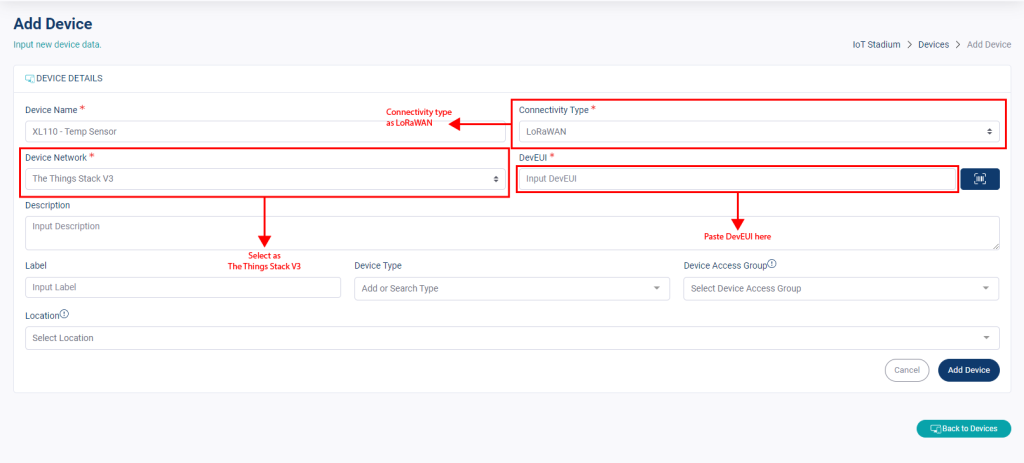
New Device Page
7. Click Add Device, the device will be added into the list, and you will be back at Device menu page
8. Click on View Device or Edit Device next to your device name.

Click on View Device or Edit Device
9. Click on Access Token.
10. Copy the Device ID at MQTT Username (at web server) and copy the Access Token at MQTT Token (at web server).
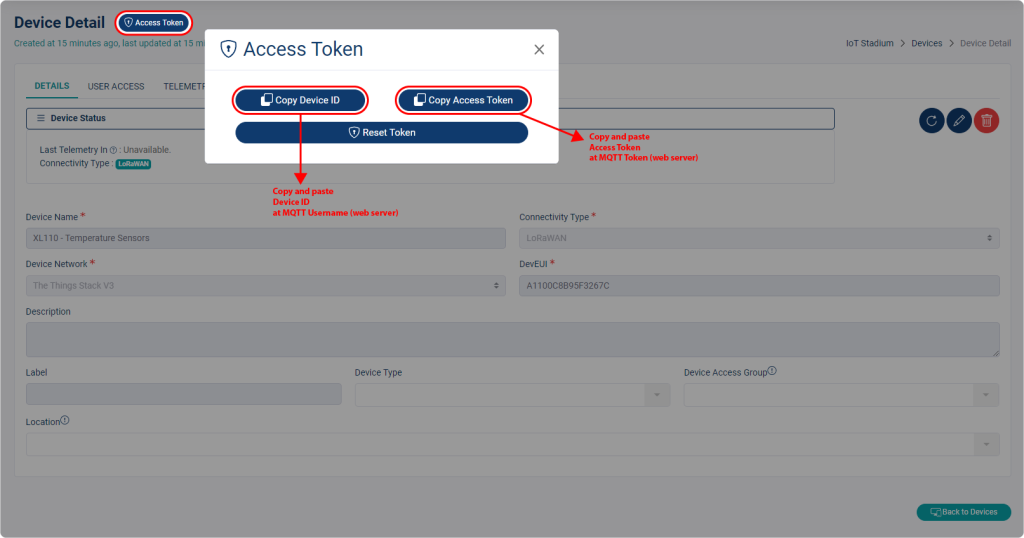
Copy Device ID and Access Token
11. Back on web server, click Save, then the device is ready to use.
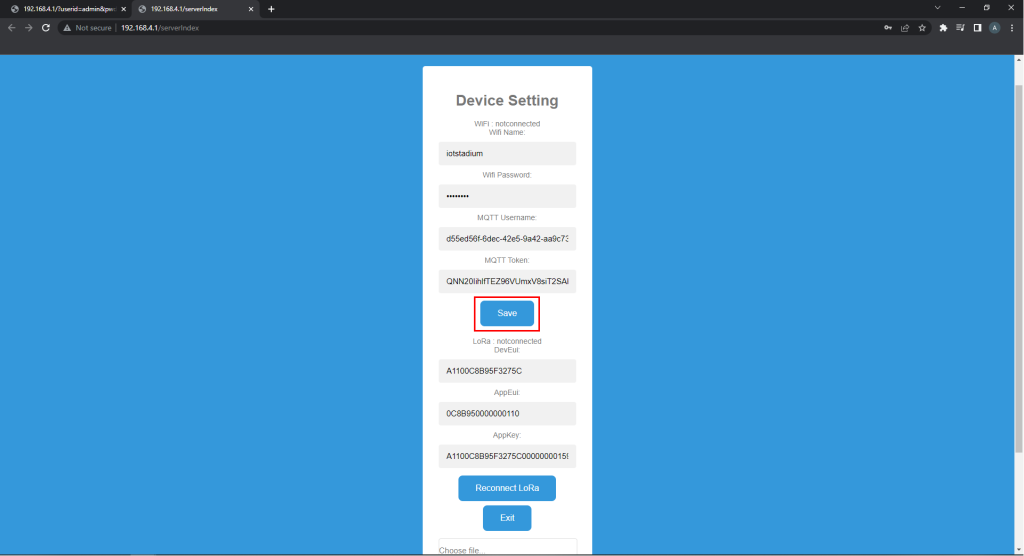
Click Save

