X110 – Temperature Sensor
X110 – Temperature Sensor is a temperature sensor using ESP8266 as its microcontroller and DS18B20 as its sensor. This device is able to read data from 15 sensors. The device already tested for indoor use.
To connect the device with IoT Stadium platform:
1. Go on Device menu.
2. Click on New Device to add the device.
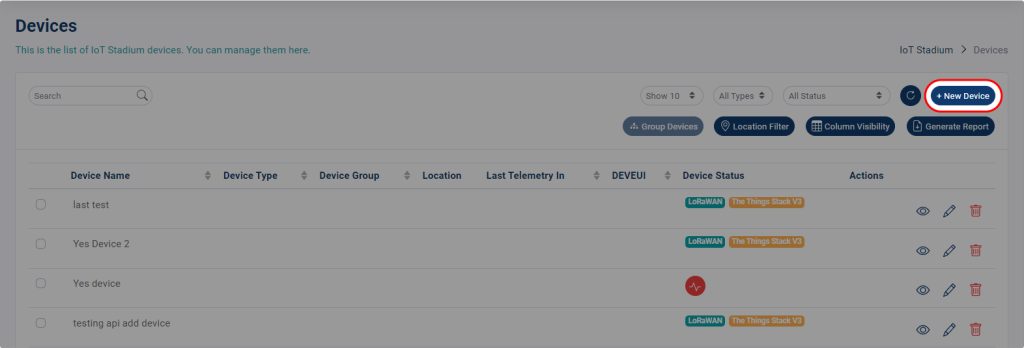
Click New Device
3. Give a name, and description for the device.
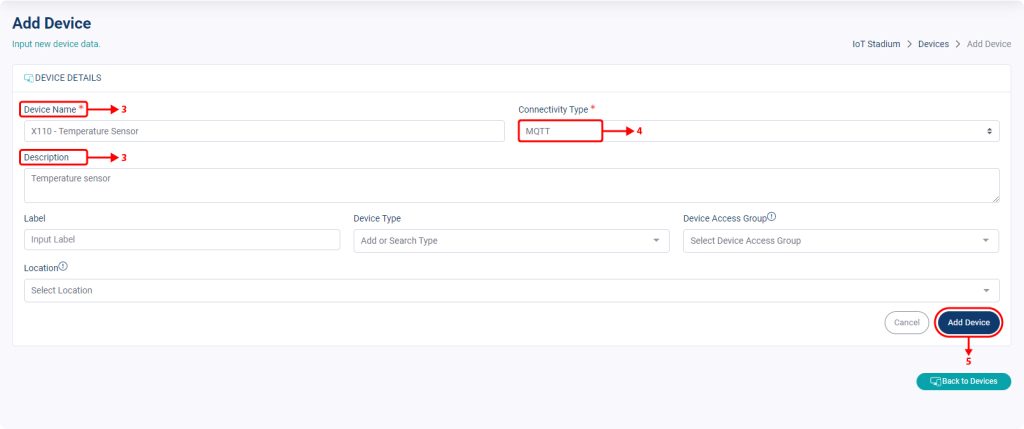
New Device Page
4.Choose MQTT as the Connectivity Type
*Note: You can skip the Label, Device Type, Device Access Group, and Location
5. Click Add Device when done.
Your device will be added into the list, but the device still have no Device ID and Access Token, so the device still unconnected with the platform.
To connect your device to the IoT Stadium platform, you can follow these steps:
1. Click on View Device or Edit Device next to your selected device.
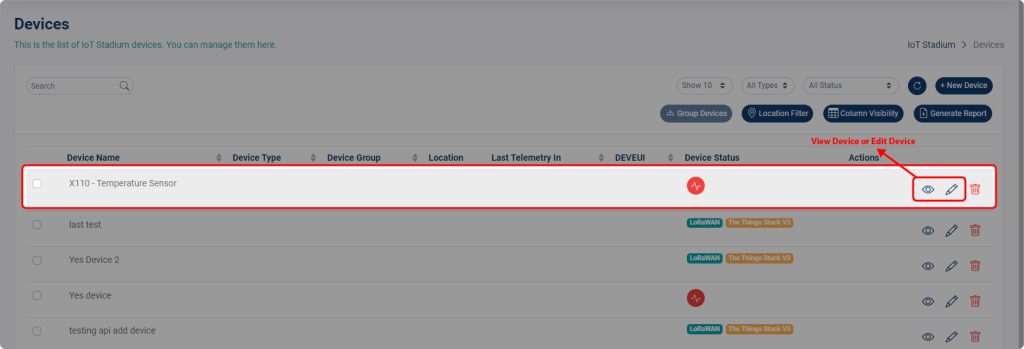
Click on View Device or Edit Device
2. Click on Access Token, then copy and paste both Device ID and Access Token.
*Note: The Universally Unique Identifier (UUID) Device ID and Access Token will be needed at step no 15
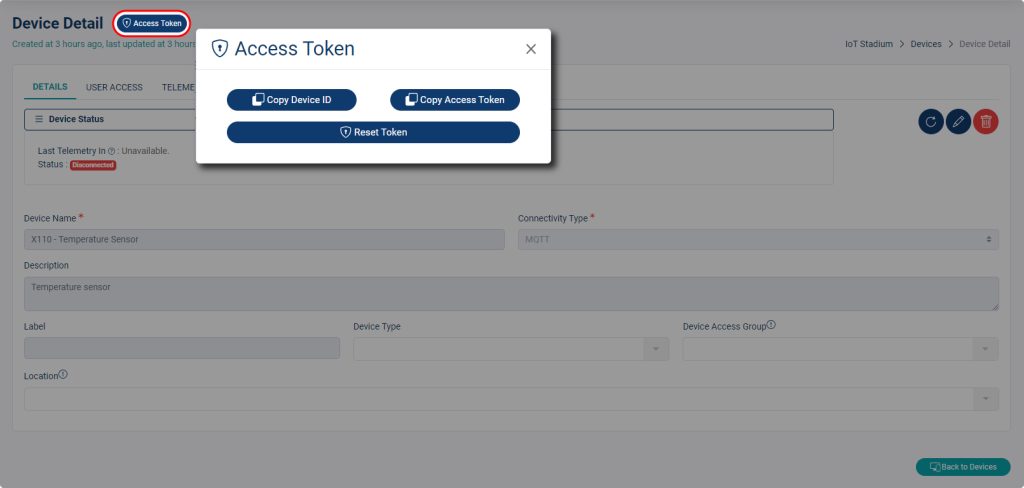
Copy Device ID and Access Token
3. Download the firmware from this link:
X110-temp-sensors-1.0.3.0.3
4. Extract the file.
5. Connect the X110 to your computer.
6. Open the folder and click Run.
7. Type the COM Port name, then press Enter
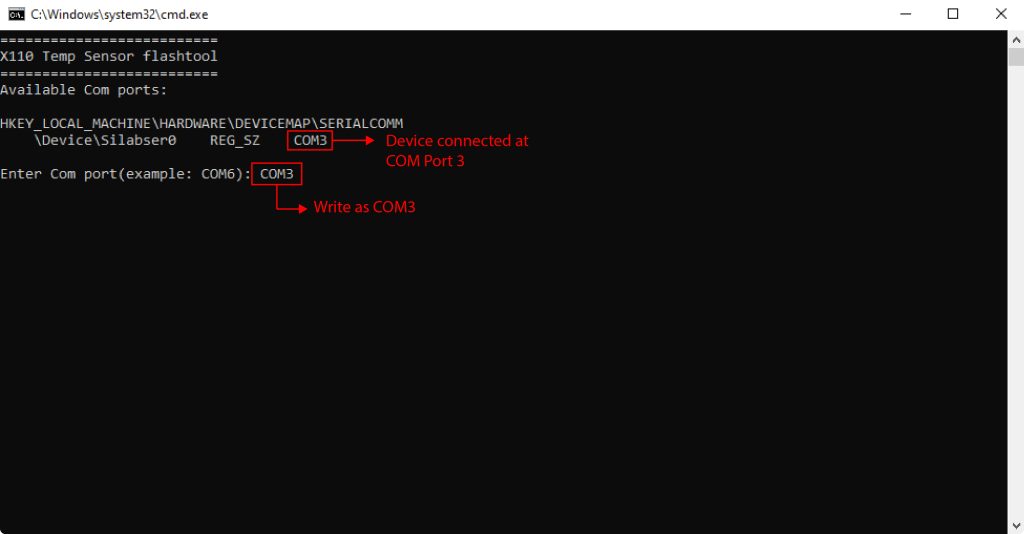
Type the COM Port
8. Type No when the board is having no firmware, or type Yes to make sure the system will clean the board and install the X110 – Temperature Sensor firmware.
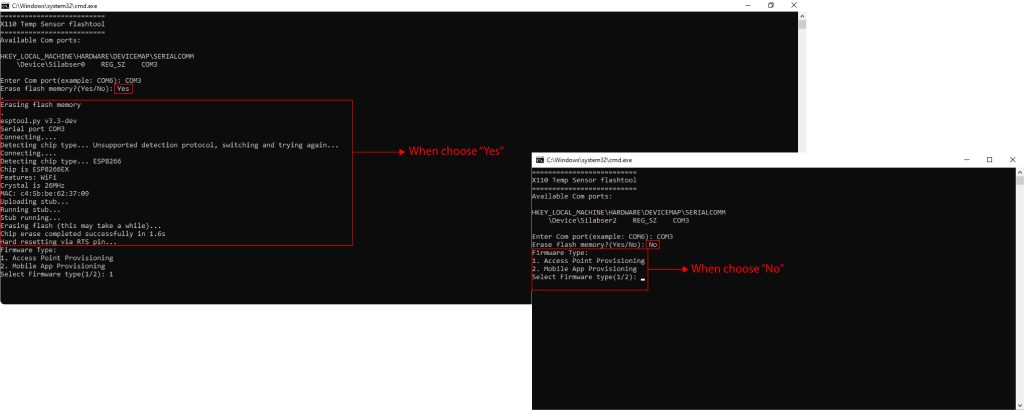
Selecting Erase Memory
9. Type 1 to choose the Access Point mode.
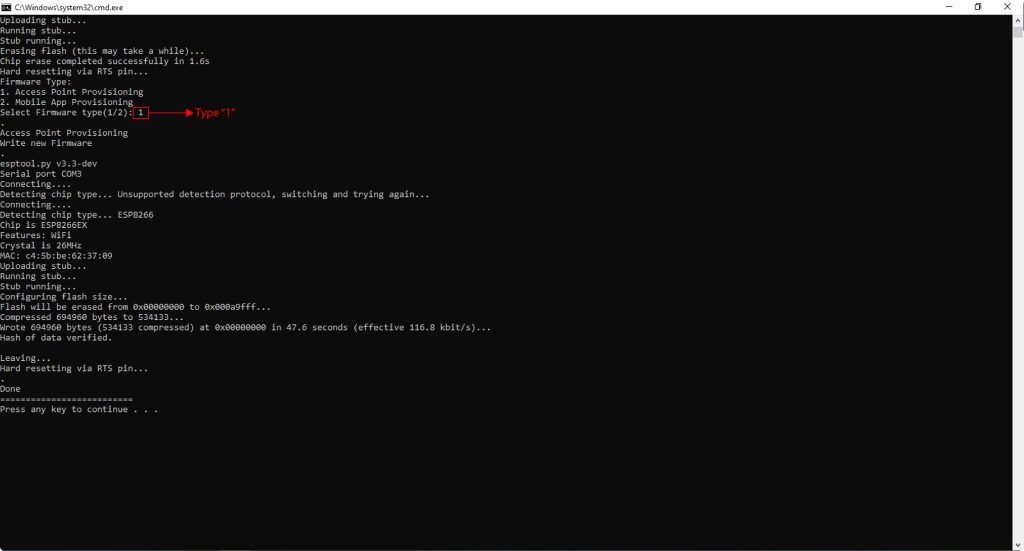
Select the Access Point mode
10. Once the installation is complete, close the program. The device will then start sharing its Access Point.
a. Wi-Fi’s LED blinks 2 times : Access Point mode
b. Wi-Fi’s LED blinks 3 times : SmartConfig mode
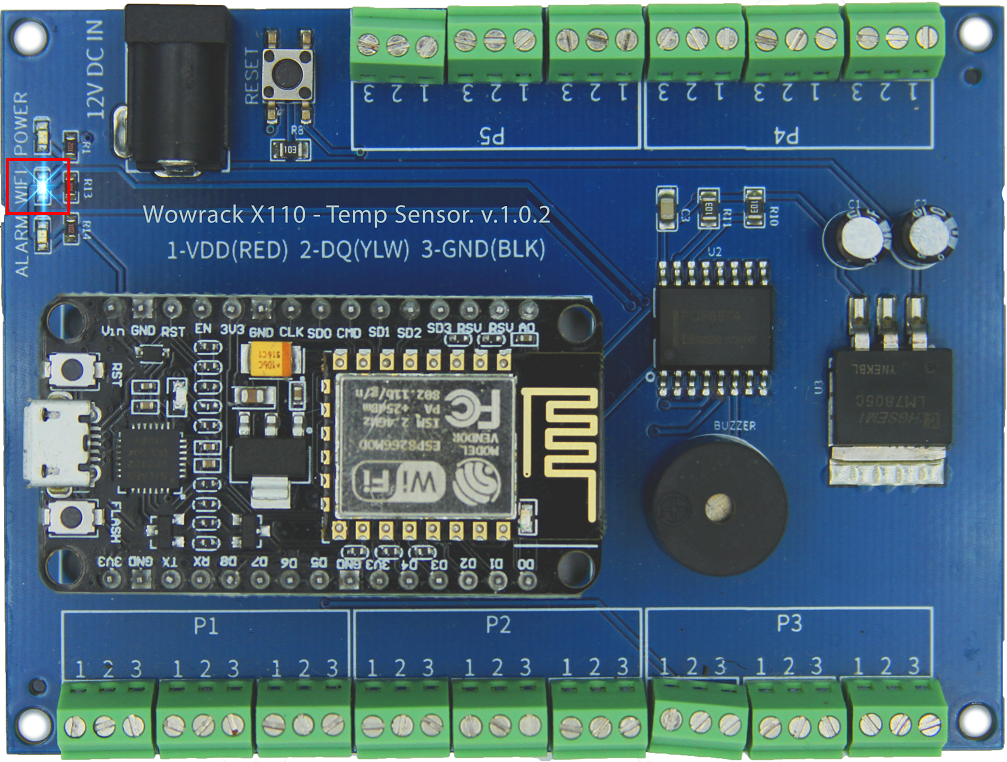
X110 Wi-FI’s LED
11. Connect your phone or PC to the Access Point of the device. Locate and connect to the Wi-Fi network labeled “X110 – Temp Sensor”.
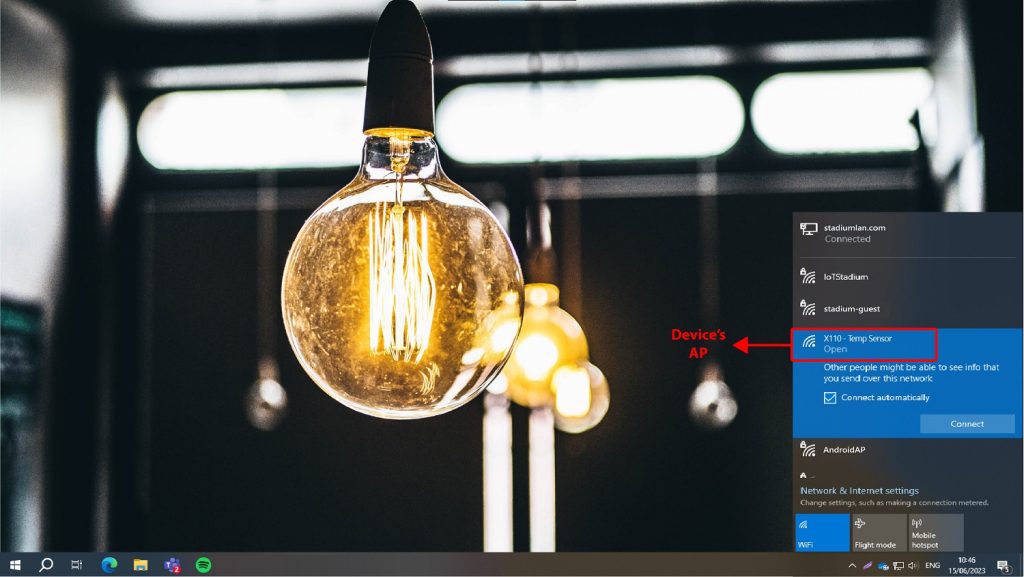
Connect to Device’s AP
11. Once connected with Wi-Fi go to 192.168.4.1 on your browser.
12. Fill Username and Password
a. Username : admin
b. Password : password
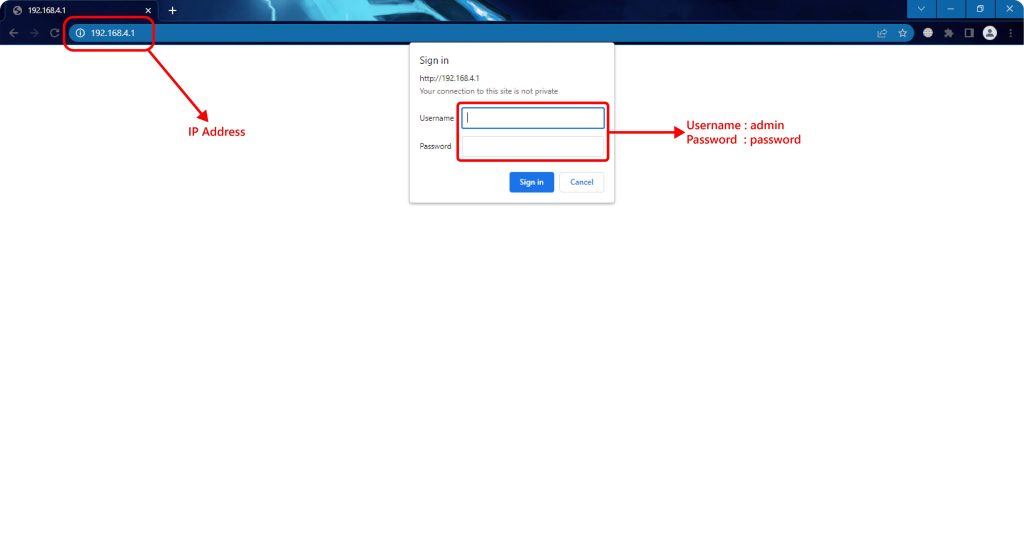
AP Configuration Page
13. Go on Connection Settings.
14. Fill the SSID and the Password with available Wi-Fi inside your room. In this example, the available Wi-Fi is iotstadium.
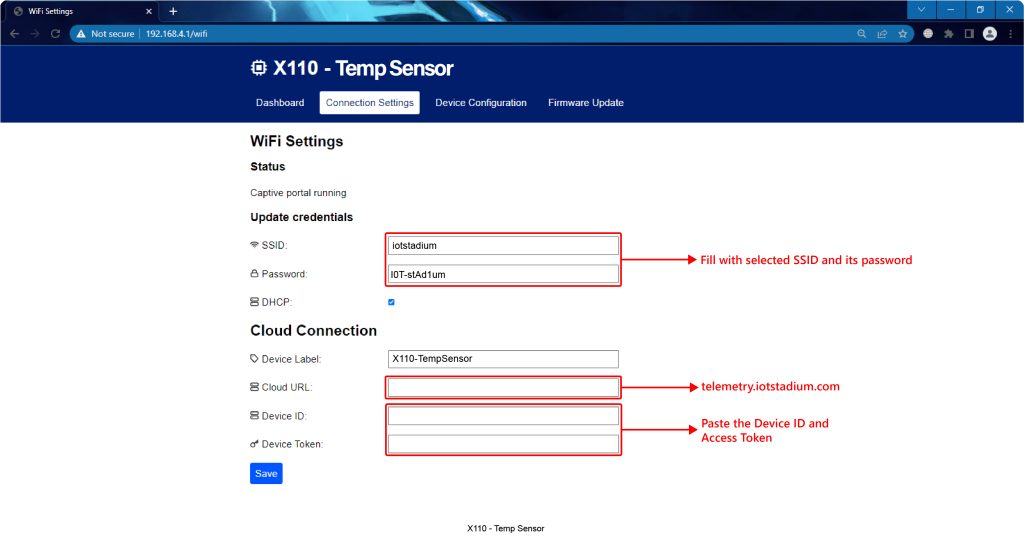
Connection Setting Page
15. Fill the Cloud URL, Device ID, and Device Token
a. Cloud URL : telemetry.iotstadium.com
b. Device ID : your Device ID
c. Device Token : your Access Token
16. Choose DHCP
17. Click Save when done.
18. The newly added device will automatically connect to the platform.
*Note: The waiting time for the device to get connect depends on the internet speed.
19. The device is ready to use, the USB can be unplugged, and the device can be powered through jack DC power.
*Note: The device work on 12VDC.
20. If you want to change the connected Wi-Fi, the Device ID, and Access Token, press the RESET button for 5 seconds. The Alarm’s LED and buzzer will turn on for a few seconds.
*Note: You need to repeat the step no. 11 until done.

