-
Getting Started
-
Device Management
-
Automations
-
Dashboard
-
User Management
-
LoraWAN
-
API and Integrations
-
Boards
-
DIY
-
Gateway
Sonoff BasicR2 Smart Switch
Sonoff BasicR2 Smart Switch is a smart switch that can communicate and be controlled with users’ PC or phone via internet. This smart switch is widely applicable and can be applied to household appliances, and lamps, as long as this device has network, users can remotely turn the connected home appliance on/off from anywhere at any time.
BasicR2 Smart Switch Pins
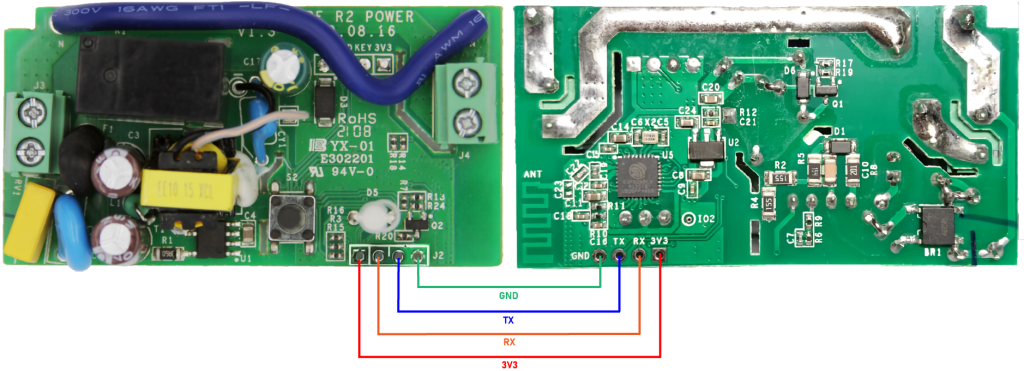
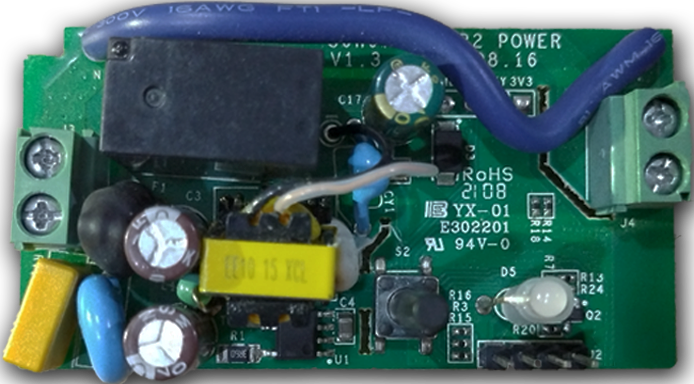
Here are the BasicR2 pinouts, you can take a look at the backside to see the pin name.
Solder these pins with 4 headers pin, so that the device can easily connect and disconnect with the Serial Programmer or USB TTL.
Serial Programmer
The Serial Programmer is also known as USB-to-TTL Converter.
A USB-to-TTL Converter is a device designed to convert USB bus signals into TTL serial signals. It serves multiple purposes, including debugging microcontroller programs via a PC and transferring programs from a PC to a microcontroller.
Here are some of the recommendations:
- CH340G: Cheapest and the most reliable
- Voltlink: A USB to serial adapter board that utilizes the widely used CP2102N chip. It comes with a built-in ESP auto-reset circuitry feature and incorporates a 500mA voltage regulator
- CP2102 or PL2303: Works with some devices, but it might be required to use an external 3.3V supply.
In this tutorial, the CH340G is used. The pinout configuration for the USB-to-TTL CH340G is like this.
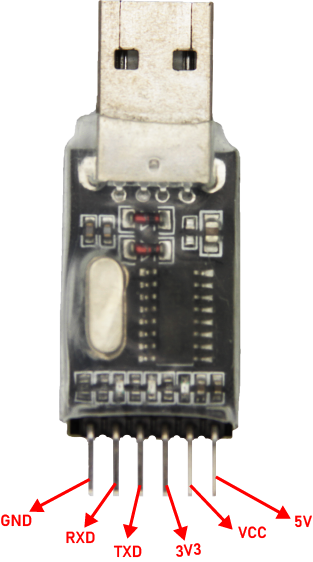
USB-to-TTL CH340G Pinouts
Schematic
After you understand the pins on both devices, connect the wires according to the table:
| USB TTL | Sonoff Smartswitch Basic R2 |
| 3V3 | 3v3 |
| TXD | RX |
| RXD | TX |
| GND | GND |
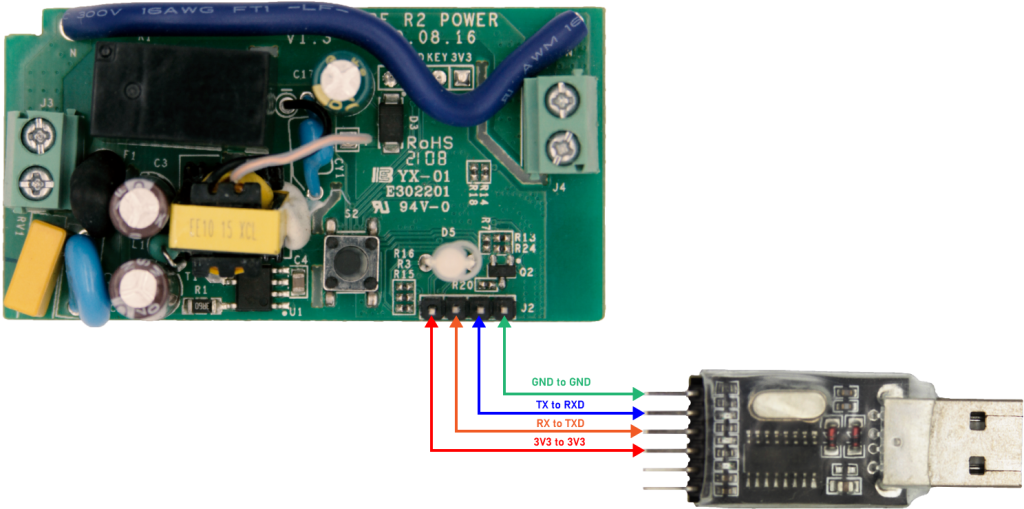
The Schematic of Sonoff BasicR2 Smart Switch with USB-to-TTL CH340G
Flashing the Firmware
After the devices have been assembled, the next step is flashing the new firmware on the Smart Switch.
*Reminder: It’s important to know that uploading the new firmware is irreversible and the user will no longer be able to use the app eWeLink.
1. Connect the USB-to-TLL with the PC.
*Note: Push the Smart Switch button while plugged in the USB.
2. Download the firmware here:
IoT Stadium Firmware for Sonoff BasicR2 Smart Switch
3. Extract the file.
4. Open the extracted file, then click Run.
5. Enter the COM Port name, then press Enter.
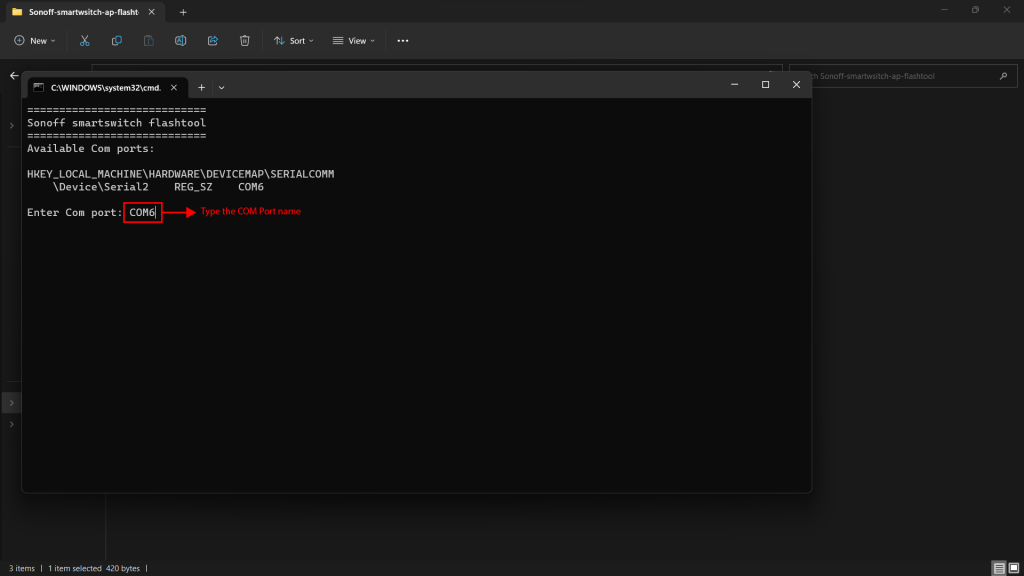
Enter the COM Port Name
*Tips: To check on which port the device is connected, open the Device Manager from the Search menu, then open Ports.
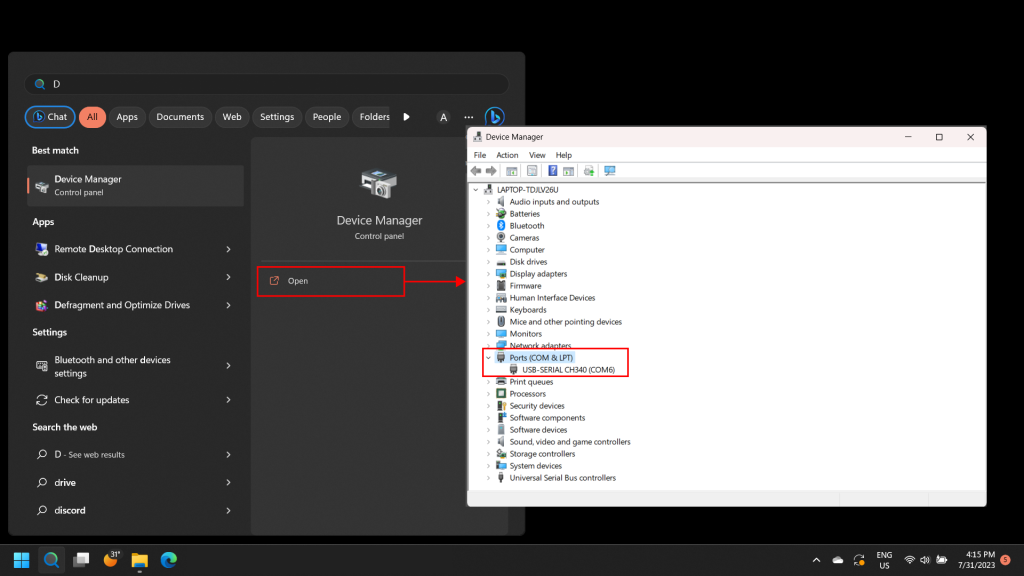
Check Port on Device Manager
6.The installation will take time.
*Note: The installation time depends on the PC’s processor.
7. When the flashing is done, the CMD window will be displayed like this:
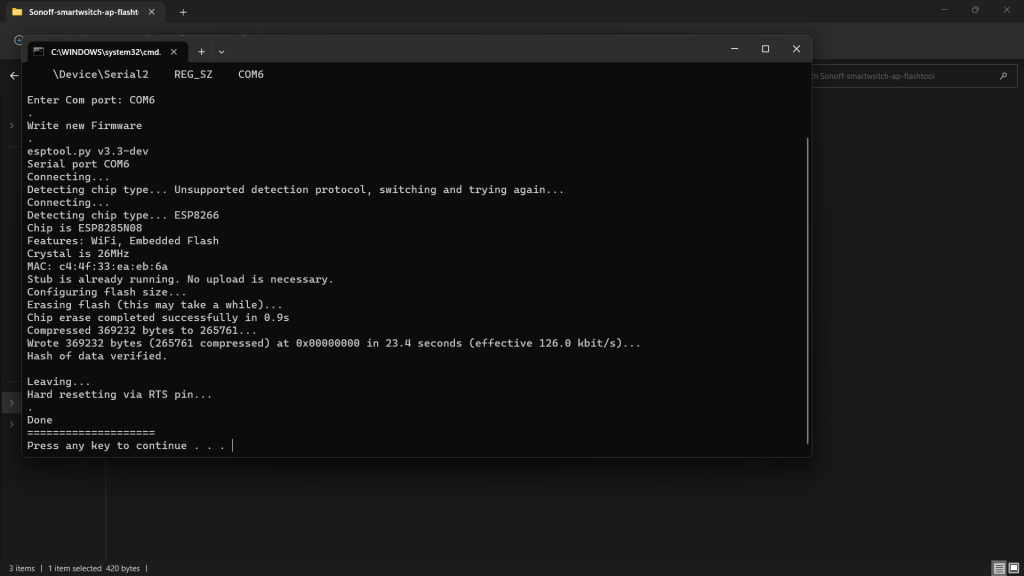
Flashing is Done
Unplug the BasicR2 and plug it back into your PC or laptop without needing to push the button. This step is necessary to allow the device to broadcast the Access Point.
Adding the device and acquiring the Device ID and Access Token
This step is used to acquire the Device ID and Access Token, which are important for the next step.
Device ID is used to uniquely identify a particular device, while the Access Token is used to authenticate and authorize access to the platform.
1. Go on app.iotstadium.com and click Login.
2. Once inside the platform, go on Device menu.
2. Click on New Device.
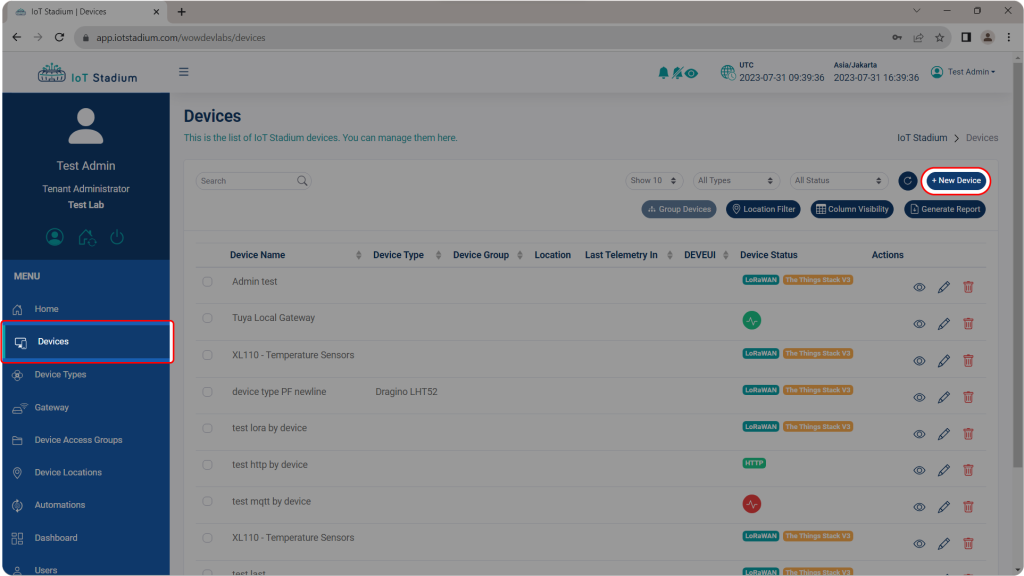
Click New Device
4. Give the device name and description.
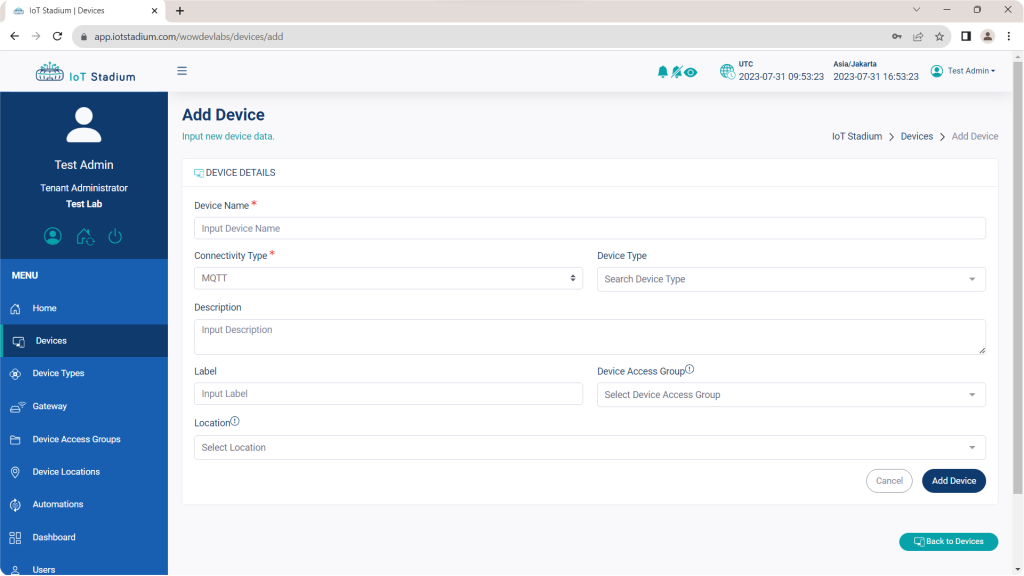
Add New Device Page
5. Select the Connectivity Type as MQTT.
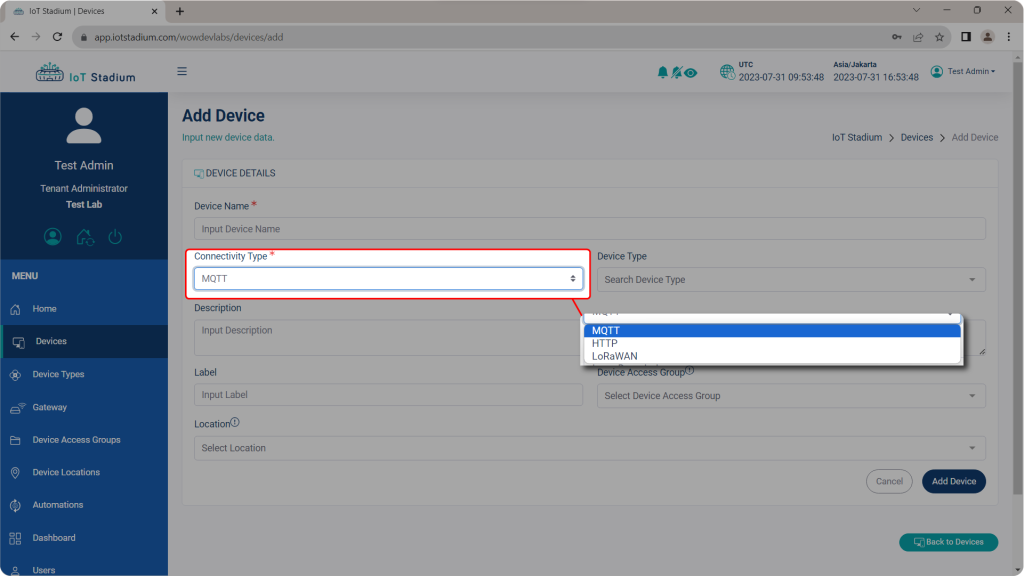
Select MQTT
6. Click Add Device.
7. The device already added into the list, and the page will be back on Device page.
8. On the Device page, click on View or Edit next to the device’s name.
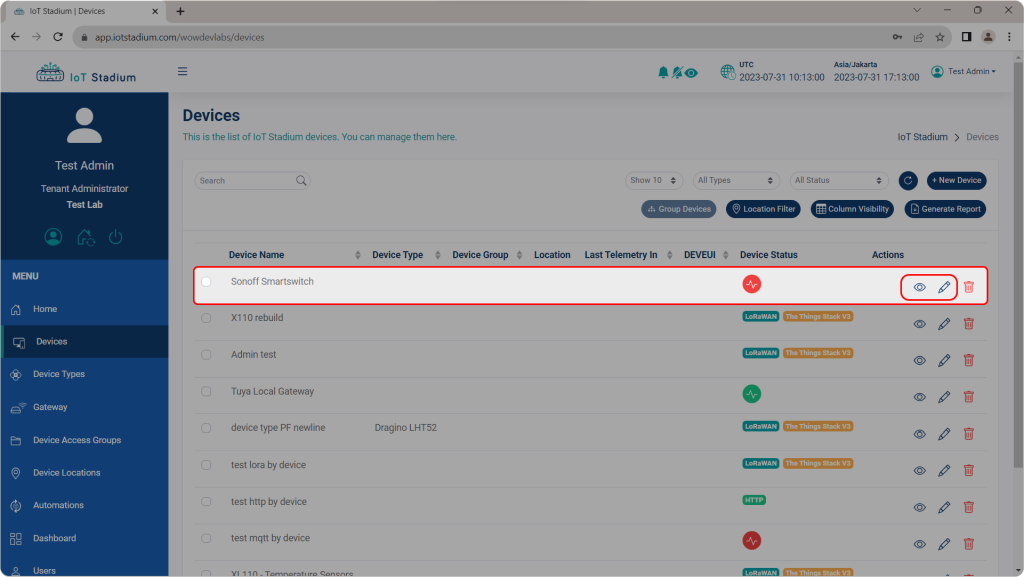
Click on View or Edit
9. Click on Access Token.
10. Copy and Paste both Device ID and Access Token on Notepad
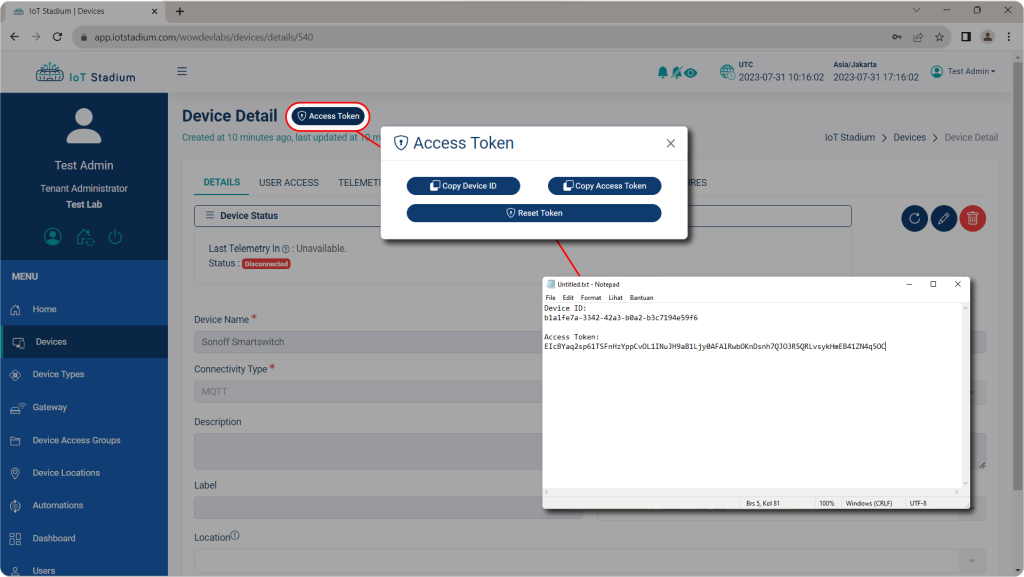
Click on Access Token
Set The Device
This process is setting up the BasicR2 to connect with an available Wi-Fi network and copying its Device ID and Access Token.
1. Connect with the device AP
a. SSID : sonoff
b. Password: IoTStadium
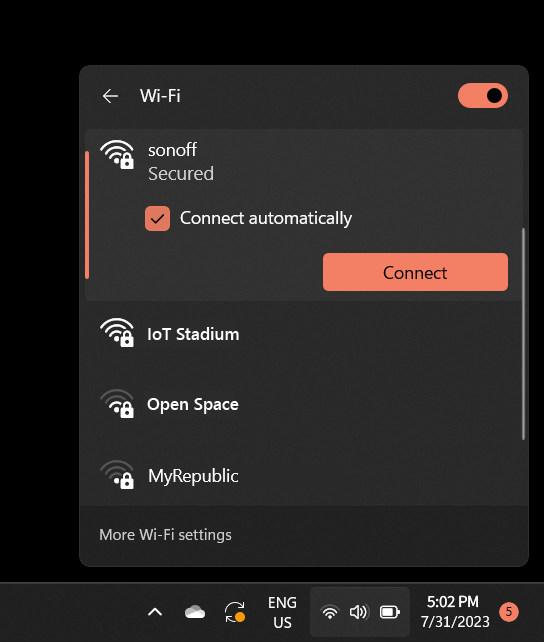
BasicR2 Smart Switch Access Point
2. Once connected, the web browser will automatically open and redirect to msftconnecttest.com/redirect and then to 192.168.4.1. Alternatively, you can manually access 192.168.4.1.

Directed to msftconnecttest.com/redirect
3. Go on Configure WiFi to automatically select the available Wi-Fi around you. You can also manually enter the SSID and its password by click on Configure WiFi (No Scan)
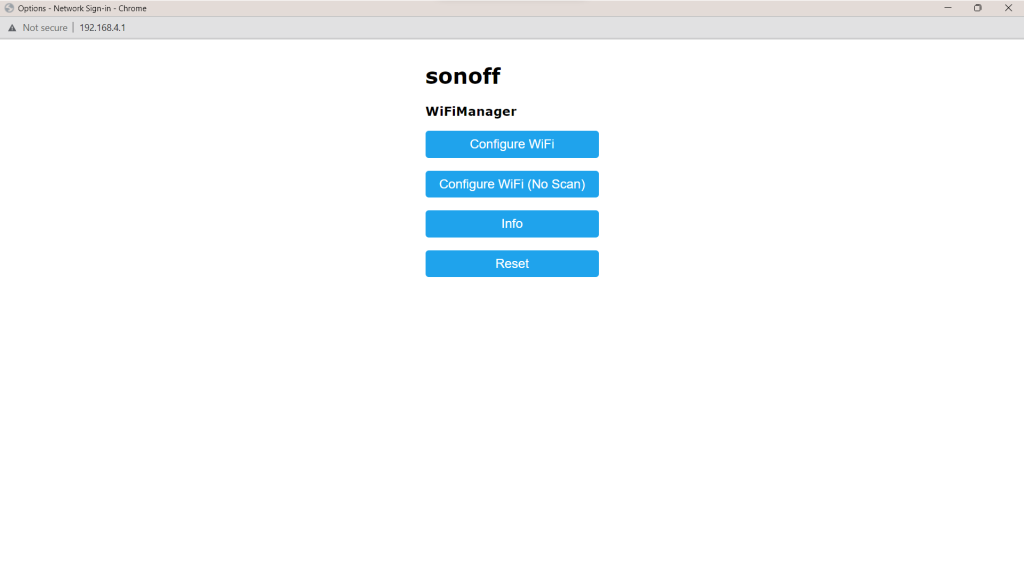
Device Setting Page
The difference between the two options will be like this:
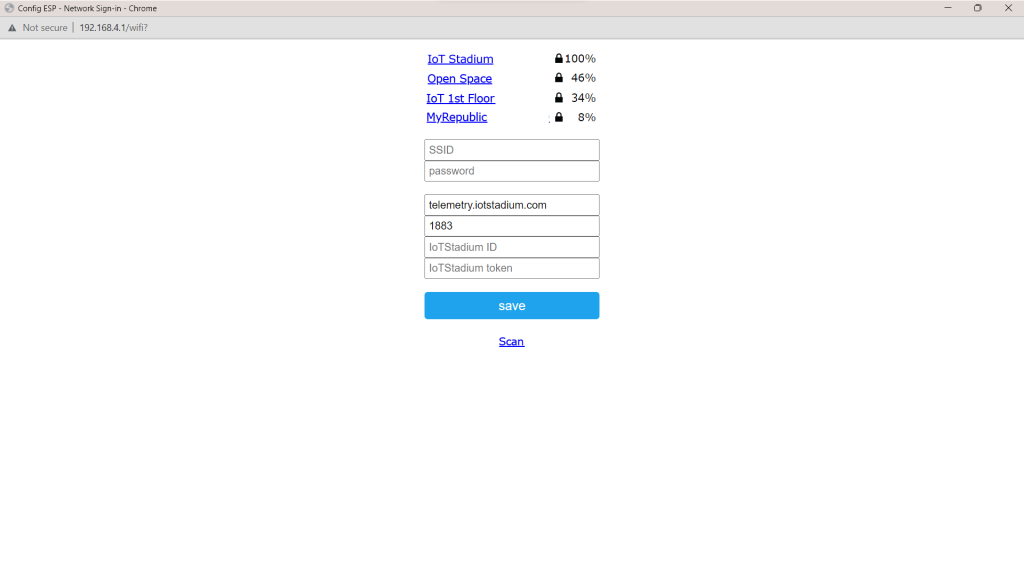
Configure WiFi
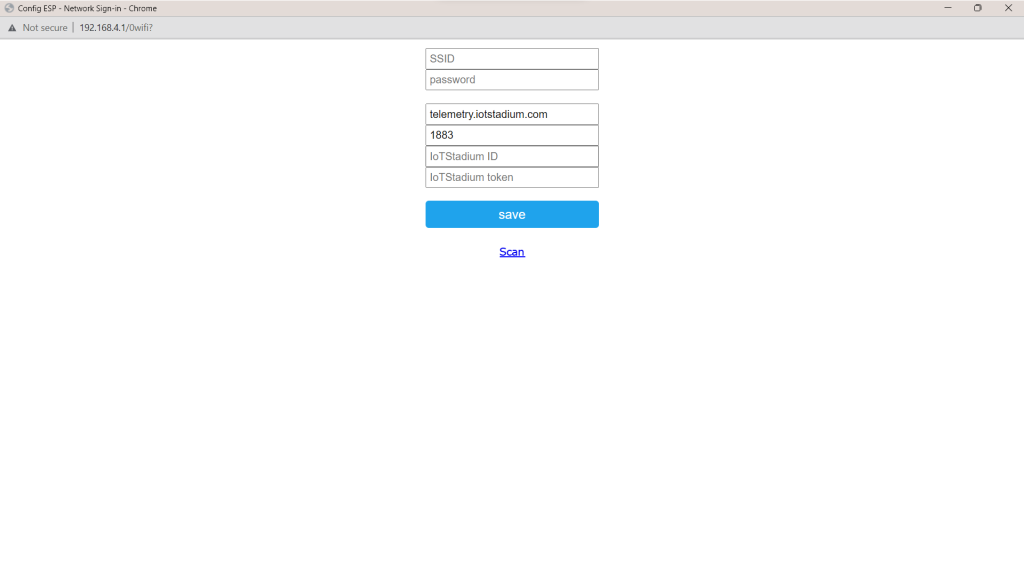
Configure WiFi (No Scan)
4. Fill in the SSID and the Password with available Wi-Fi inside your room, by clicking on available Wi-Fi or insert it manually.
5. Copy and paste Device ID to IoT Stadium ID, and Access Token to IoT Stadium Token.
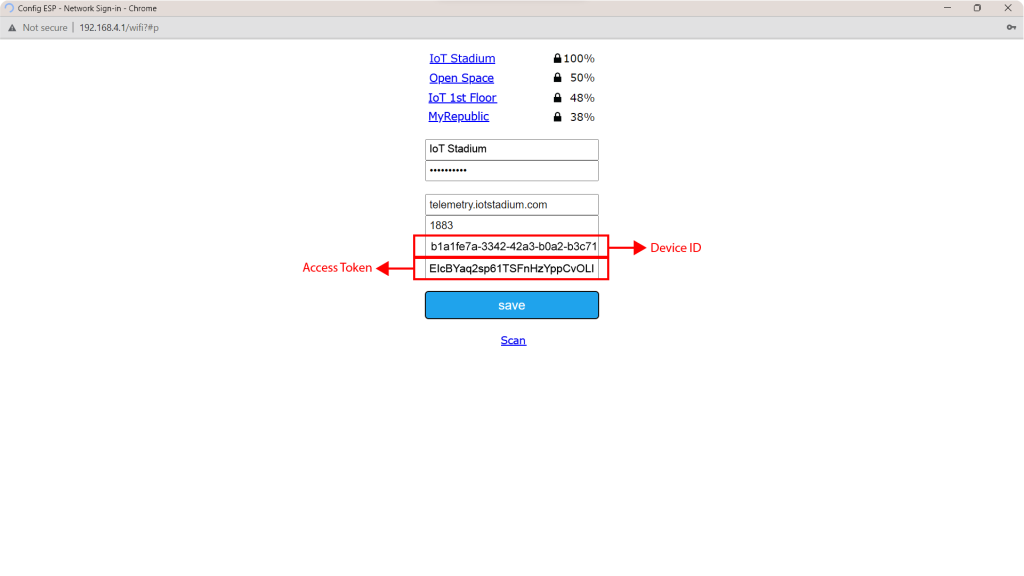
Paste the Device ID and Access Token
6. Click Save
7. The Device Status changed to green, indicated the device is successfully connected to the platform.
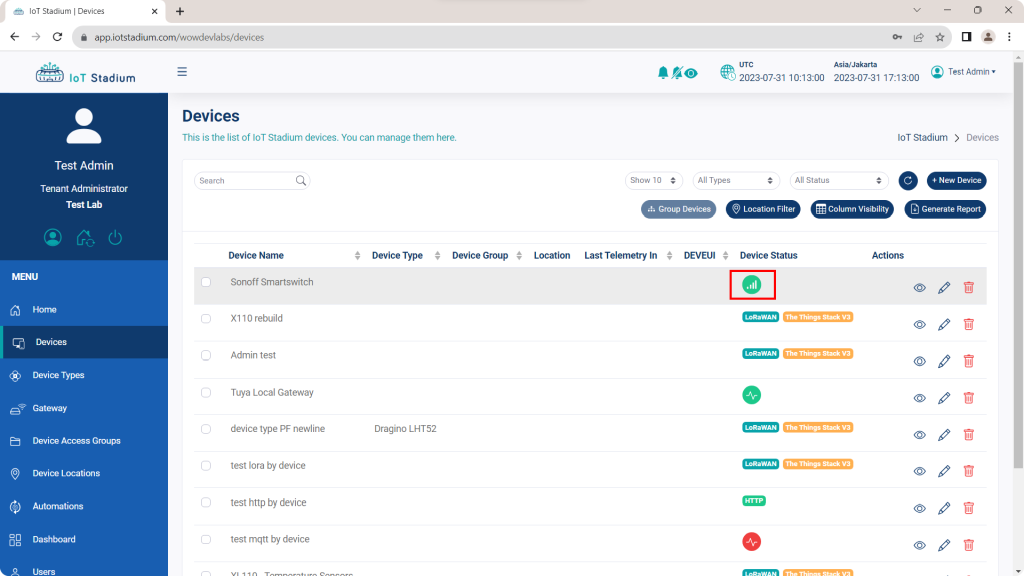
The Device Status


