-
Getting Started
-
Device Management
-
Automations
-
Dashboard
-
User Management
-
LoraWAN
-
API and Integrations
-
Boards
-
DIY
-
Gateway
Set the Action
After you set your triggers or your schedule, you need to set the action for your newly set automation rule. There is a different configuration between both triggers condition and the schedule condition.
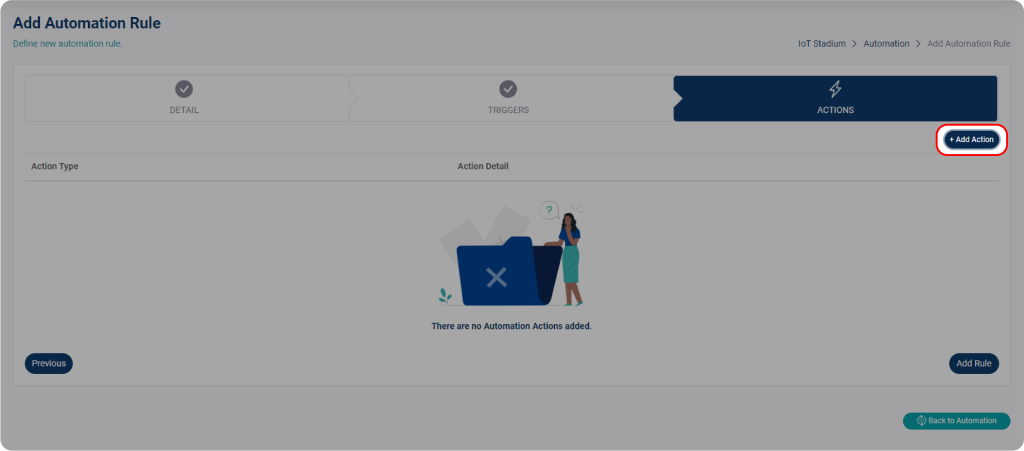
Click on Add Action, then choose your Action Type, and click on one of the actions. Each action is having a different option.
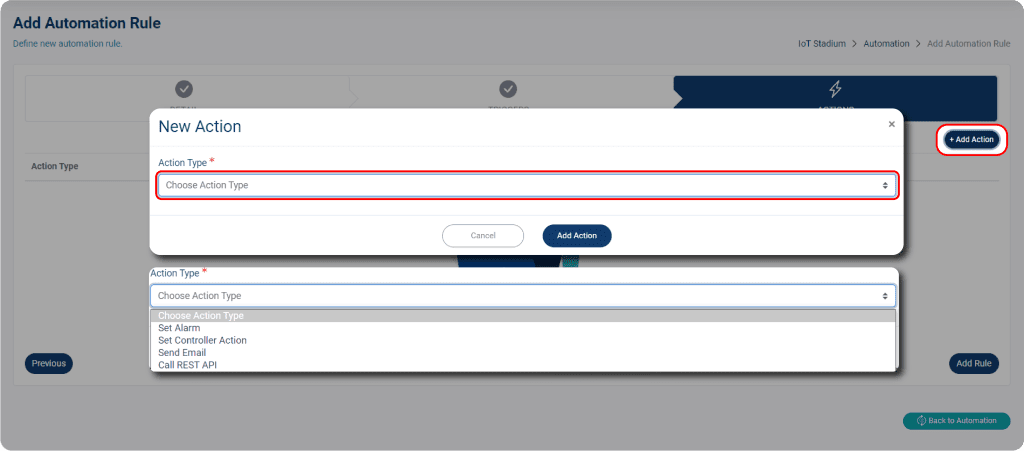
Note: The only action available for Schedule automation is Set Controller Action. If you choose Telemetry Trigger or Controller Trigger, all the action types are available.
Set the Alarm
This feature is used to notify the technician when the trigger on the device you’ve chosen has reached the predetermined limit. The notification will be sent via email or as a screen notification.
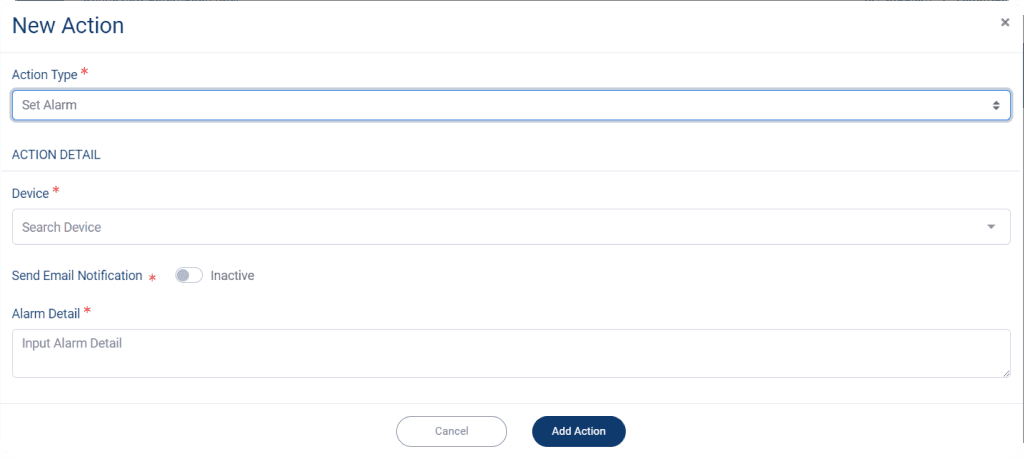
The Device dropdown menu only contains your selected device’s telemetry. The system will send a notification when your selected device reaches its threshold preset limit.
If you want the alarm send as email notification, slide the Inactive button to activate the function.
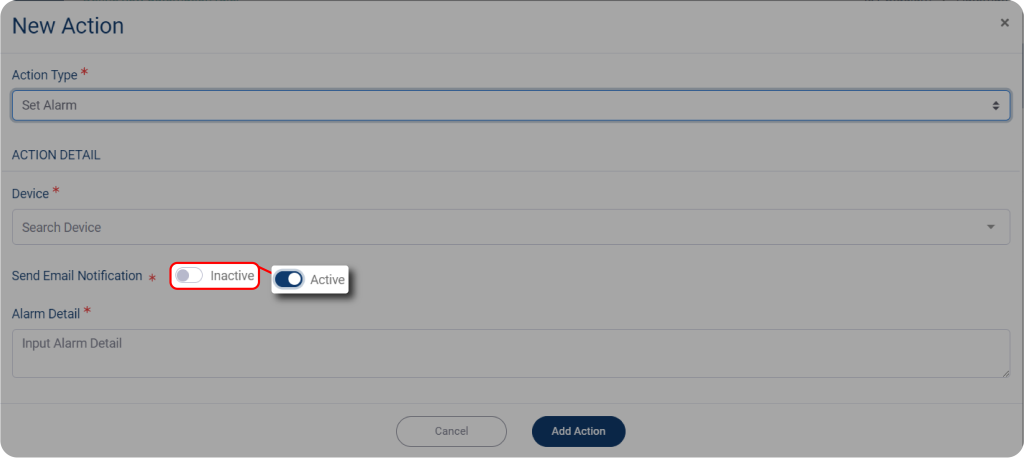
Then you must select the email recipient, and you can select multiple recipients. To do so, select the recipient from the Send Email To dropdown menu. Fill out the alarm detail to include the detail in the notification email.
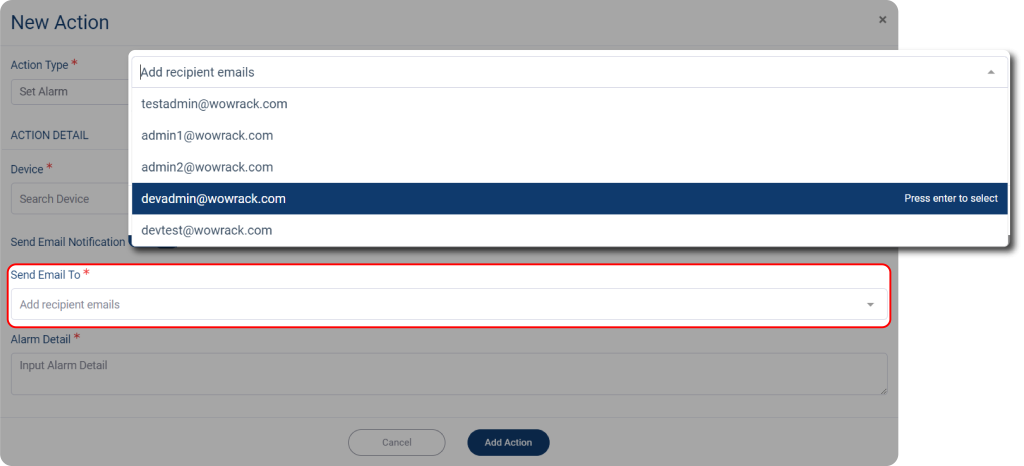
Click Add Action when done.
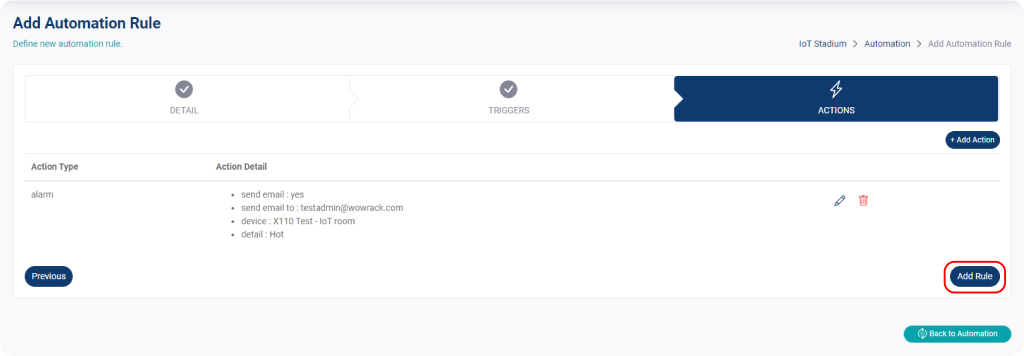
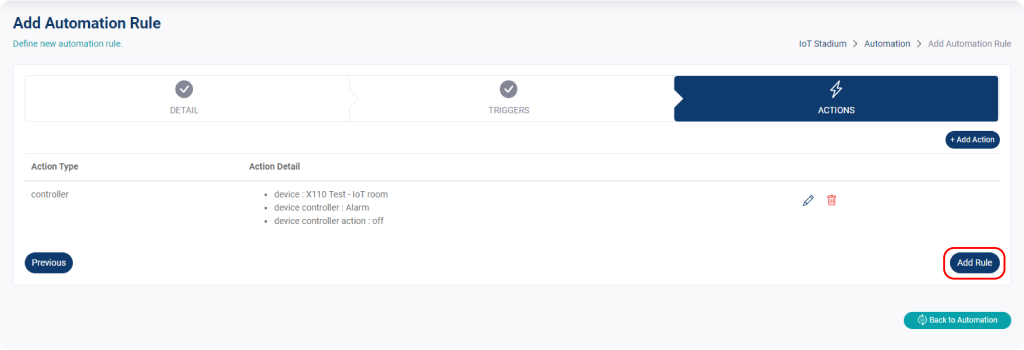
The page will show your recently set action; click Add Rule, and your newly set automation will be added on your Automations list.
Set Controller Action
This feature is used to activate the controller of another device when your preset trigger rule hit its threshold limit.
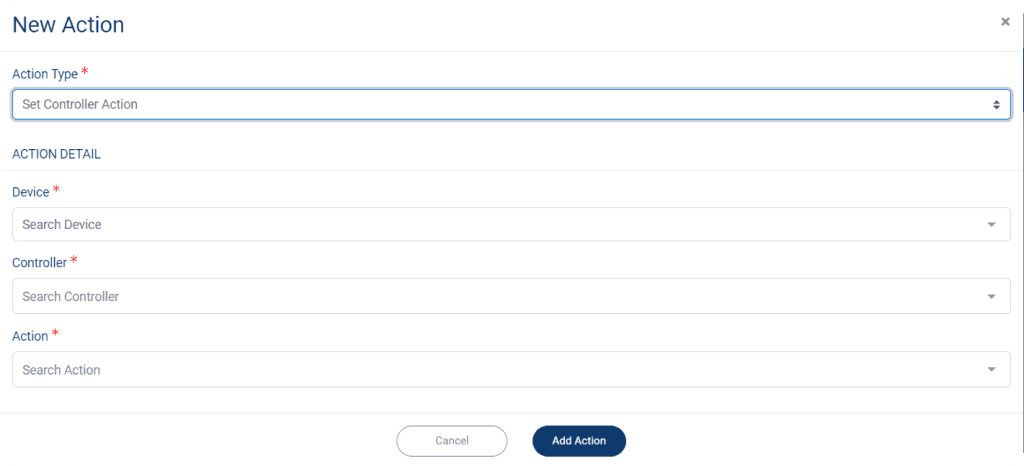
Select the device on the Device dropdown menu, you could select the same device as your trigger or select another device, as long as the other device has a controller. Then set the controller of your selected device.
Set the Action of your controller (On or Off) and click Add Action when done.
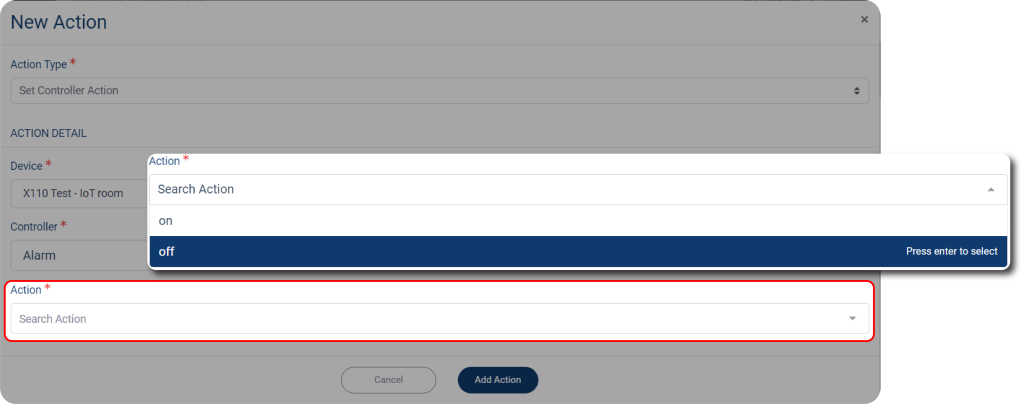
Click on Add Rule, then your automation will be updated.
Send the Email
This feature will send an email with subject and content when your preset trigger rule hit its threshold limit.
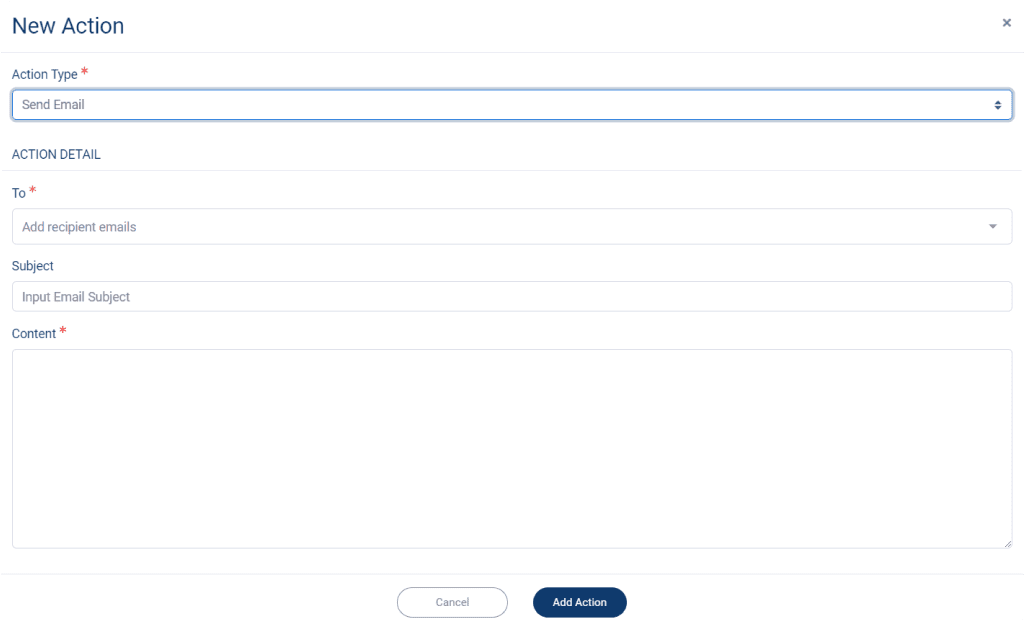
Click on To dropdown menu to add the email recipient, where you can select for more than one recipient. Fill out the Subject detail, even it’s not required. Write the email’s Content. And click Add Action when done.

Call REST API
A RESTful API or REST API is an architectural style for an Application Program Interface (API) that accesses data via HTTP requests. When you want to access data or resources on a REST server, each resource or data is identified by a global ID or URI (Universal Resource Identifiers)
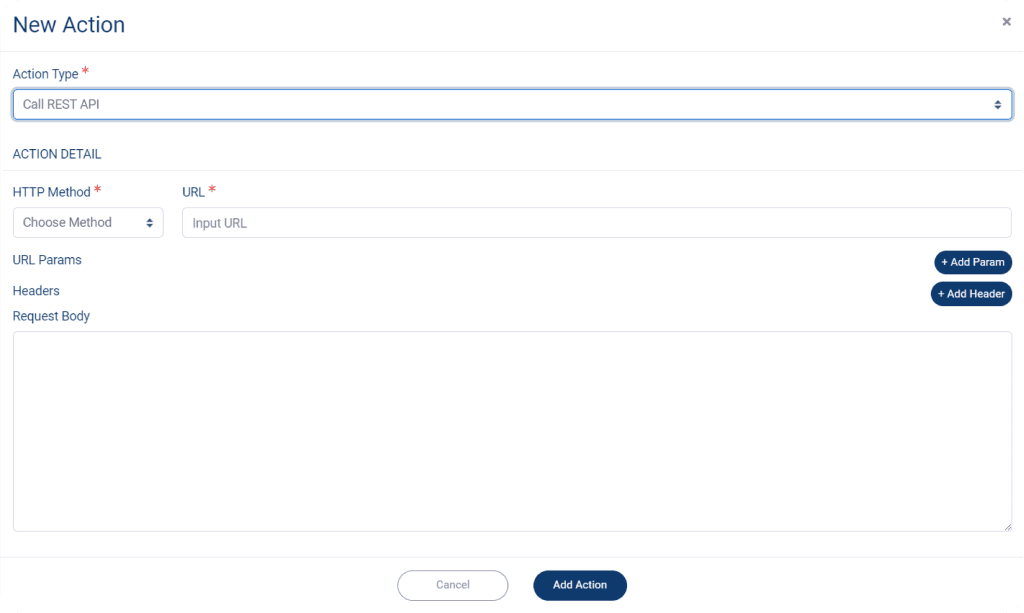
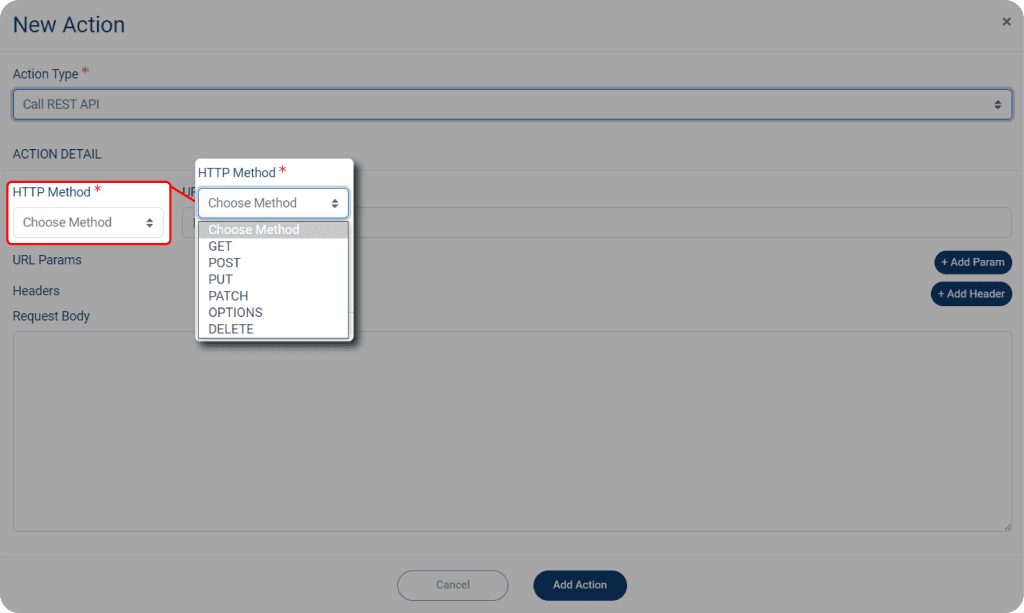
Set your method to get data on HTTP Method dropdown menu. There are six HTTP methods to access the data: GET, POST, PUT, PATCH, OPTIONS, and DELETE.
- GET is used to read data/resources from REST server.
- POST is used to create a new data/resource on the REST server.
- PUT is used to update data/resources on the REST server.
- DELETE is used to delete data/resources from REST server.
- OPTIONS is used to get supported operations on resources from the REST server.
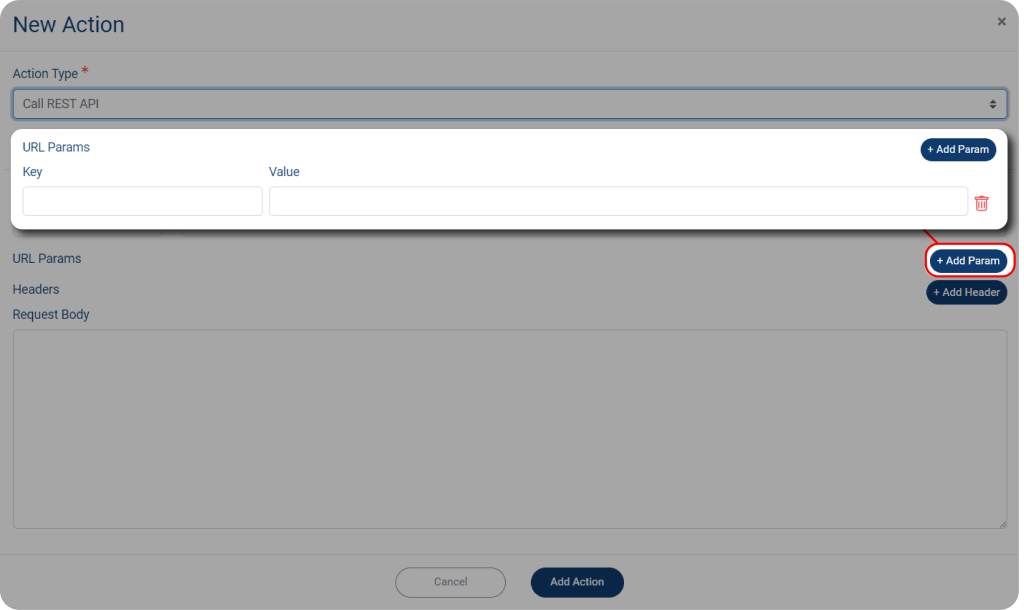
Input your URL, and if you want to add the parameter for your URL, click on Add Param. You could also add for more than one URL parameter. Then fill the Key and the Value for your parameter. You could also add more than one parameter by click on Add Param again.
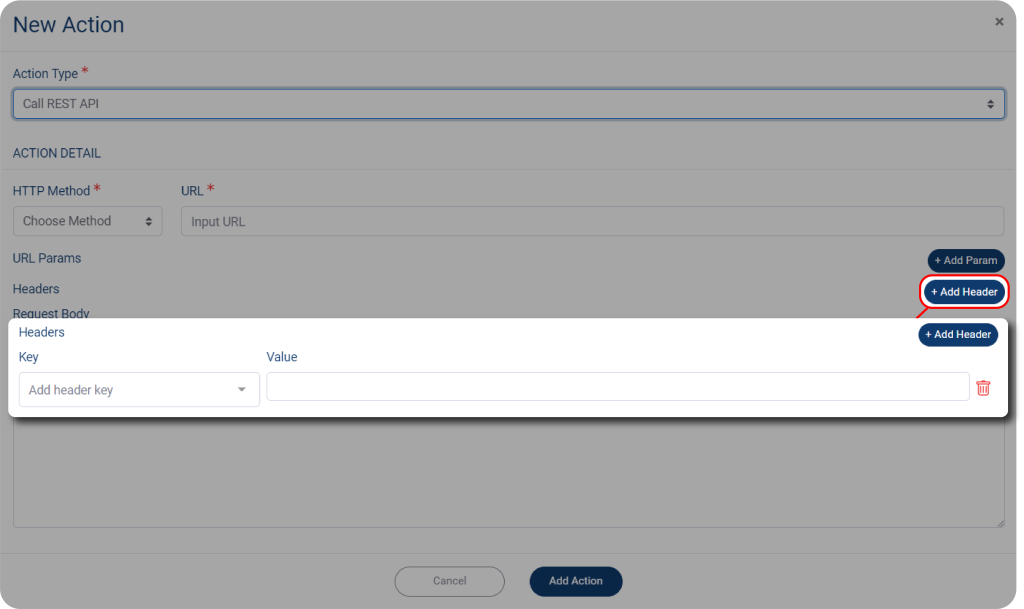
You could also add the Headers for your REST API, by click on Add Header. You could also add for more than one Header.
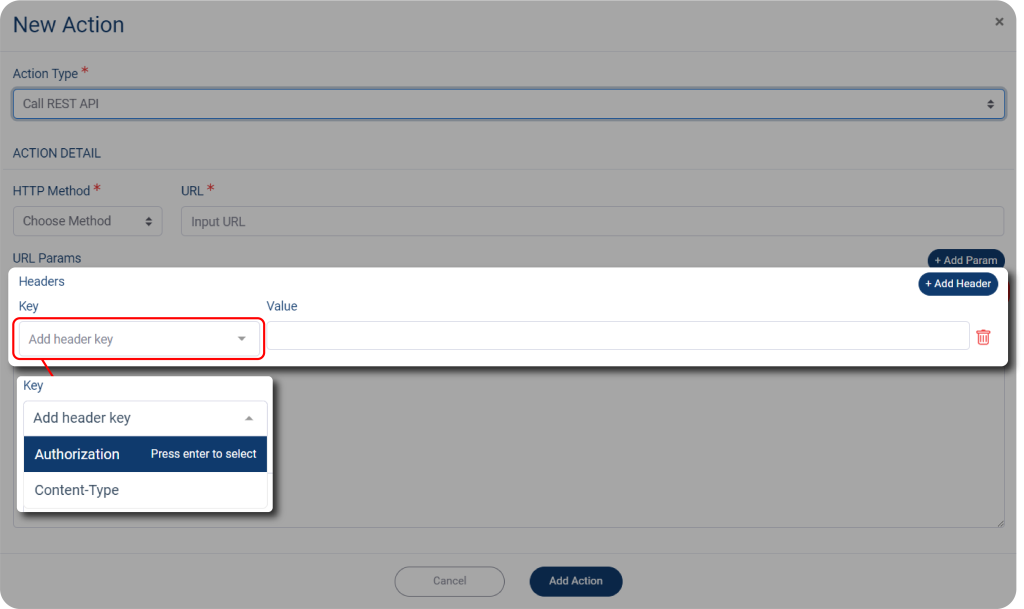
Choose the header key on the Key dropdown menu, where you could choose Authorization or Content-Type. Also, you need to fill the Value for your header.
After it fill the Request Body, then click Update Action when done.
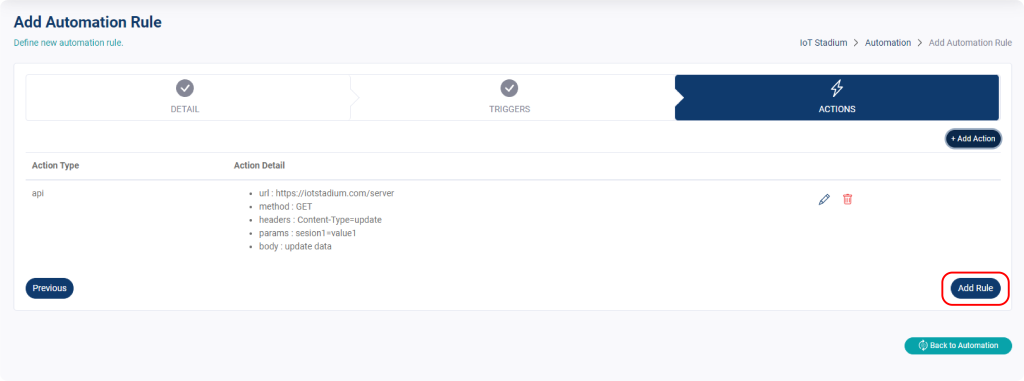
Click on Add Rule, then your Automation will be updated.

