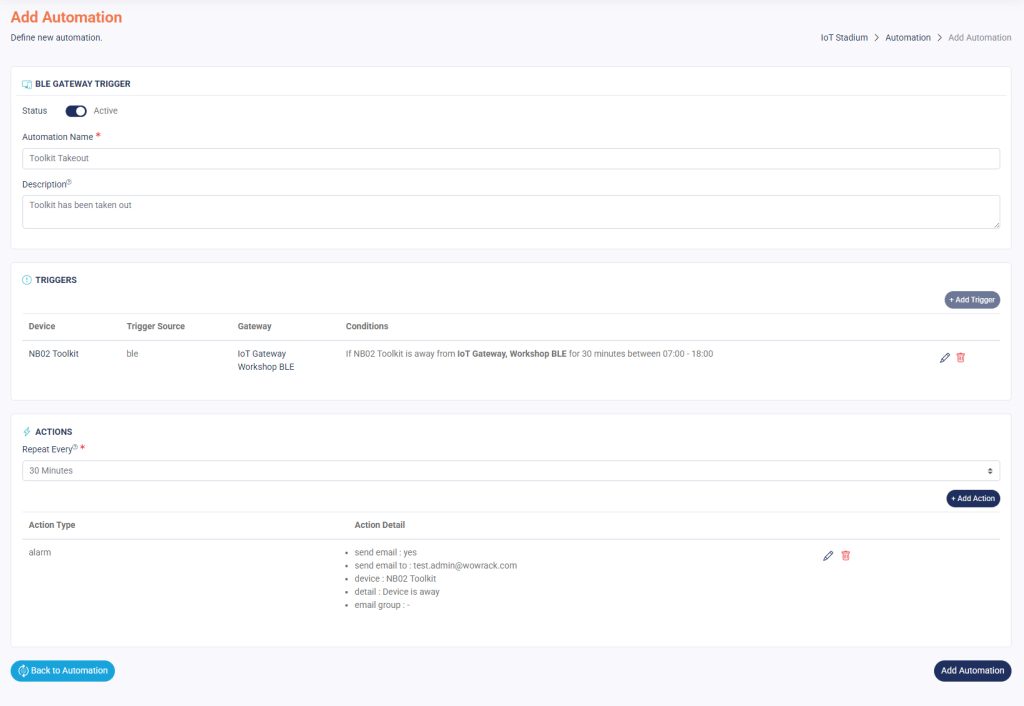
Set BLE Gateway Trigger
The BLE Gateway Trigger is designed for tags or beacons that use BLE as their communication protocol.
For example, if you want to restrict a tagged device to a specific area, you can set a trigger to activate actions when the device leaves the preset area for a specified duration or at a specific time.
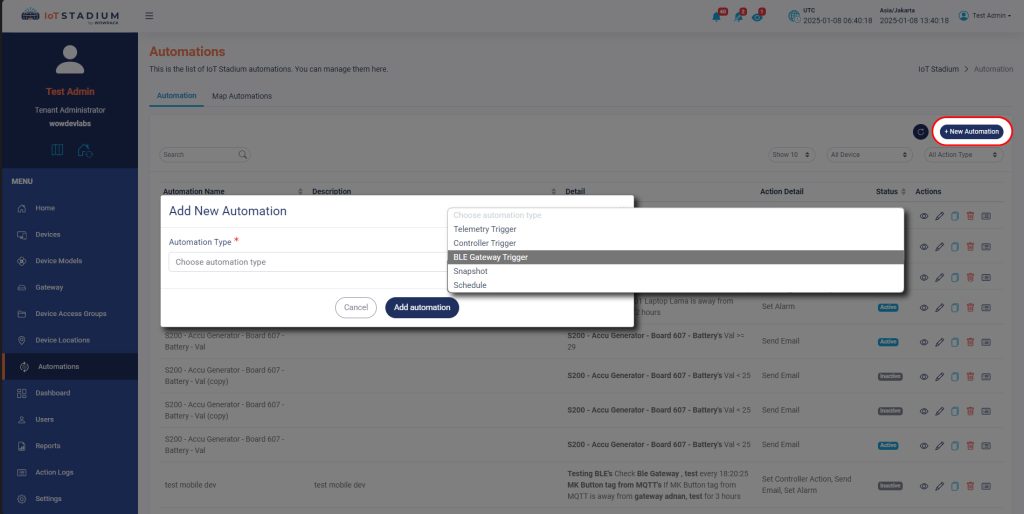
Add New Automation
1. Click on New Automation.
2. Choose the Automation Type as BLE Gateway Tigger.
3. Click Add Automation to go to the next section.
Set the Trigger
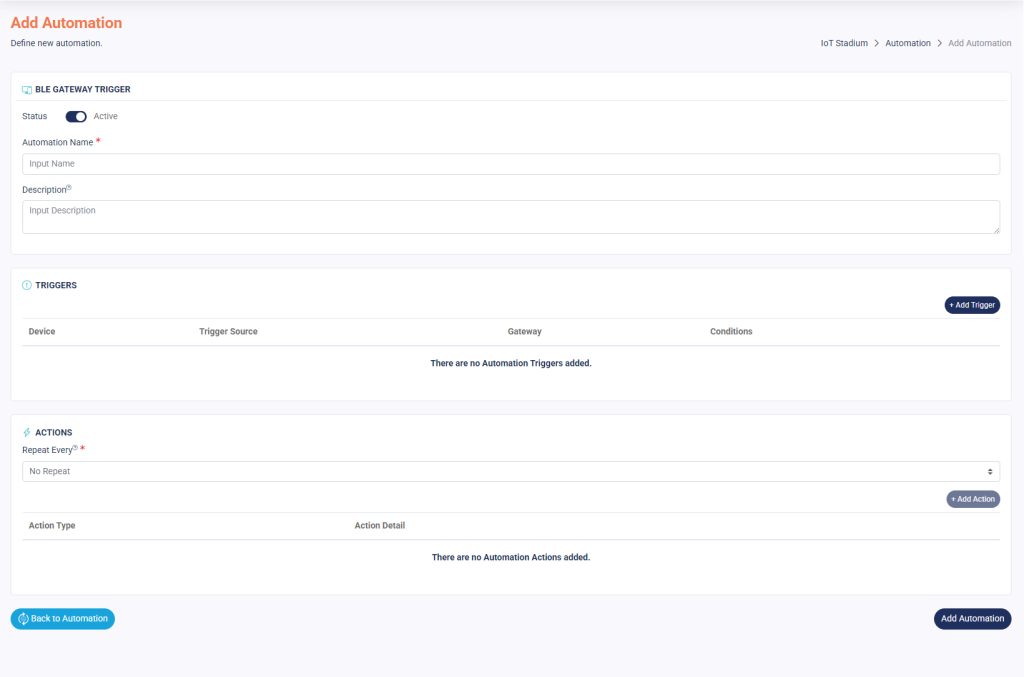
After you choose your type of automation, you will go to this page:
1. Make sure to slide the Active button to enable your automation.
2. Assign a name and description to the automation.
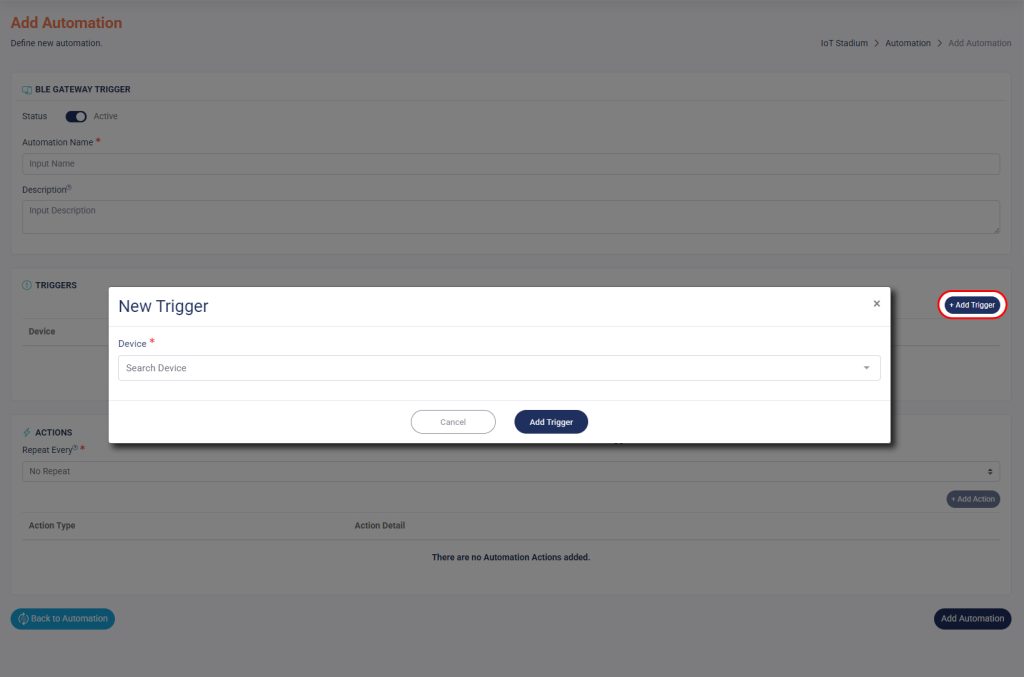
3. Click Add Trigger.
4. Select the Device you want to use, then click Add Trigger when finished.
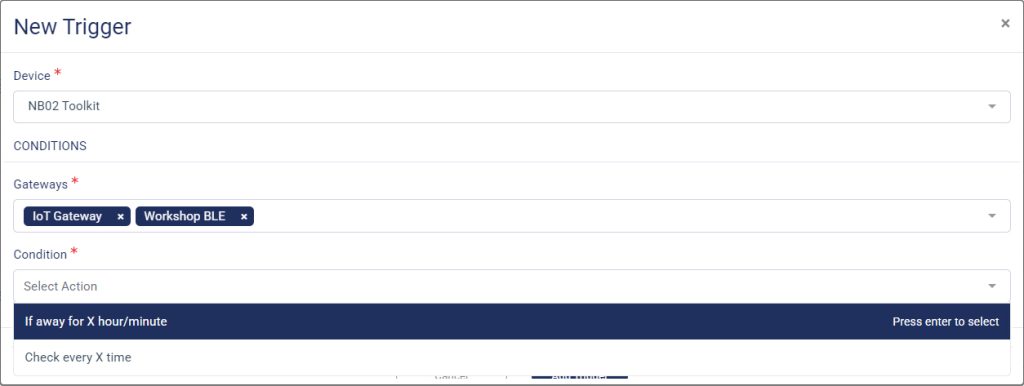
5. Choose Gateway, you may select more than one gateway.
*Notes: The gateway will be selected as the movement area of the selected tag or beacon.
Away Time
This automation selected when you want the tagged device to need to be available at specific time of the day. Let’s you want the toolkit needs to be available in the IoT room and Workshop at 08:00
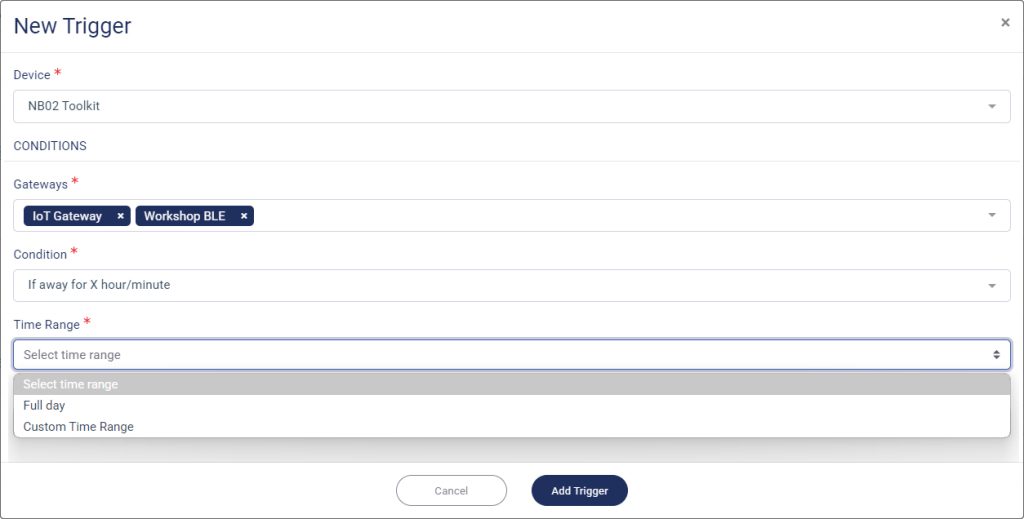
1. Set the Condition as If away.
2. Set the Time Range.
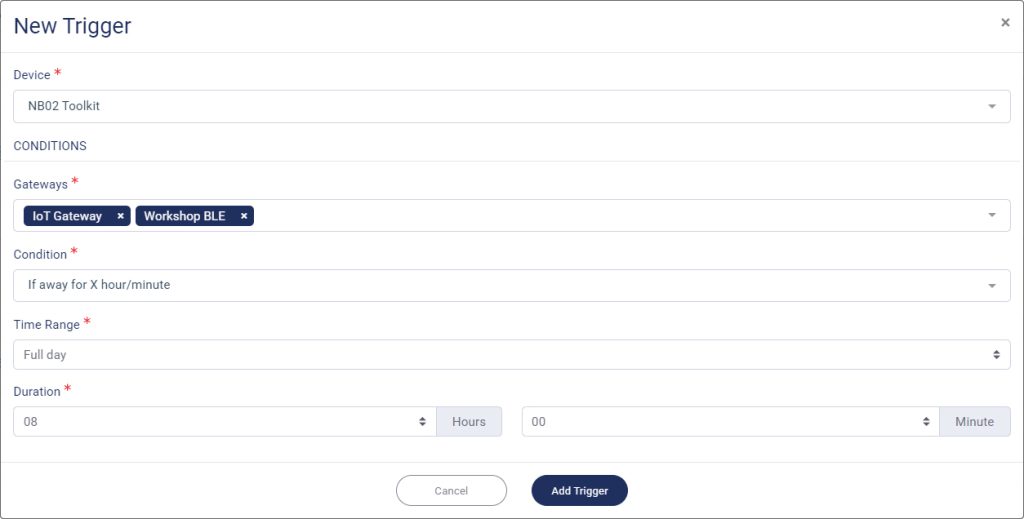
Full Day
Select this choice if you want the tagged device need to be always available on the selected locations or gateways.
1. Select Time Range as Full Day.
2. Set the Hour and Minutes.
3. Click Add Trigger when done.
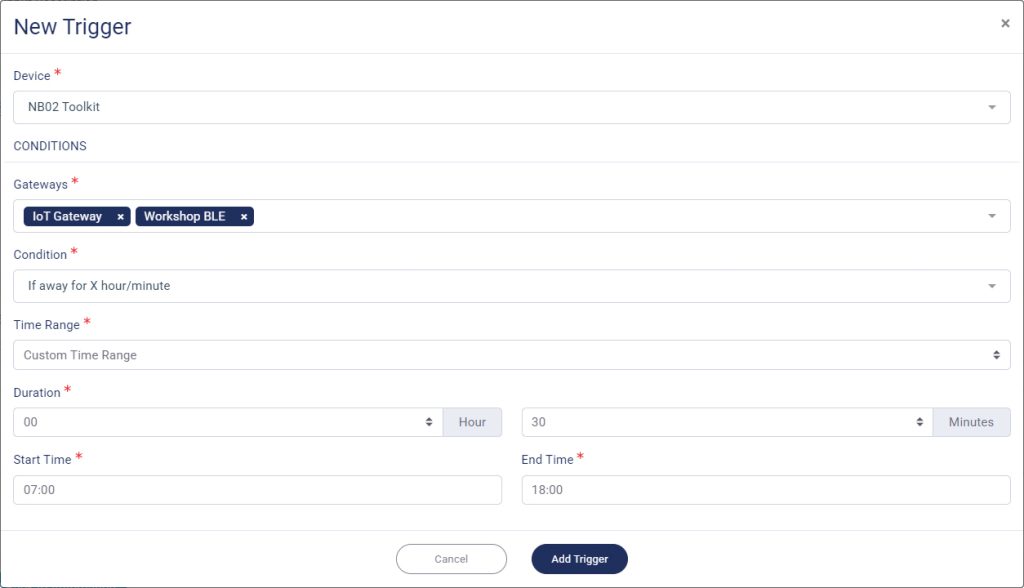
Custom Time Range
Select this choice if you want the tagged device need to be available on the selected locations or gateways in specific time. and only allowed to away from the location at the specific time.
1. Select Time Range as Custome Time Tange.
2. Set the Duration.
3. Set the Start Time and End Time.
4. Click Add Trigger when done.
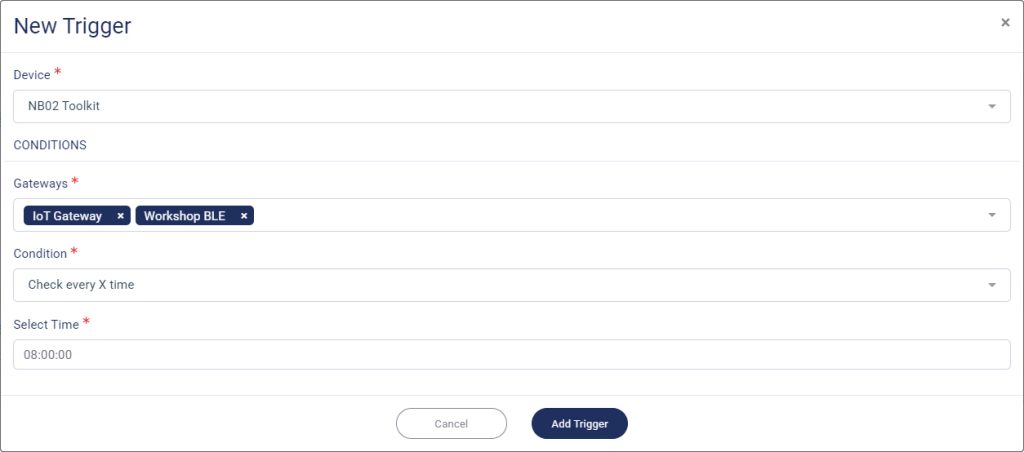
Check Time
Select this choice if you want the tagged device need to be available on the selected locations or gateways in specific time.
1. Select Time Range as Check Every Time.
2. Set the Time.
3. Click Add Trigger when done.
Add Actions
Once you’ve done set the triggers and relation, you can set the action for your automation.
1. Set the Repeat Every.
*Notes: Automation actions will be executed once every desired interval.
2. Click Add Action.
3. Choose the Action Type.
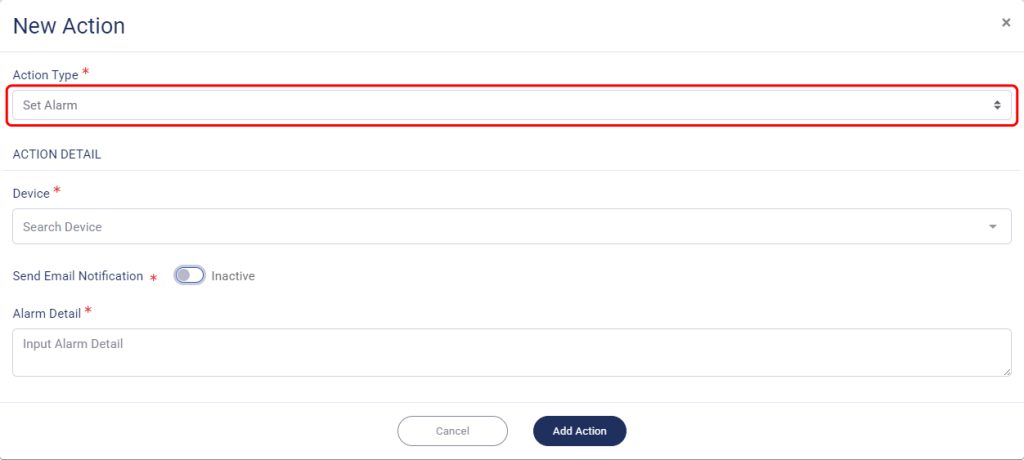
Set the Alarm
This feature is used to notify when the trigger on the device you’ve chosen has reached the predetermined limit. The notification will be sent via email or as a screen notification.
1. Select which Device.
*Notes:The Device dropdown menu only contains your selected device’s telemetry.
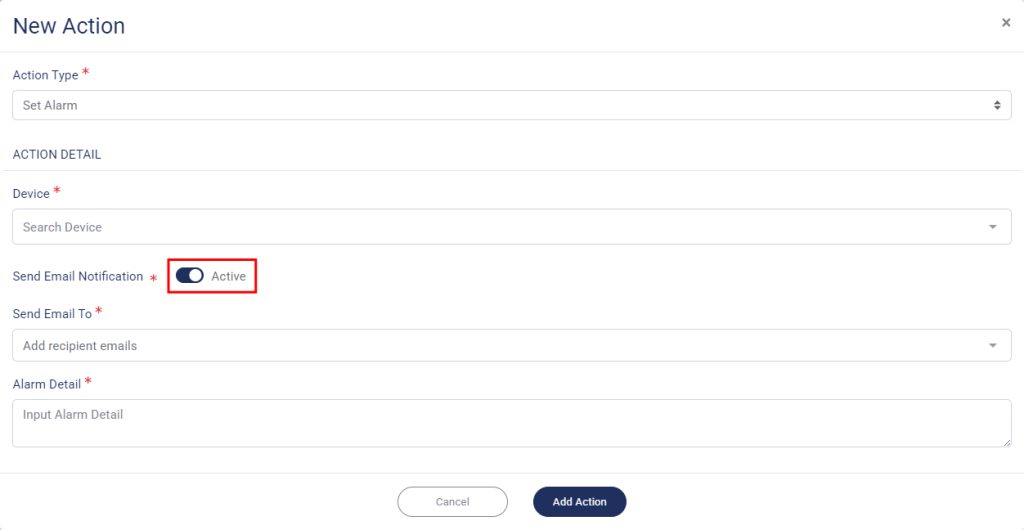
2. If you want the alarm send as email notification, slide the Inactive button to activate the function.
3. Set the email recipient, and you can select multiple recipients.
4. Fill out the Alarm Detail.
5. Click Add Action when done.
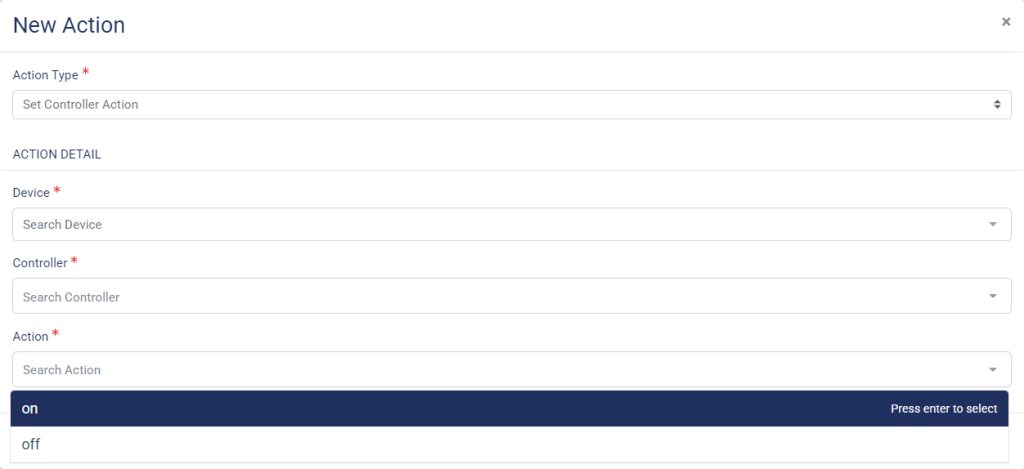
Set the Controller Action
This feature is used to activate the controller of another device when your preset trigger hit its threshold limit.
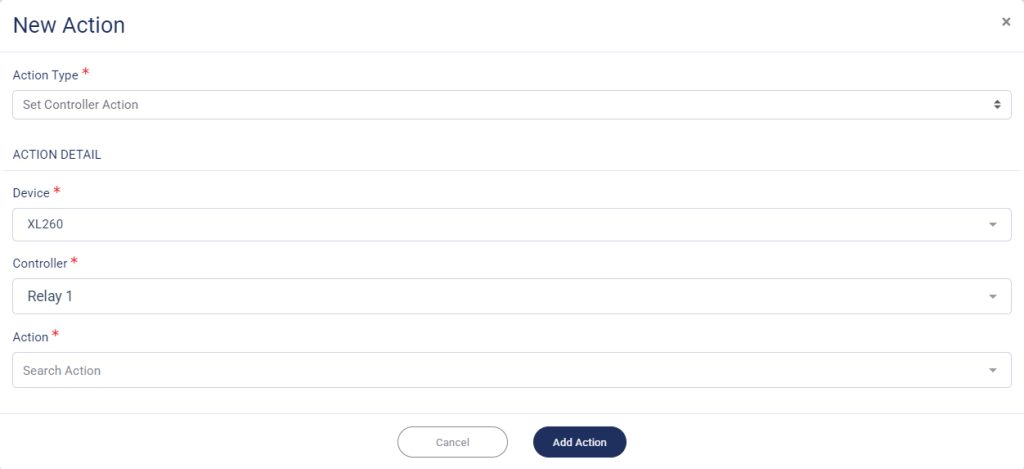
1. Select which Device.
*Notes:you could select the same device as your trigger or select another device, as long as the other device has controller
2. Set the Controller of your selected device.
3. Set the Action of your controller.
4. Click Add Action when done.
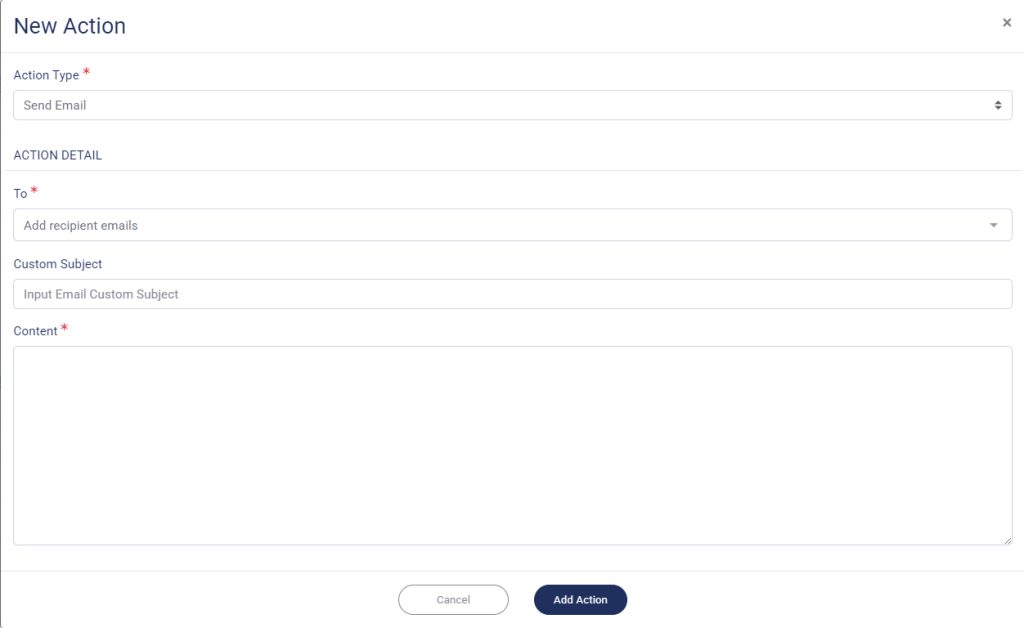
Set the Email
This feature will send an email with subject and content when your preset trigger hit its threshold limit.
1. Set the email recipient, and you can select multiple recipients
2. Set the Subject.
3. Don’t forget to add the detail about your email.
4. Click Add Action when done.
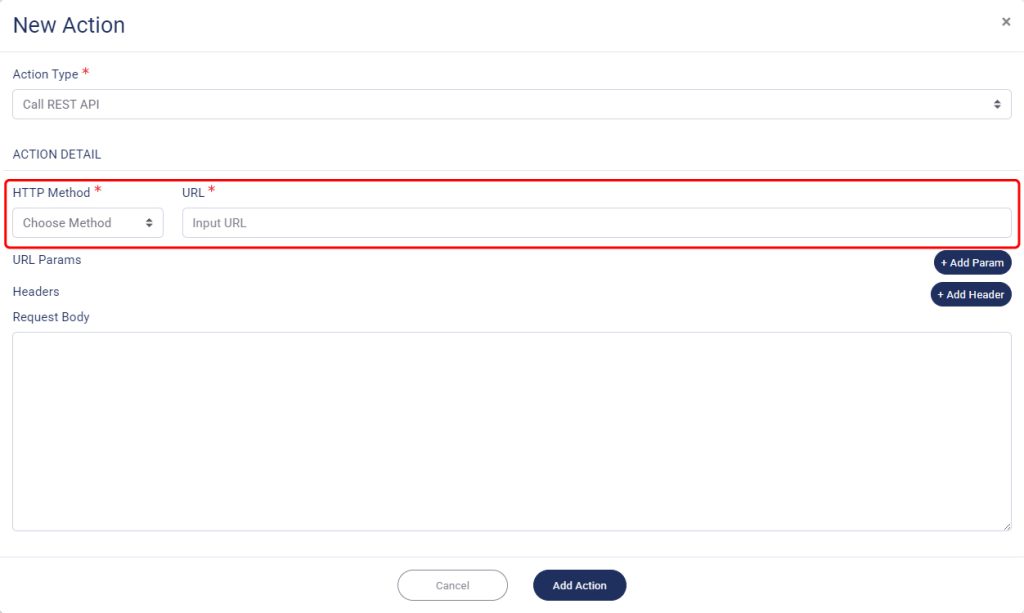
Call Rest API
A RESTful API or REST API is an architectural style for an Application Program Interface (API) that accesses data via HTTP requests. When you want to access data or resources on a REST server, each resource or data is identified by a global ID or URI (Universal Resource Identifiers).
1. Set your method to get data on HTTP Method dropdown menu.
2. Input your URL.
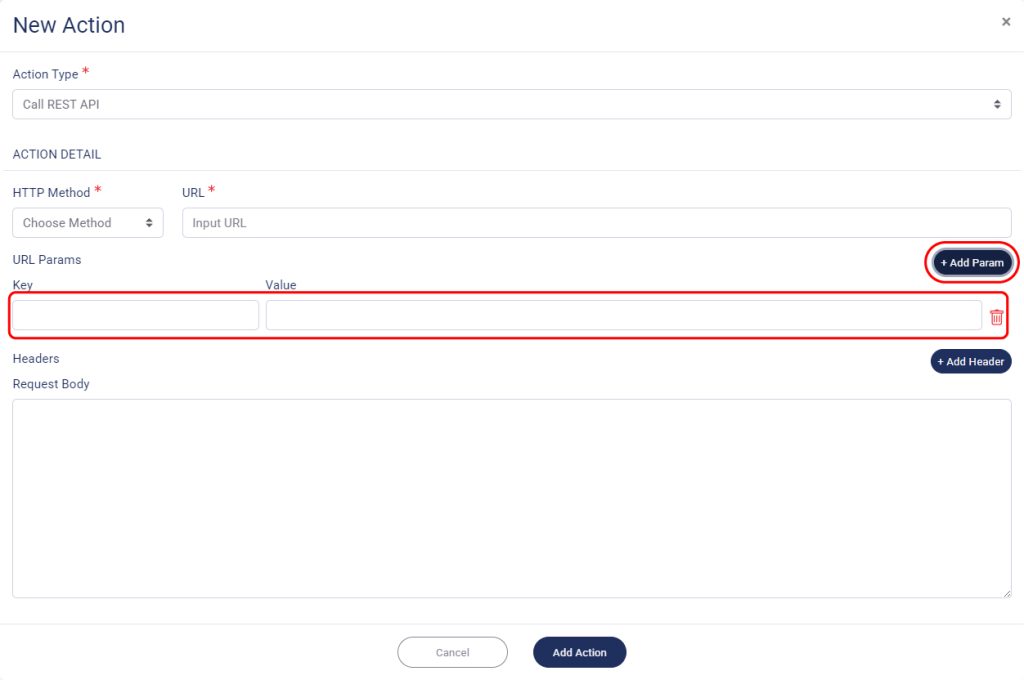
3. If you want to add the parameter for your URL, click on Add Param. You could also add for more than one URL parameter. Then fill the Key and the Value for your parameter.
*Notes: You could also add more than one parameter.
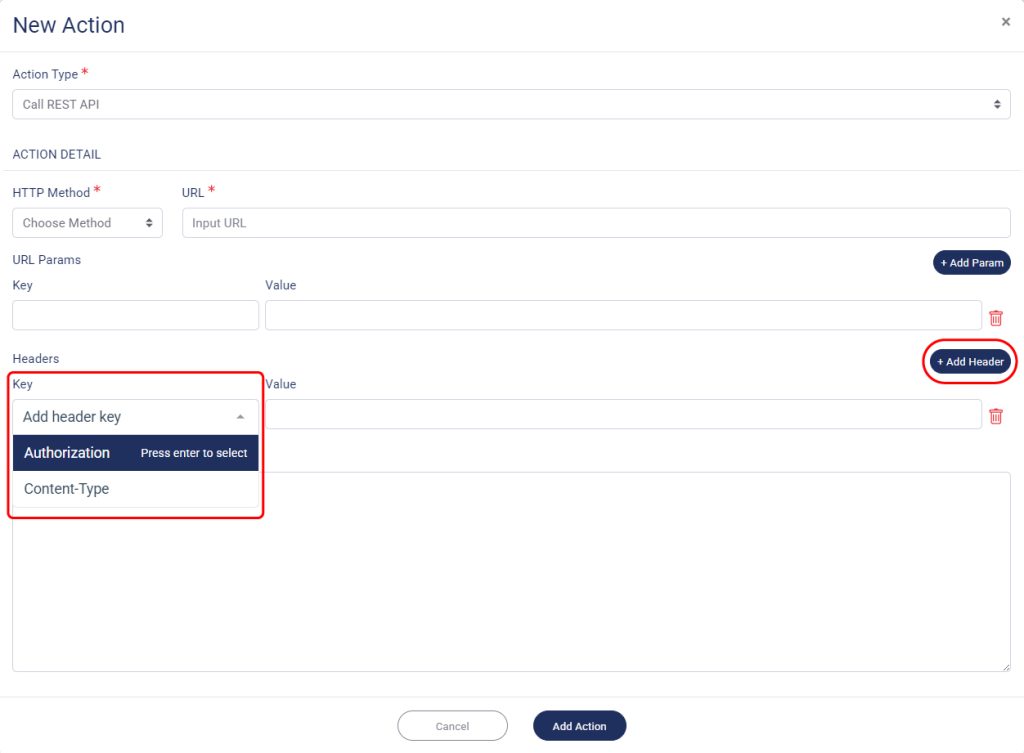
4. Click Add Heder if you want to add.
*Notes: You could also add for more than one.
5. Fill the Request Body
6. Click Add Action when done.
You could also set more than one action.
When you’re done setting the automation, click on Add Automation.


