-
Getting Started
-
Device Management
-
Gateway Management
-
Automations
-
Dashboard
-
User Management
-
LoraWAN
-
API and Integrations
-
Boards
-
DIY
-
Gateway
S100 Digital IO
S100 Digital Input is an IoT device which can process any digital input, from any sensor. This compact board also can be controlled and monitored from anywhere and anytime, as long as you connected with the internet.
S100 Pins
Here are the pins of S100:
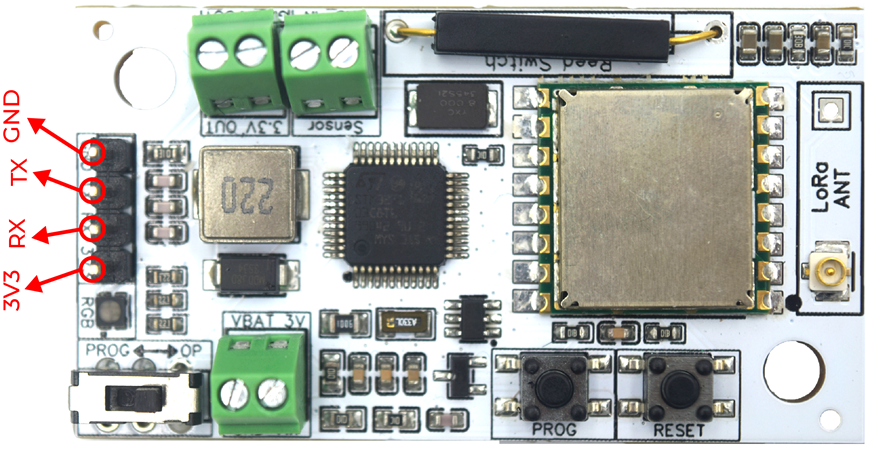 The pins at S100 are for connecting the device with the Serial Programmer or USB TTL.
Serial Programmer
The Serial Programmer is also known as USB-to-TTL Converter.
A USB-to-TTL Converter is a device designed to convert USB bus signals into TTL serial signals. It serves multiple purposes, including debugging microcontroller programs via a PC and transferring programs from a PC to a microcontroller.
Here are some of the recommendations:
– CH340G: Cheapest and the most reliable.
– Voltlink: A USB to serial adapter board that utilizes the widely used CP2102N chip. It comes with a built-in ESP auto-reset circuitry feature and incorporates a 500mA voltage regulator.
– CP2102 or PL2303: Works with some devices, but it might be required to use an external 3.3V supply.
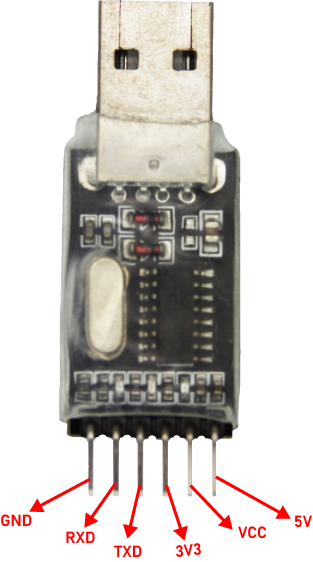
In this tutorial, the CH340G is used. The pinout configuration for the USB-to-TTL CH340G is like this:
Schematic
After you understand the pins on both devices, connect the wires according to the table:
|
USB-to-TTL
|
S100 Digital Input
|
|---|---|
|
3V3
|
3V3
|
|
TXD
|
RX
|
|
RXD
|
TX
|
|
GND
|
GND
|
5V and VCC pin on USB-to-TTL will not be used.
Flashing the Firmware
After the devices have been assembled, the next step is flashing the new firmware on the S100 Digital Input.
1. Connect the USB-to-TTL to your PC.
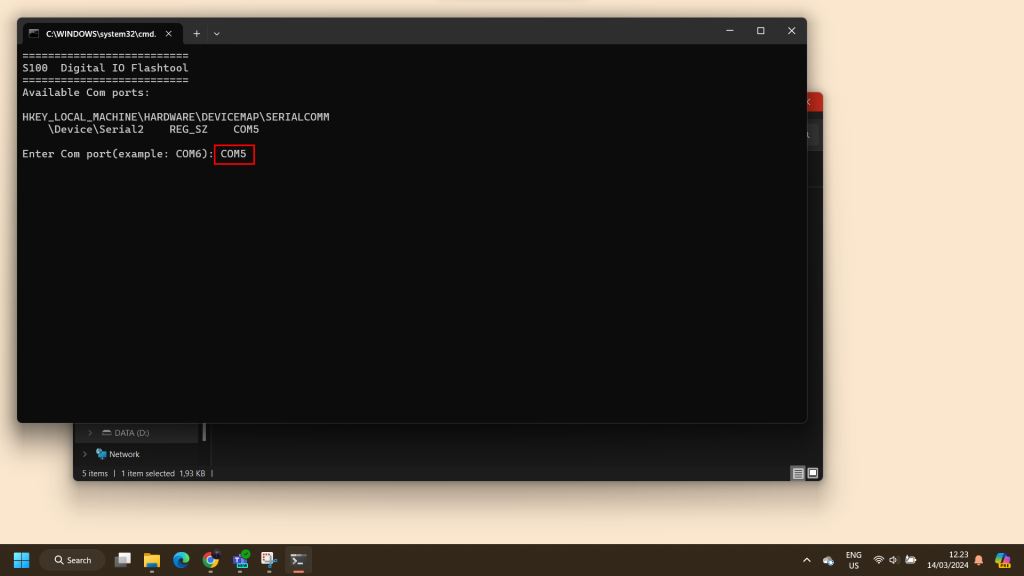
2. To understand on which COM port your USB is connected you can open Device Manager.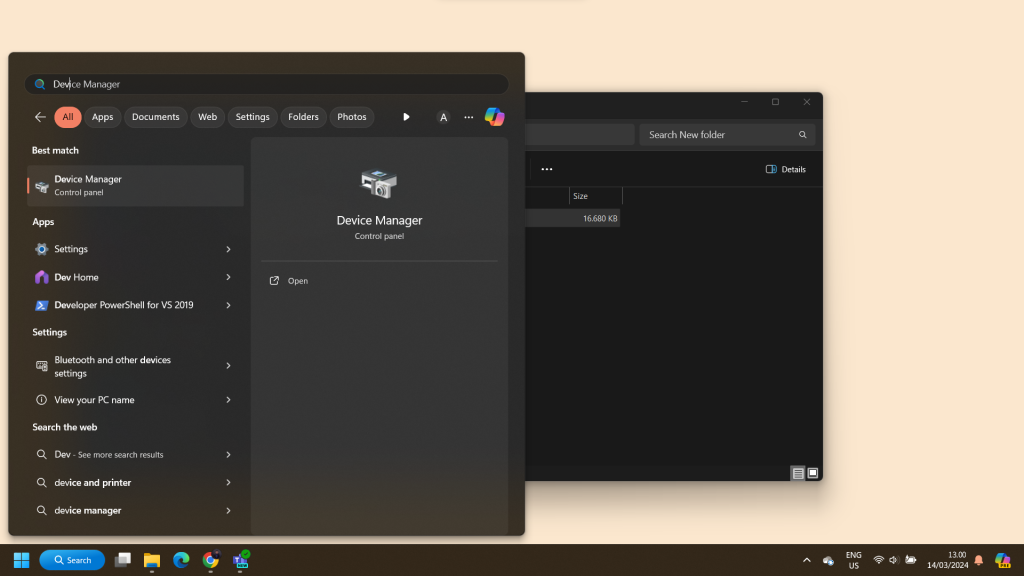
3. Then go to Ports. You will see the type of your USB-to-TTL and on which COM port the device is connected.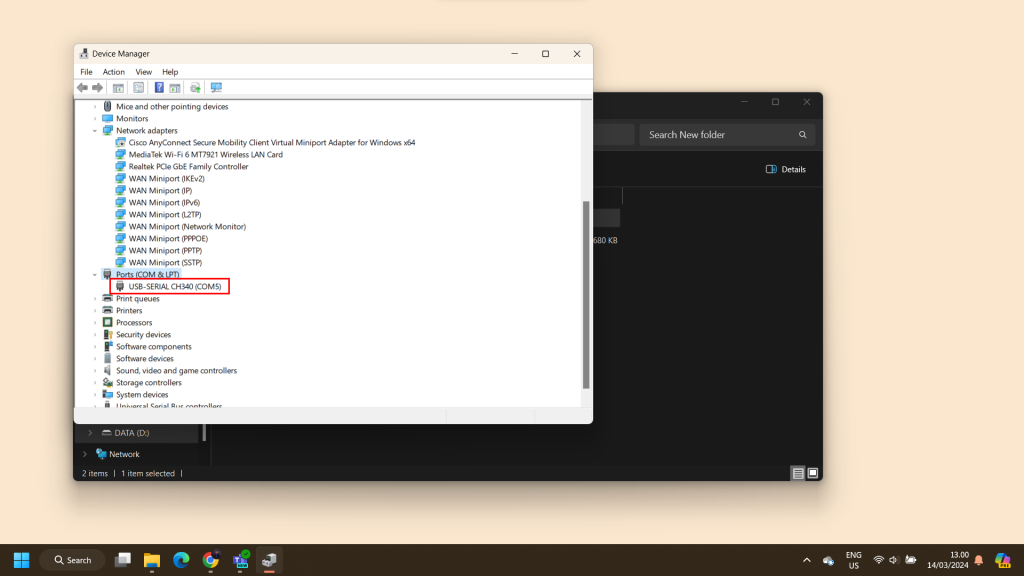
4. Download the program from this link.
S100-digital-io-sensor.v.1.0.zip
5. Extract the program.
6. Go to Run.
8. You may select to install your device in Active High or Active Low. It all depends on the choice of your sensor. Just input the number of types that you want to use to continue the installation.
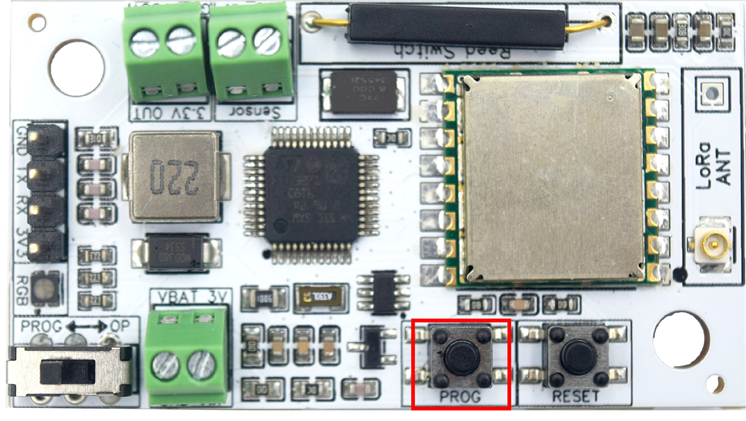
9. Make sure you slide the switch to PROG.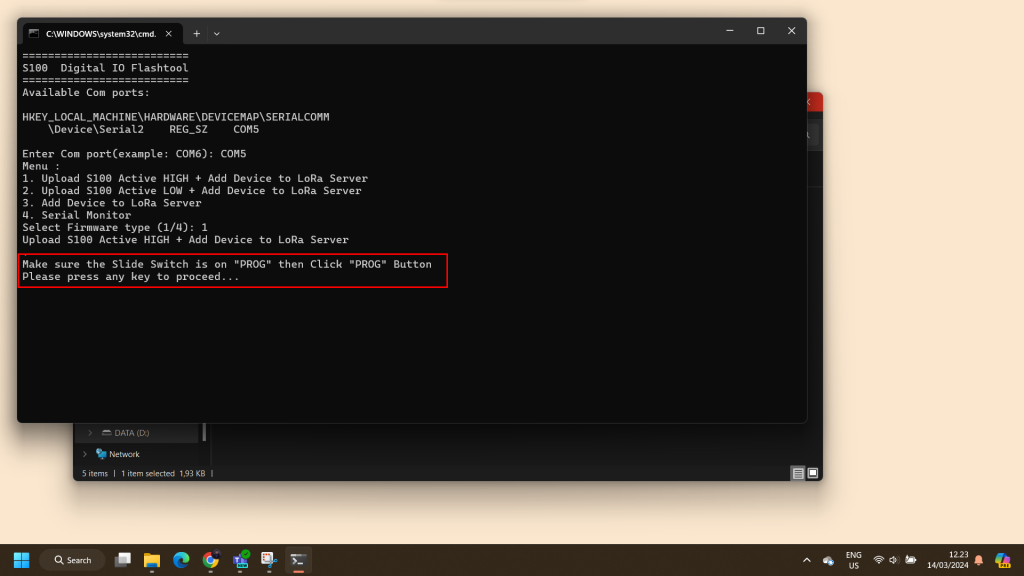
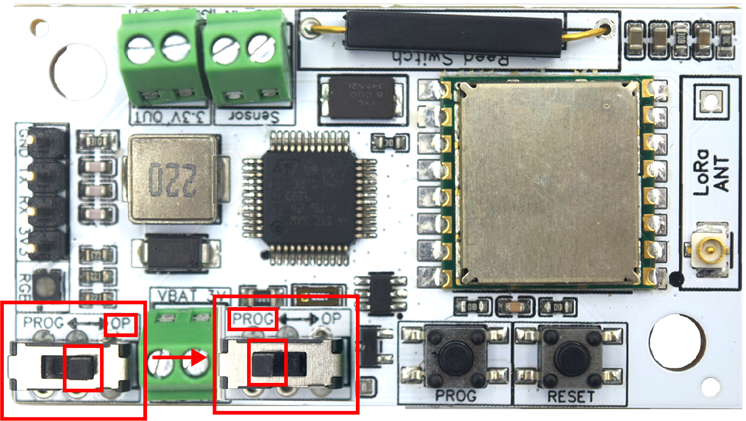
11. Press any key to continue the installation progress.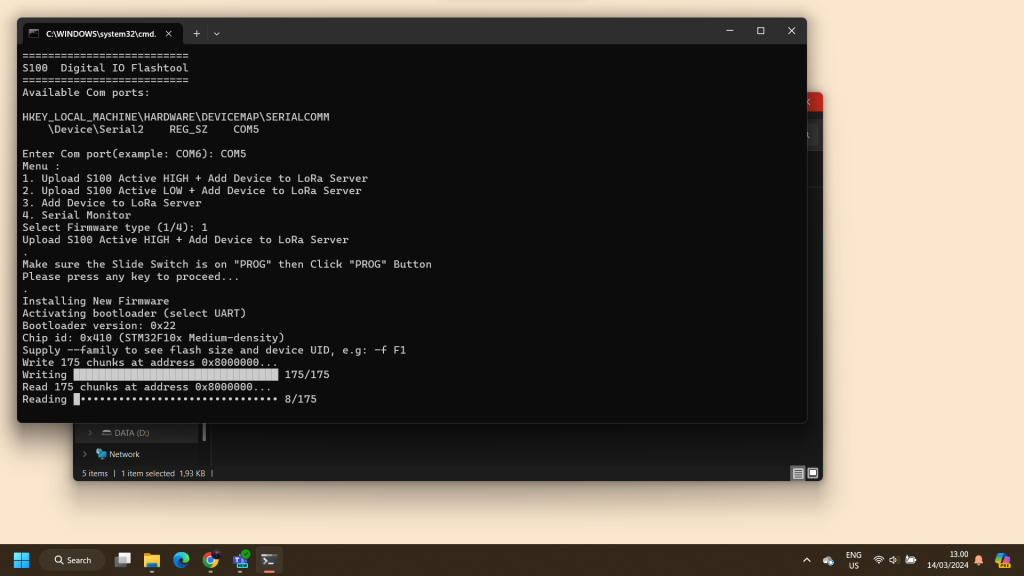
12. To add the device to LoRa server, make sure to slide the switch to OP again. Then press any key to continue the installation progress.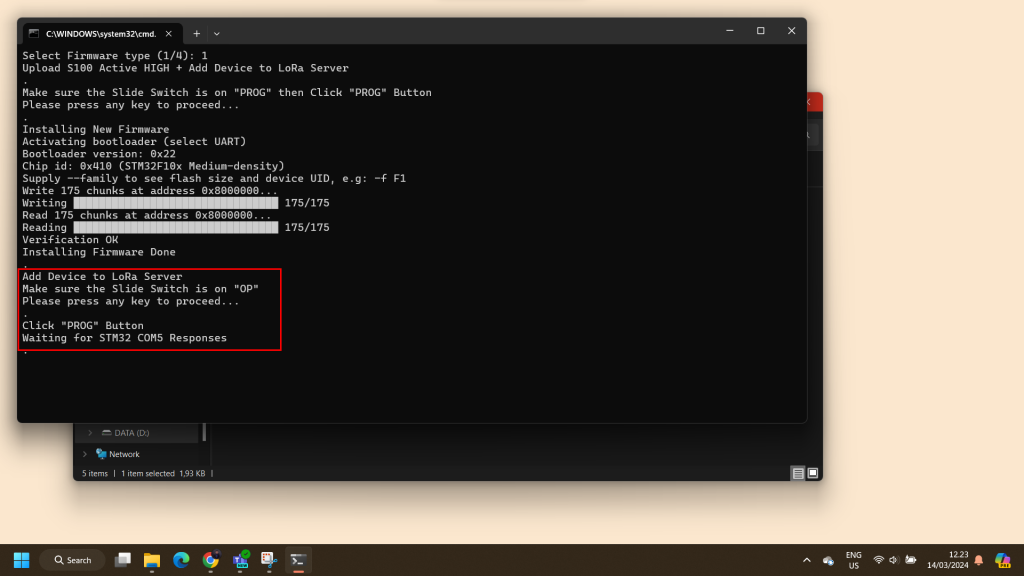
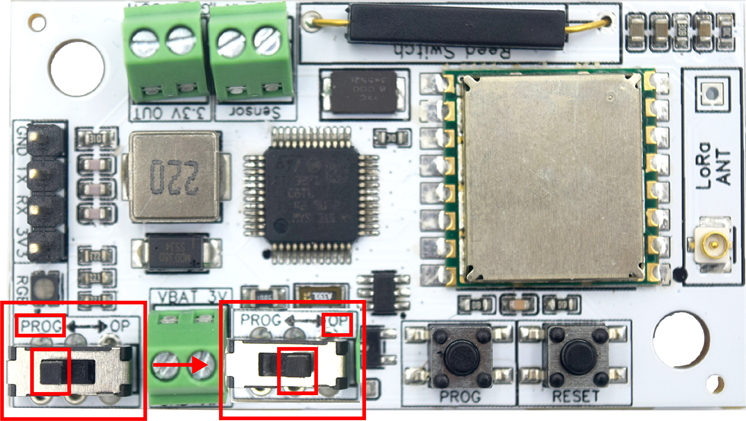
13. Push the PROG button once more.
14. The device will be registered to our LoRa server.
Note: You can copy the device_id and save it on your notepad. The device_id will be used as the Hardware ID to register your device on IoT Stadium platform.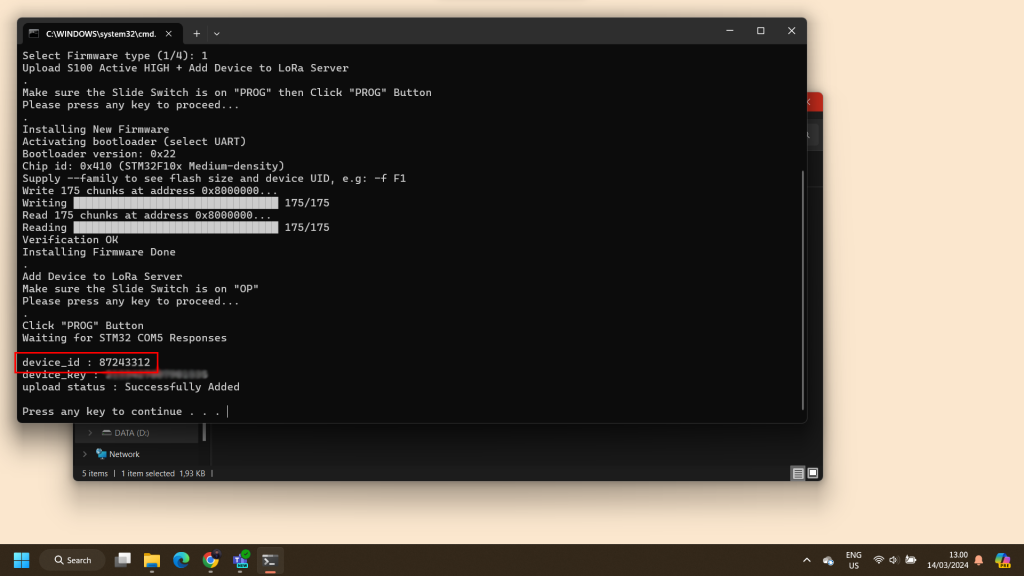
Add S100 to The Platform
This step is used to register or add your new device to the IoT Stadium platform.
1. To register on IoT Stadium platform, go to app.iotstadium.com.
2. Input your Email Address and Password then click Login.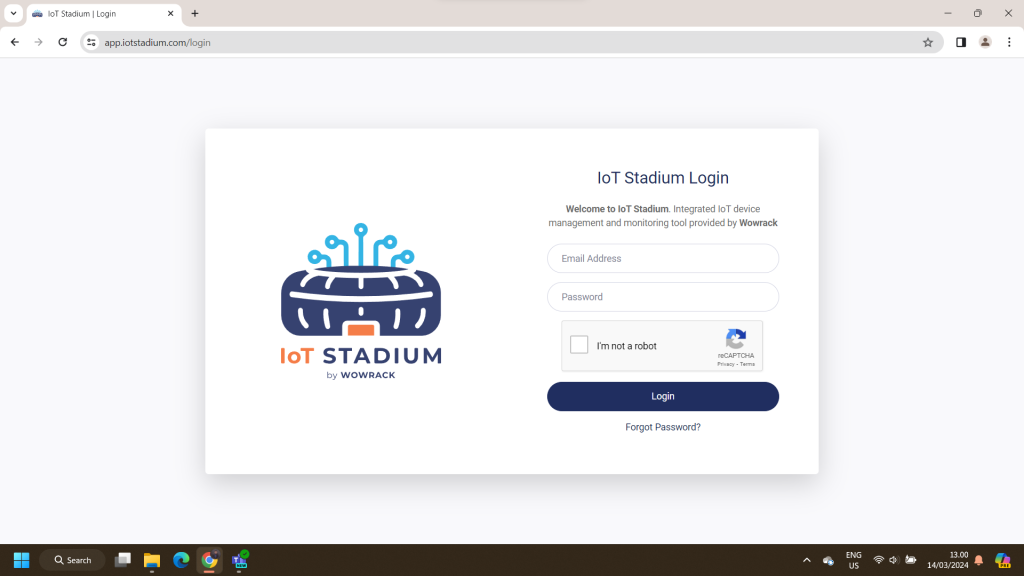
3. Go to Device Tab, then click New Device.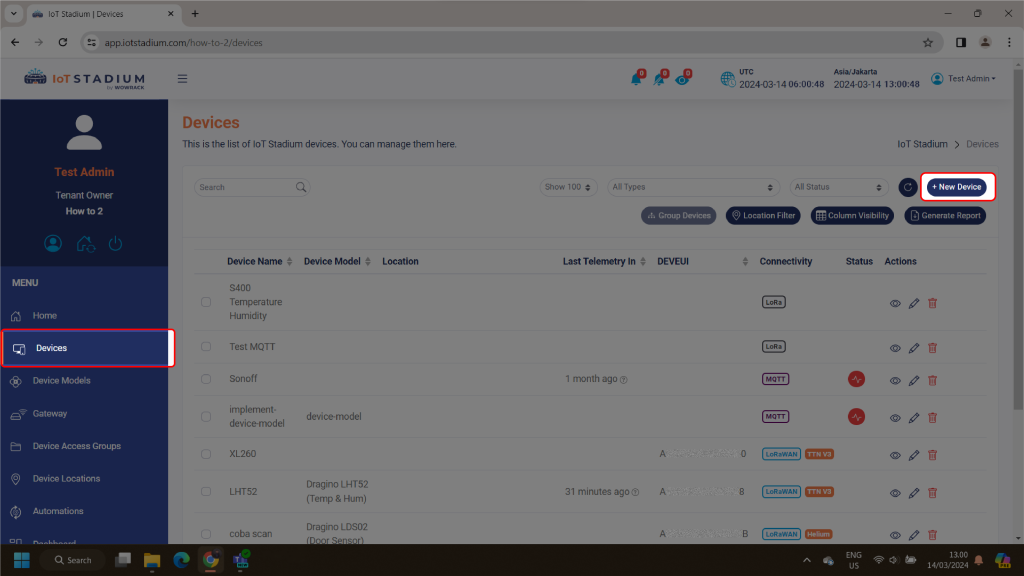
4. Fill the Device Name.
5. Make sure to select the Connectivity Type as LoRa.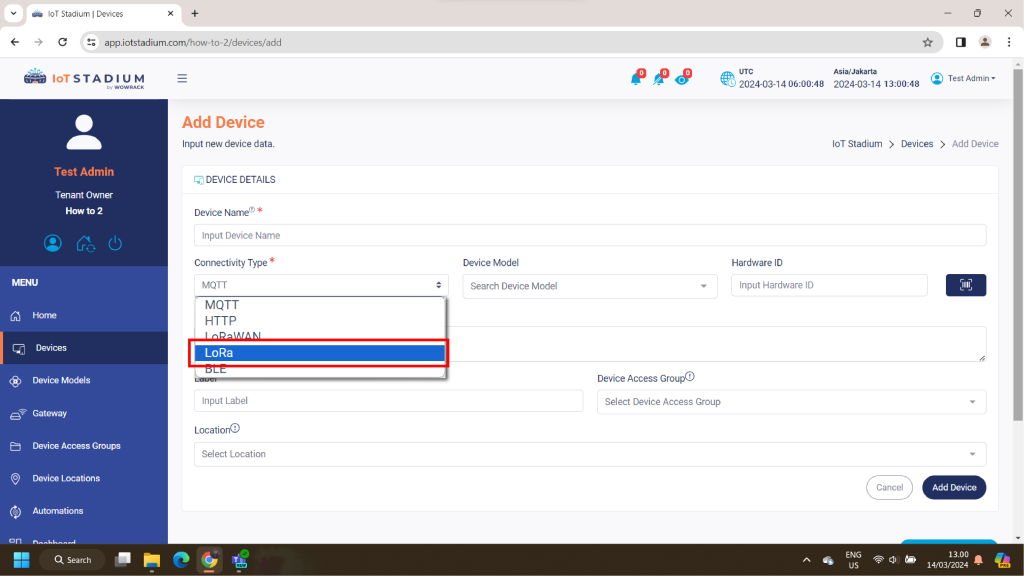
6. Copy the device_id to the Hardware ID.
7. If your device is successfully registered, you will get the green notification.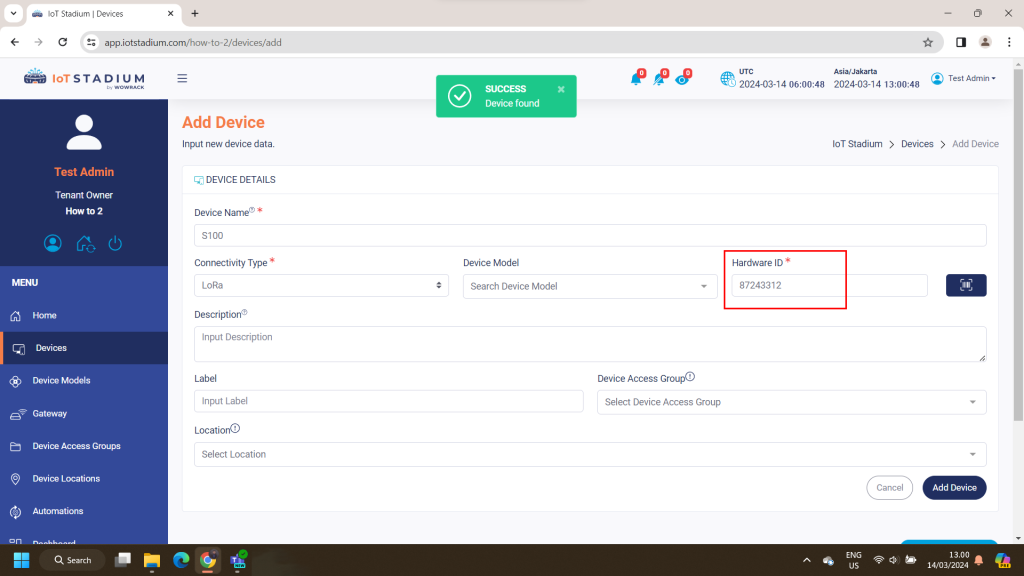
*note: if your device isn’t registered yet, you will get the red one.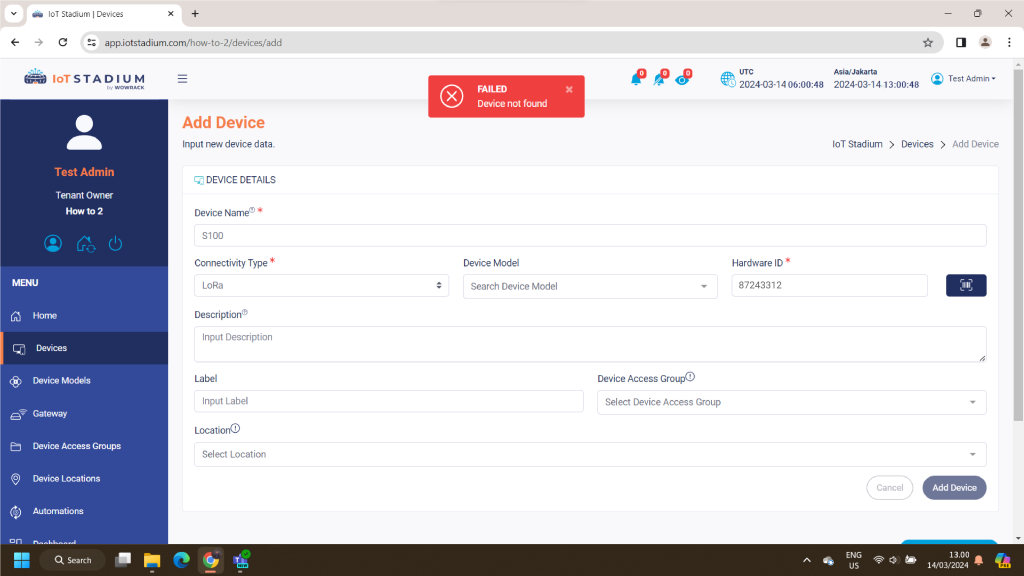
8. Click Add Device when done, then your device will be added to the platform.


