ESP32-CAM
The ESP32-CAM is a development board with a powerful microcontroller and Bluetooth and Wi-Fi connectivity, ideal for IoT applications involving image processing and capture. It features a camera module and a microSD card slot for easy data storage. This device is ideal for remote monitoring or surveillance projects, as it can capture and transmit images over a wireless network.
ESP32-CAM Pins
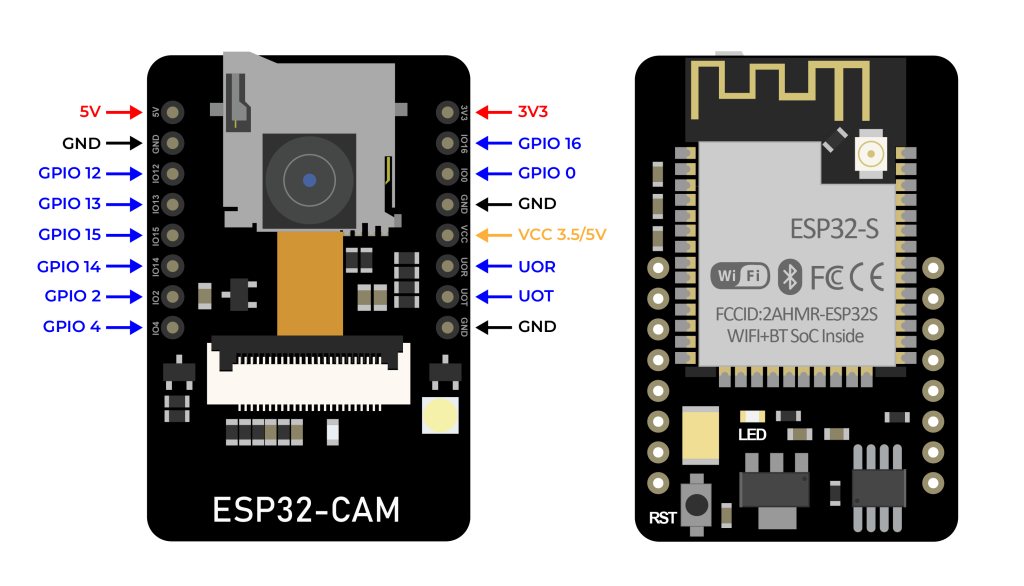
Here are the ESP32-Cam pinouts, you can take a look at the topside to see the name.
Serial Programmer
The Serial Programmer is also known as USB-to-TTL Converter.
A USB-to-TTL Converter is a device designed to convert USB bus signals into TTL serial signals. It serves multiple purposes, including debugging microcontroller programs via a PC and transferring programs from a PC to a microcontroller.
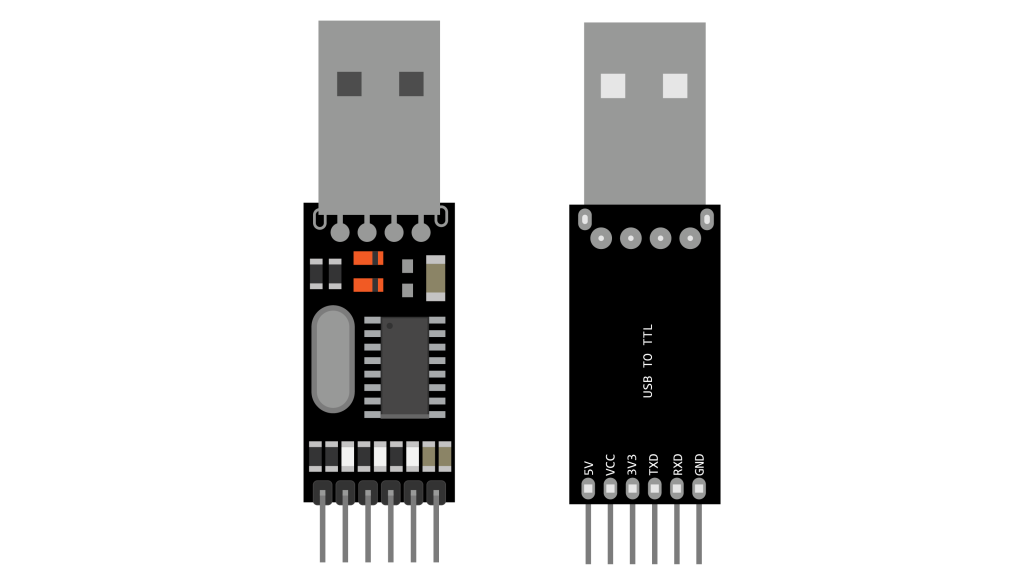
There are numerous USB-to-TTL options available for flashing the ESP32-CAM. This tutorial uses the CH340G type. The USB-to-TTL CH340G pinout configuration looks like this.
Schematic
After you understand the pins on both devices, here’s how you connect the USB-to-TTL to the ESP32-CAM module.
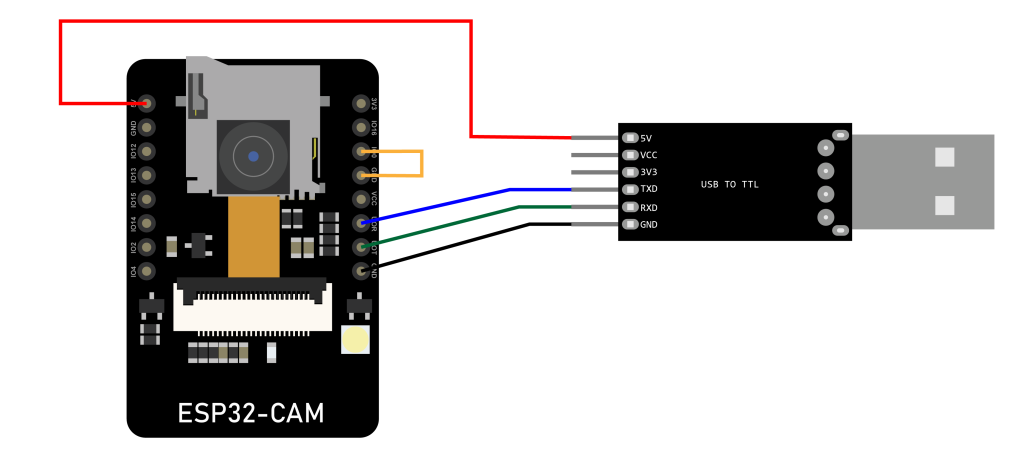
Make sure to connect the ESP32-CAM with 5V pins on any serial programmer.
*Note: The GPIO 0 pin is connected to ground. This connection is only needed when programming the ESP32-CAM. Once you’ve finished programming the module, you must unplug this connection.Flashing the Firmware
After the devices have been assembled, the next step is flashing the firmware to the module.
1. Make sure to connect the GND with GPIO 0 pin.
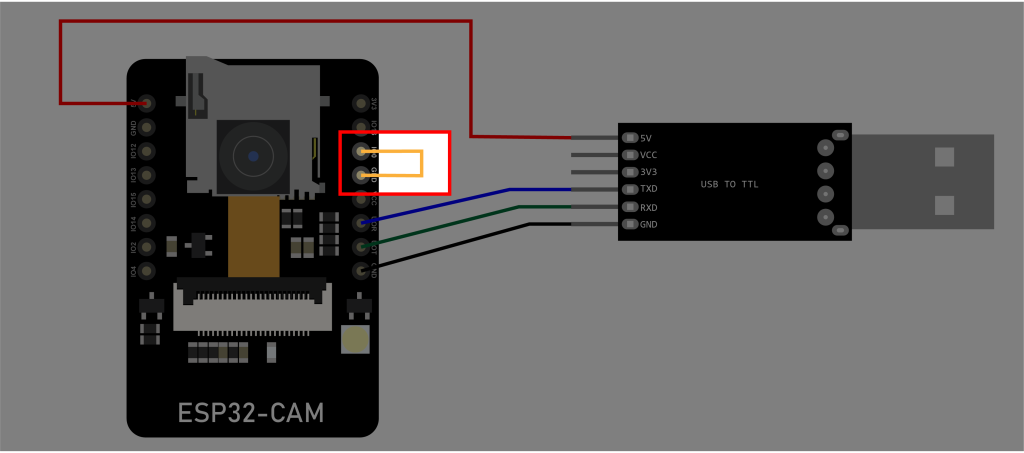
2. Press the RST button.
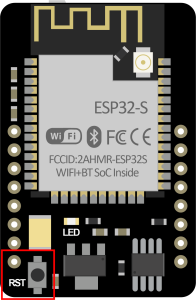
3. Connect the serial programmer with the PC.
4. To understand on which COM port your USB is connected you can open Device Manager.
5. Then go to Ports. You will see on which COM port the device is connected.
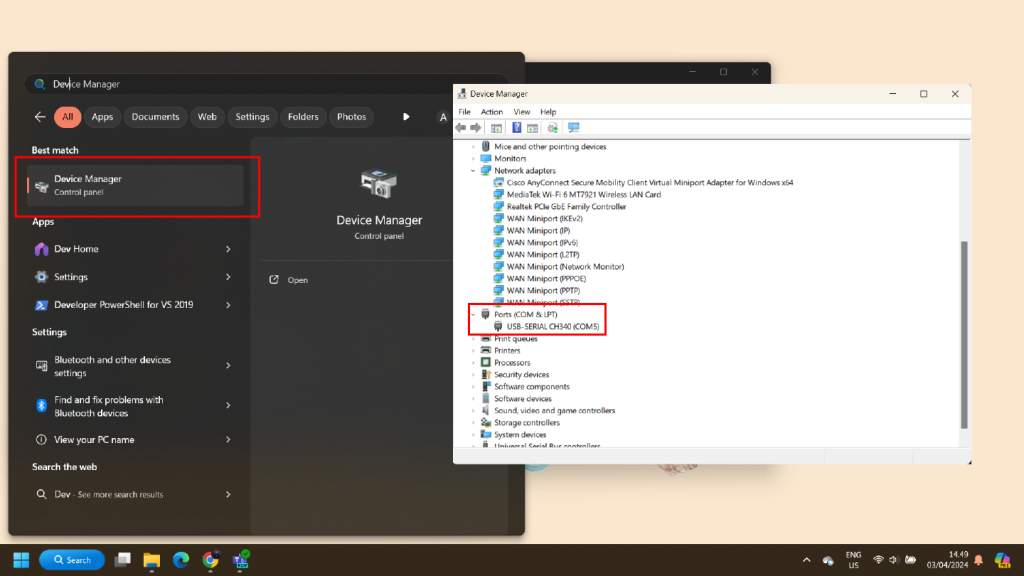
6. Download the firmware here:
ESP-Camera-V.1.0,zip
7. Extract the file.
8. Click to Run.
9. Enter the COM Port.
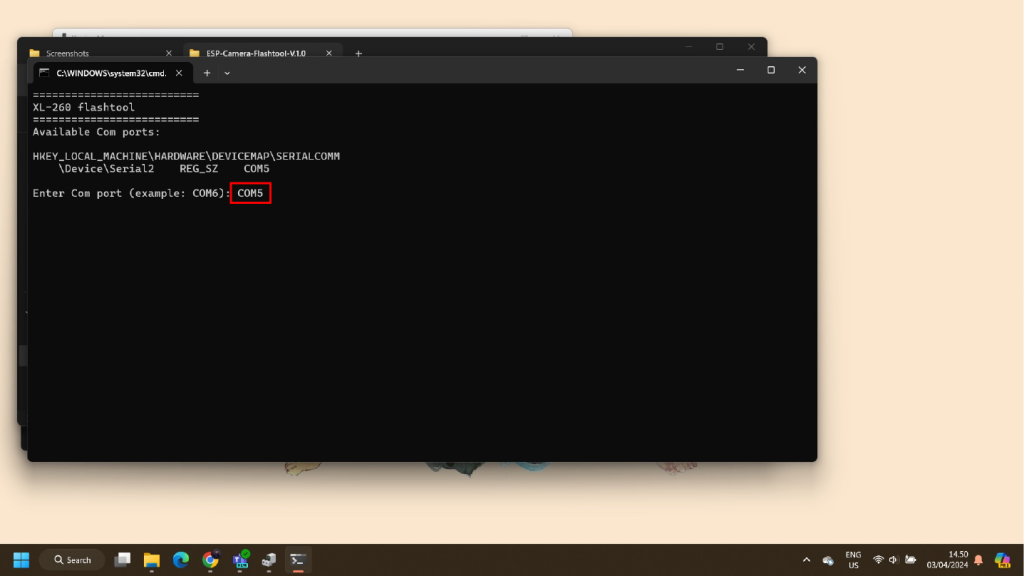
10. Type 1 to continue the install the firmware.
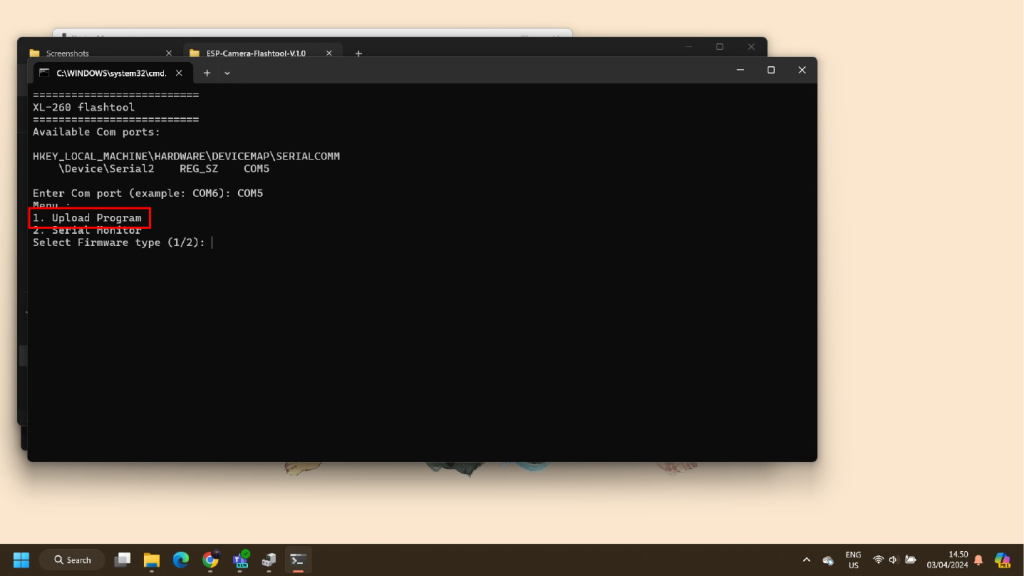
11. The installation will begin.
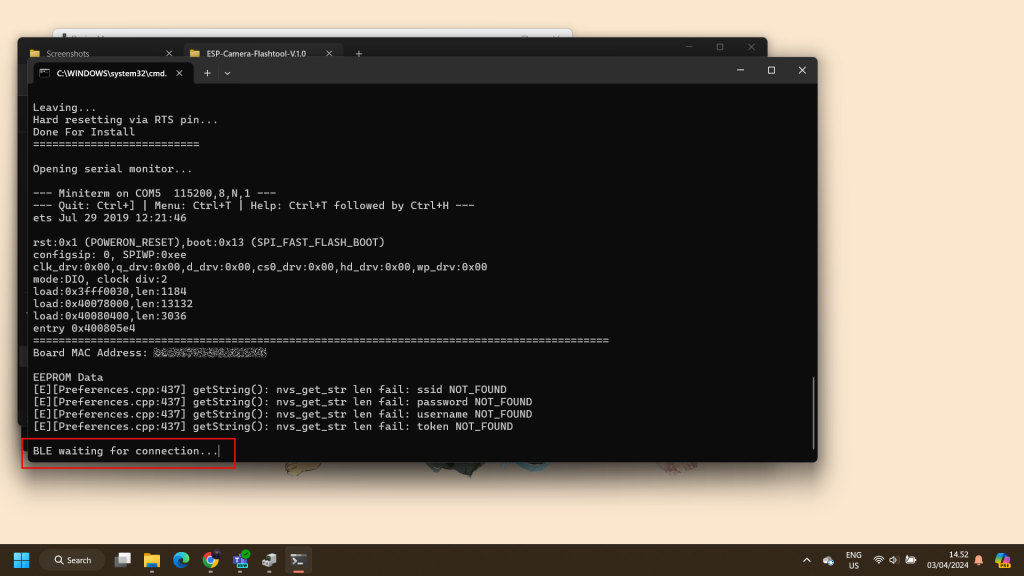
12. After the firmware successfully installed, the gateway will activate its BLE, and you need to go your phone to continue the process.
*Note: Unplug the GND with GPIO 0 pin and press the RST button again.
Add ESP32-Cam to the Platform
Since the device activates its BLE, you need to download the IoT Stadium Mobile App to add the ESP32-CAM into the IoT Stadium platform.
1. Download the Mobile App from the Google Play Store with the name IoT Stadium.
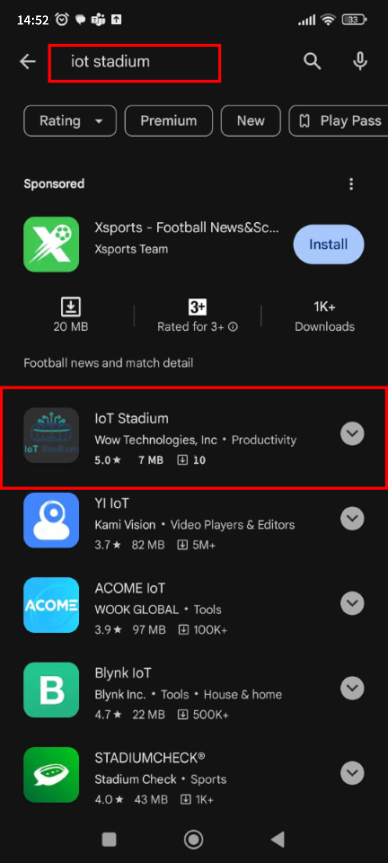
2. Install and open the app.
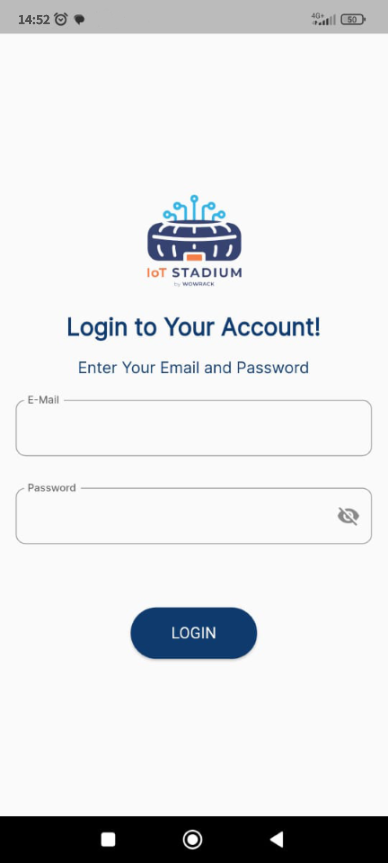
3. Enter your Email Address and Password of IoT Stadium Account, then click Login.
4. Click on Bluetooth to provision your phone with the module.
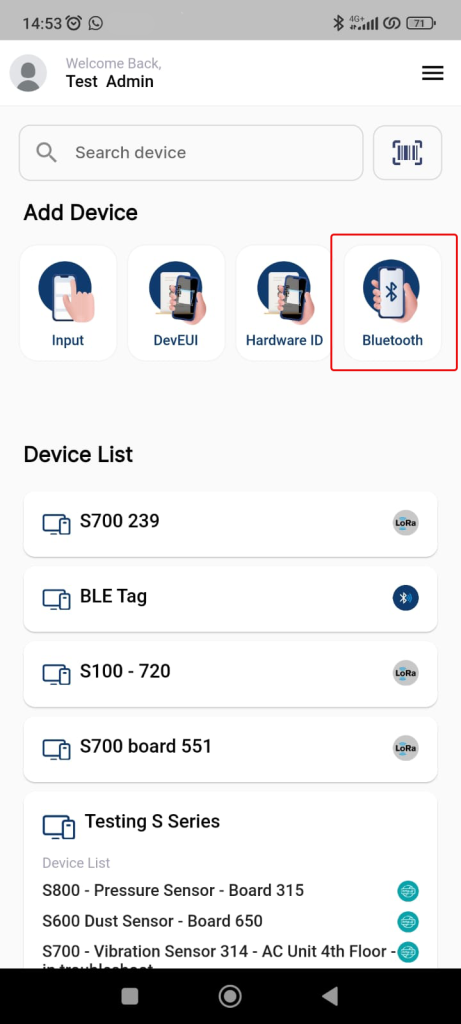
5. Make sure to activate your Bluetooth and activate your GPS.
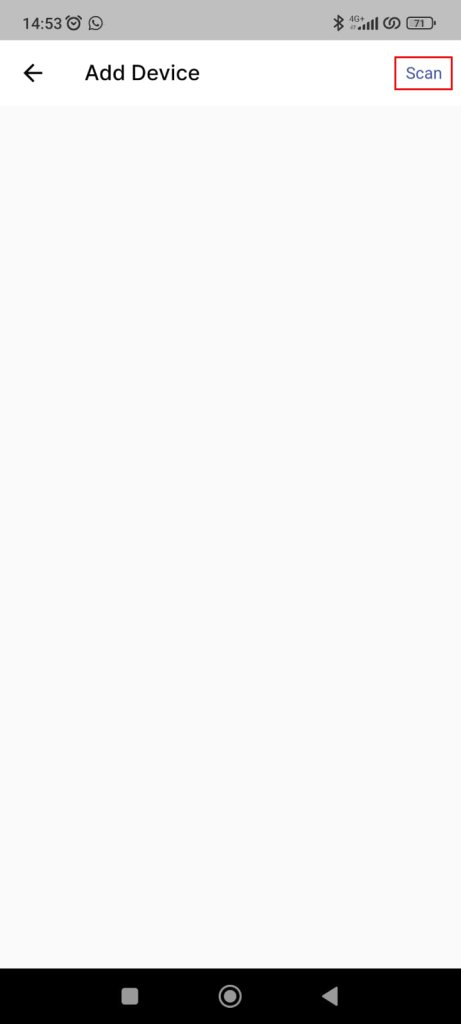
6. Click on Scan.
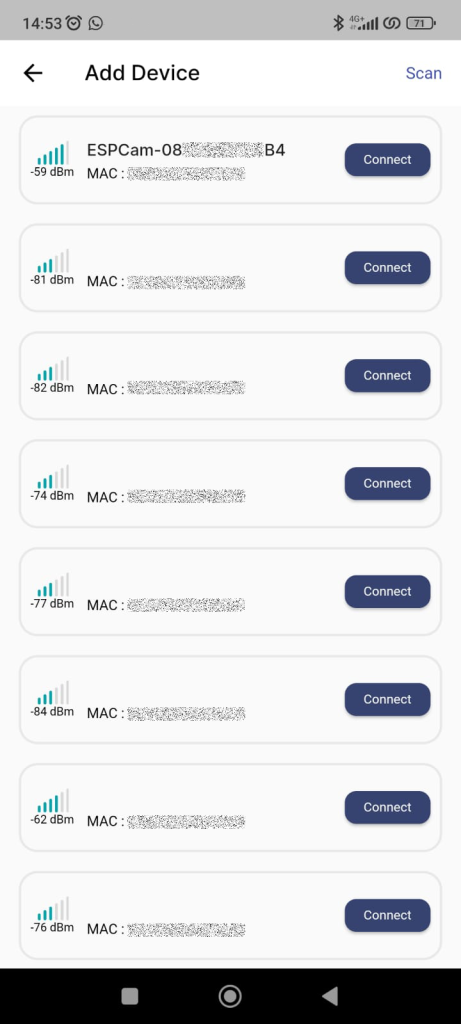
7. Connect with ESPCam-08********B4.
*Note: the number or code of ESP32-CAM depends on its MAC Address.
8. Give the device its name.
9. Set the Connectivity Type as MQTT.
10. Set the Device Model as ESP32-Camera.
11. Enter your selected W-Fi by entering its SSID name and its Password.
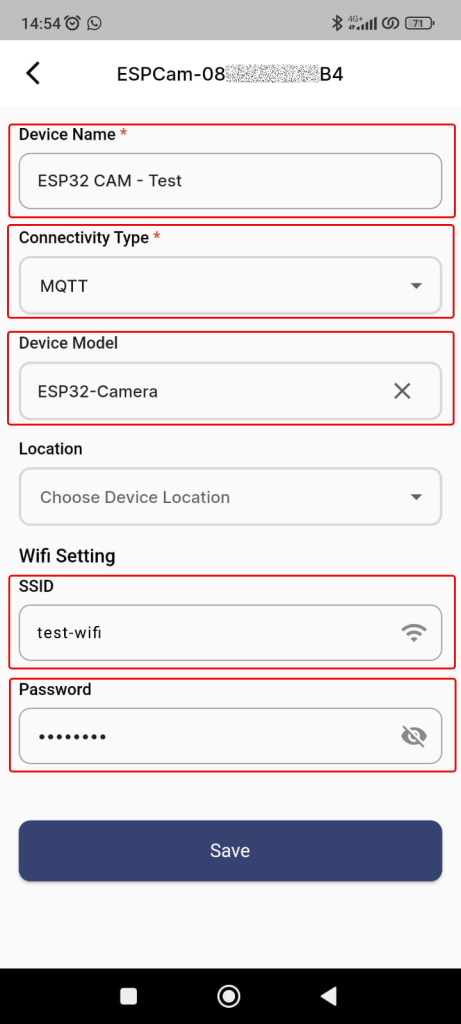
12. Click Save when done.
13. Your device will be added to the platform.

