-
Getting Started
-
Device Management
-
Automations
-
Dashboard
-
User Management
-
LoraWAN
-
API and Integrations
-
Boards
-
DIY
-
Gateway
Add Automation
IoT Stadium provides you the ability to automate tasks and processes by leveraging the data and capabilities of connected devices. You can set multiple triggers from different devices and specify actions to be taken when these triggers are reached.
Adding New Automation
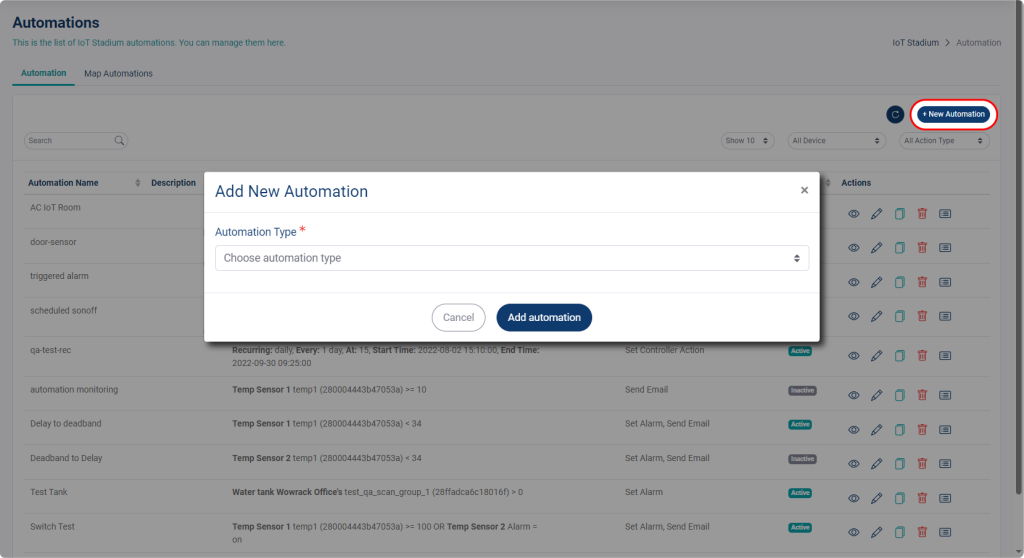
1. Click on Automation.
3. Select the automation type.
4. Click Add Automation when done.
Automation Type
Little tips, you can give a name for your Automation after you’ve done set the Action.
Telemetry Trigger
Note: this step is to set the Telemetry Trigger
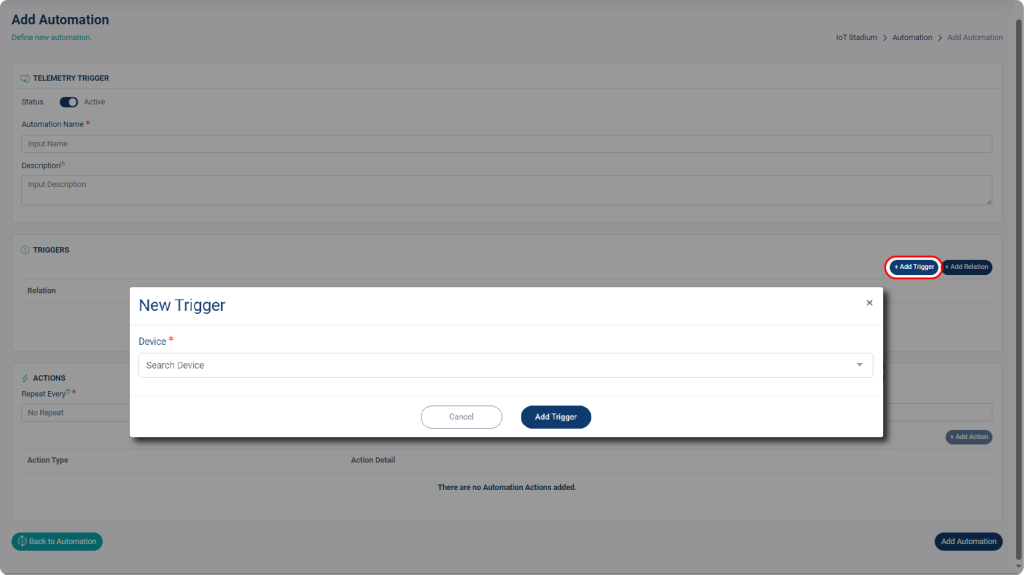
1. Click on Add Trigger.
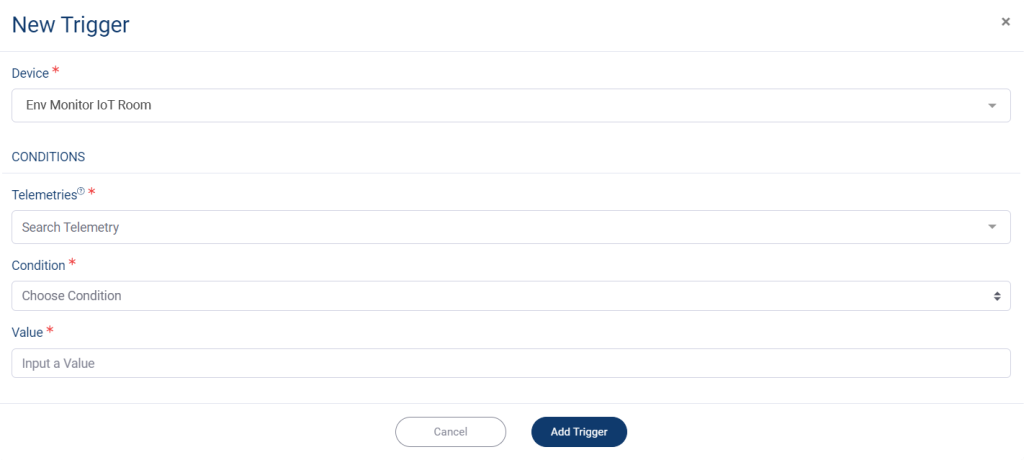
2. Select your Device from dropdown menu.
3. Set the Telemetries. You can select multiple telemetries and each telemetry will be connected with OR relation (Any one of them can trigger a response).
Tips: select telemetries which measure the same variable and having the same unit.
4. Set the Condition.
5. Set the Value.
*Note: You can only input with number.
6. Click Add Triger when done.
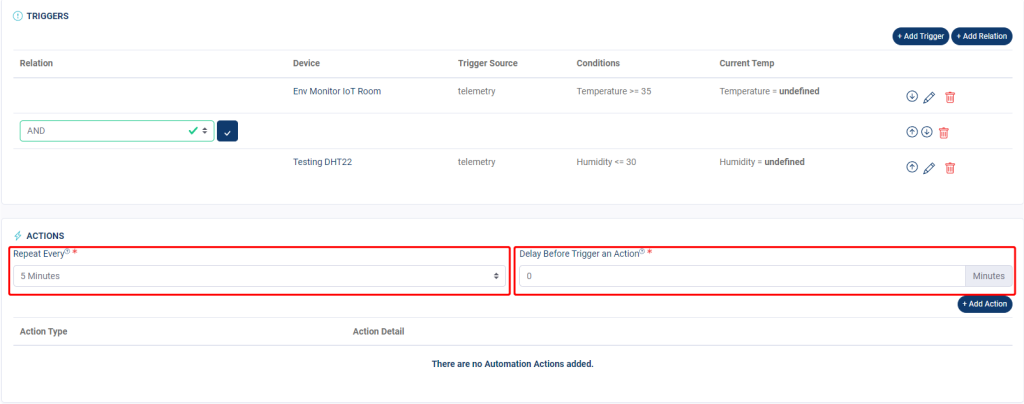
*Note: The next step used when you want to set a condition between your triggers.
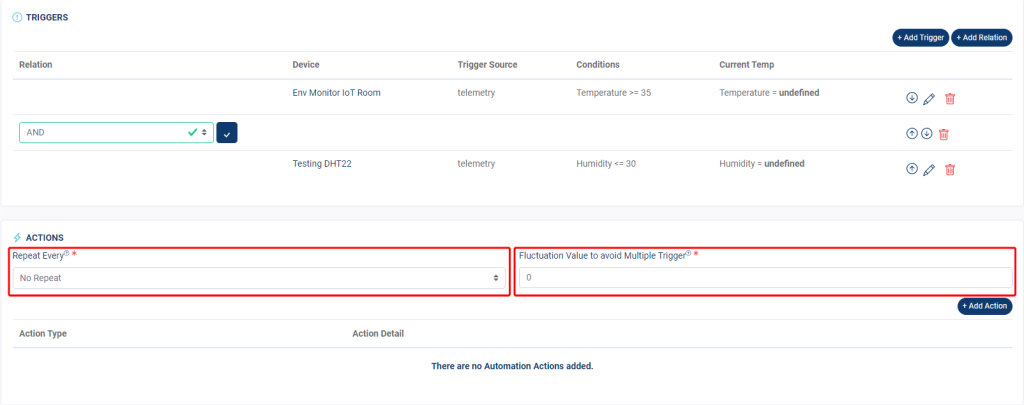
Suppose you have two triggers, and you want the action is activated when one of the triggers meets the preset conditions. You can do that by following this step:
1. Click Add Relation.
2. Set the condition for your relation.
 Tips: You can move the relation and condition Up and Down.
3. Click the checklist button when done.
4. Set the interval on Repeat Every dropdown menu.
There is a difference when you set the interval as No Repeat and when you are not choosing that option. When you select No Repeat, you also need to set how much fluctuation value are allowed, because some sensors might have a different margin of error.
If you set the repeating interval to a value other than No Repeat, you must set the delay time.
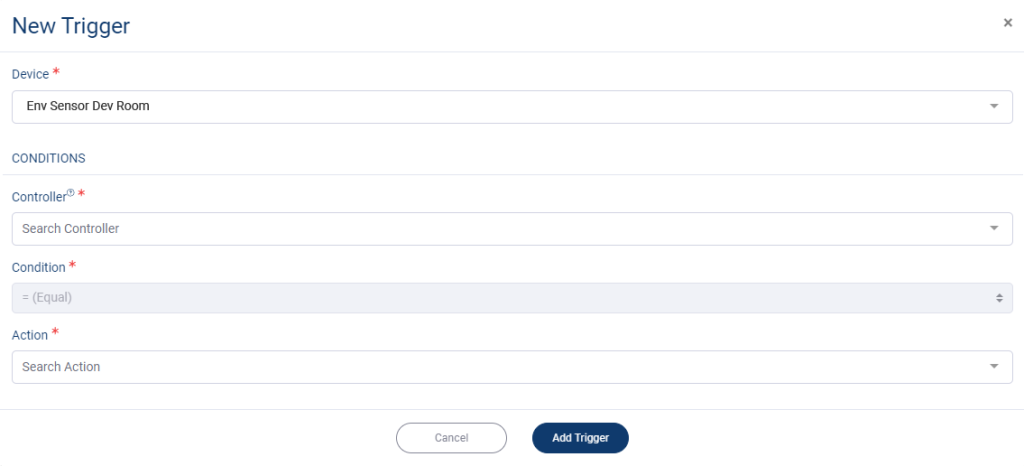
Controller Trigger
1. Click on Add Trigger.
2. Select your Device from dropdown menu.
*Tips: If you choose on the device that having no controller, there will be no list of controllers to shown. So, make sure your device has a controller.
3. Set the Controller.
4. The Condition will be equal (=), which means that the trigger will be sent when the Action reaches the value.
5. Set the Action.
6. Click Add Triger when done.
Schedule
1. Set the Start Time.
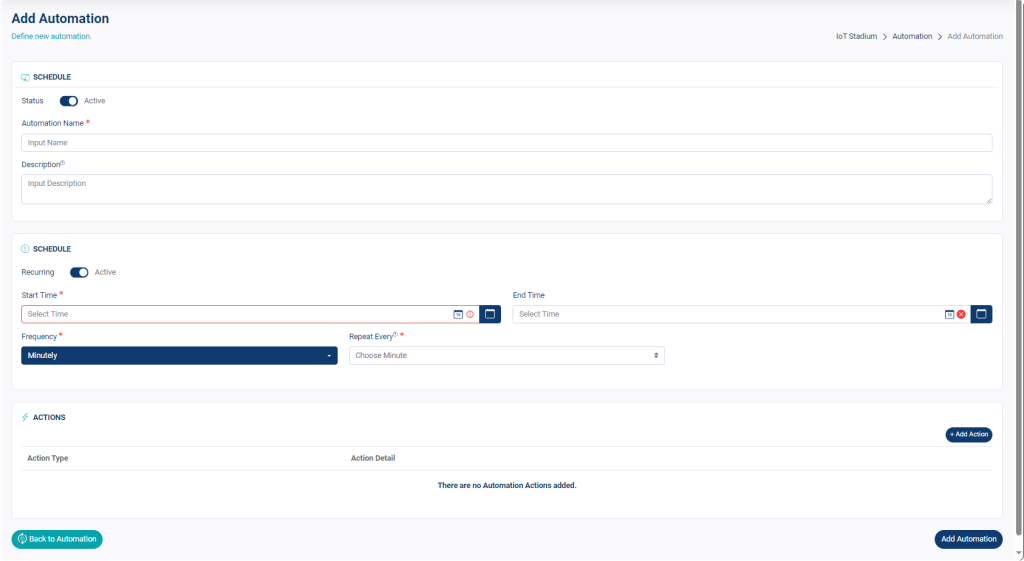
Example: if you plan to set the schedule on 13 October, the Start Time will begin on 13 October at 00.00, and you cannot choose a date before that.
2. Set the End Time.
3. Set the repeating interval at Frequency and Repeat Every.
You also need to specify the time frequency and repeating interval. Set the time frequency using the Frequency option, and each option will have a different repeating interval. The Repeat Every command will be executed at the specified time. Depending on the time frequency you set, the Repeat Every option will vary.
Action
After you set your triggers or your schedule, you need to set the action. There is a different configuration between the triggers and the schedule.
There are four type of Action you may chose: Set Alarm, Set Controller Action, Send Email, Call REST API.
*Note: The only action available for Schedule automation is Set Controller Action. If you choose Telemetry Trigger or Controller Trigger, all the action types are available.
1. Click on Add Action.
2. Set the Action Type.
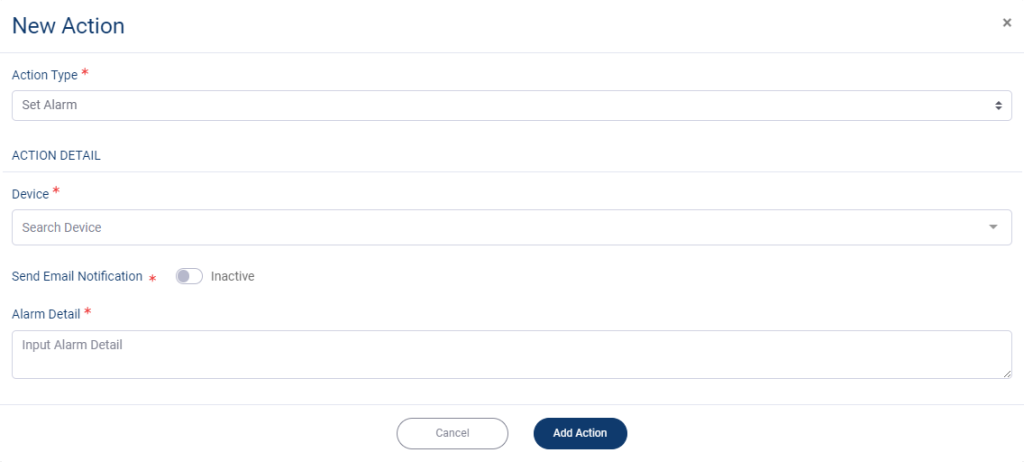
Set Alarm
1. Set the Device.
*Note: Make sure your selected device has an alarm function.
2. Give the detail about the alarm.
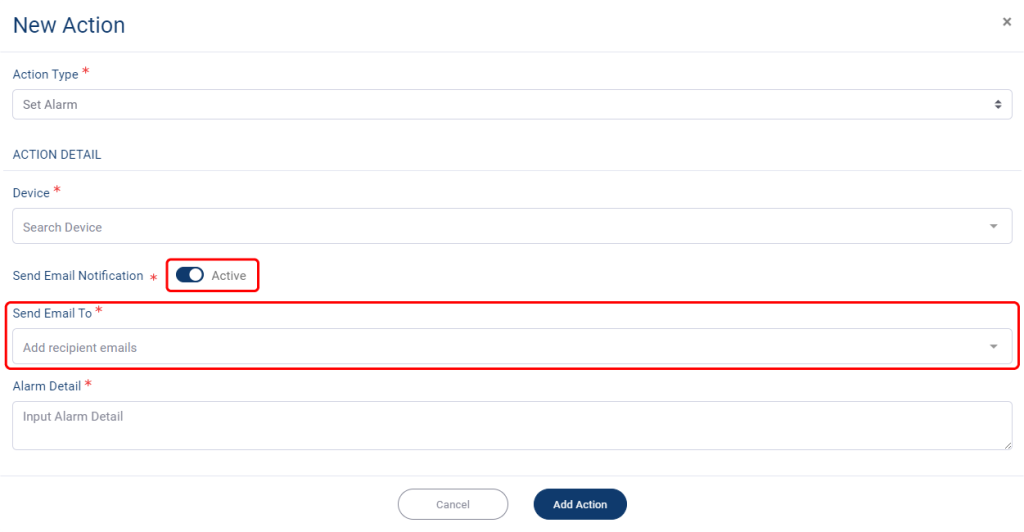
3. You may activate the email notification on the slider.
4. Then, you need to set email recipient.
5. Click Add Action when done.
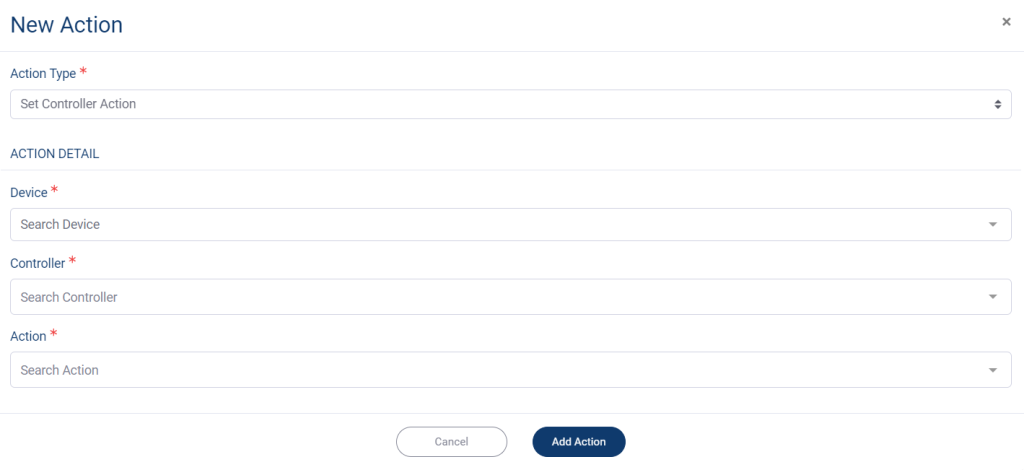
Set Controller Action
1. Set the Device.
2. Set the Controller.
*Note: Make sure your selected device has a controller function.
3. Set the Action.
4. Click Add Action when done.
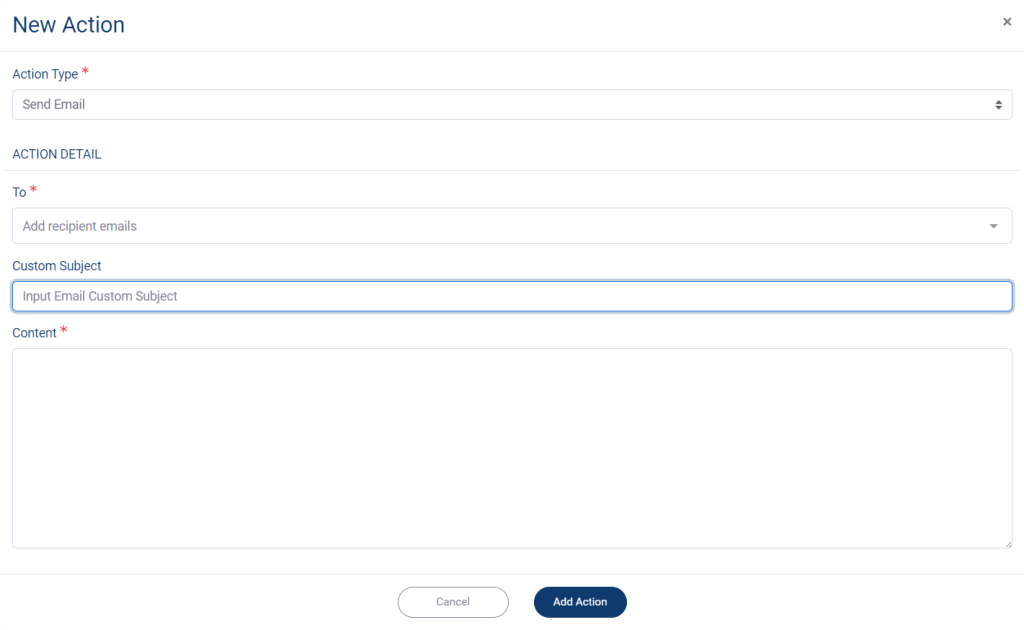
Send Email
1. Select the email recipient. You can select more than one user.
2. Set the email subject.
3. Fill the Content for your email.
4. Click Add Action when done.
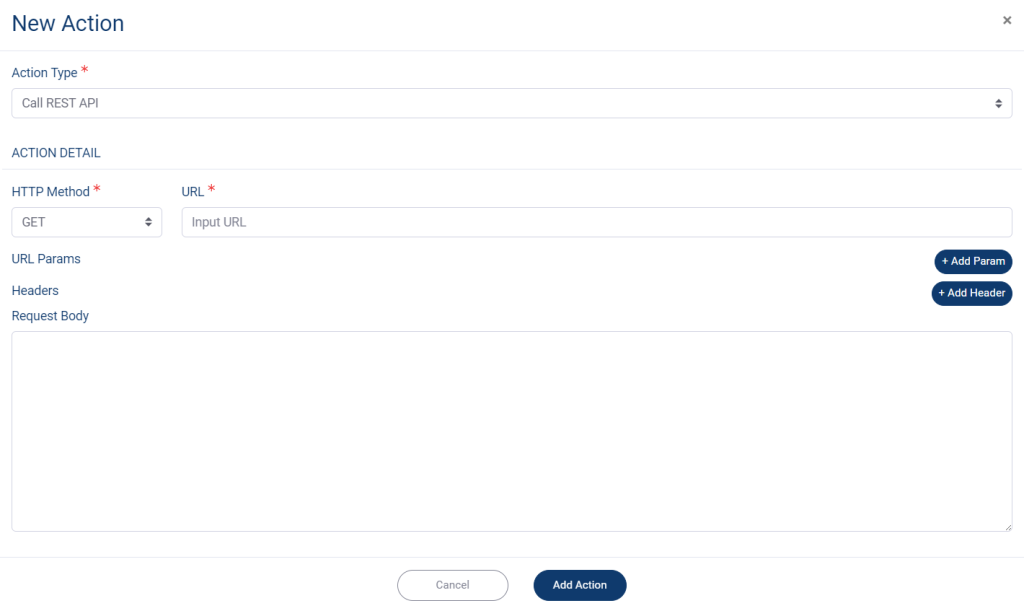
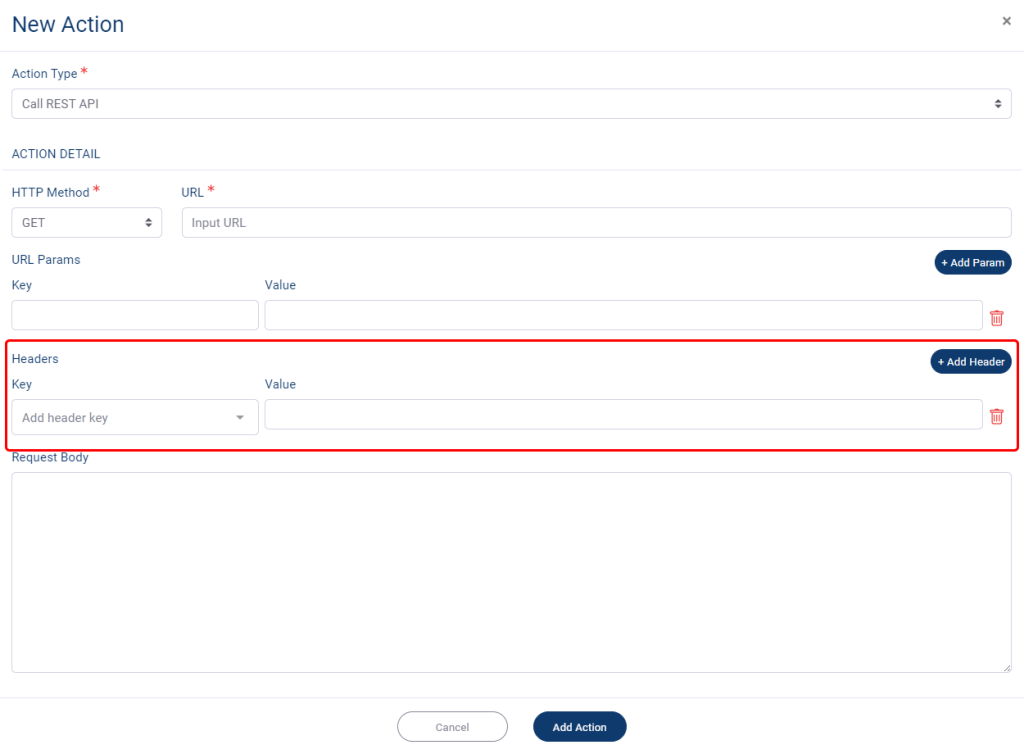
Call REST API
A RESTful API or REST API is an architectural style for an Application Program Interface (API) that accesses data via HTTP requests. When you want to access data or resources on a REST server, each resource or data is identified by a global ID or URI (Universal Resource Identifiers).
1. Set your HTTP Method.
2. Input your URL.
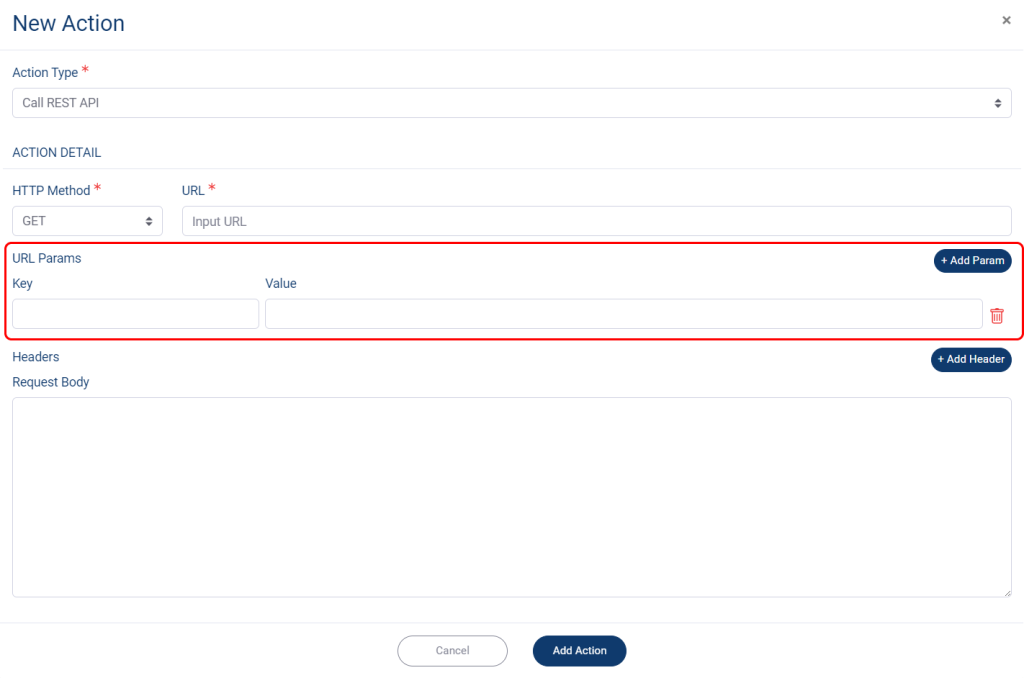
3. Click on Add Param to add parameter for your URL.
4. Set its Key and Value.
5. Click on Add Header to add the header.
6. Set its Key and Value.
7. Fill its Request Body.
8. Click Add Action when done.


