Imagine you want to set a limit for a telemetry value, and when that limit is reached, you want an action to occur—like triggering an alarm or automatically activating another device to handle the situation. In such cases, you can use this type of trigger.
A Telemetry Trigger lets you set thresholds for one or multiple telemetry values, whether they share the same limit or have different ones.
Add New Automation
1. Click on New Automation.
2. Choose the Automation Type as Telemetry Trigger.
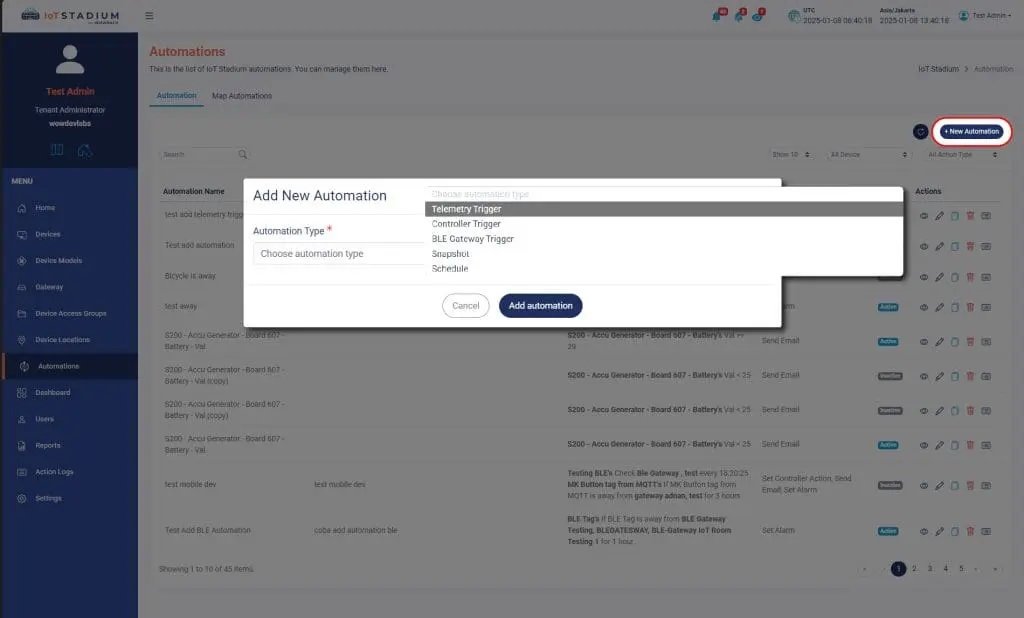
3. Click Add Automation to go to the next section.
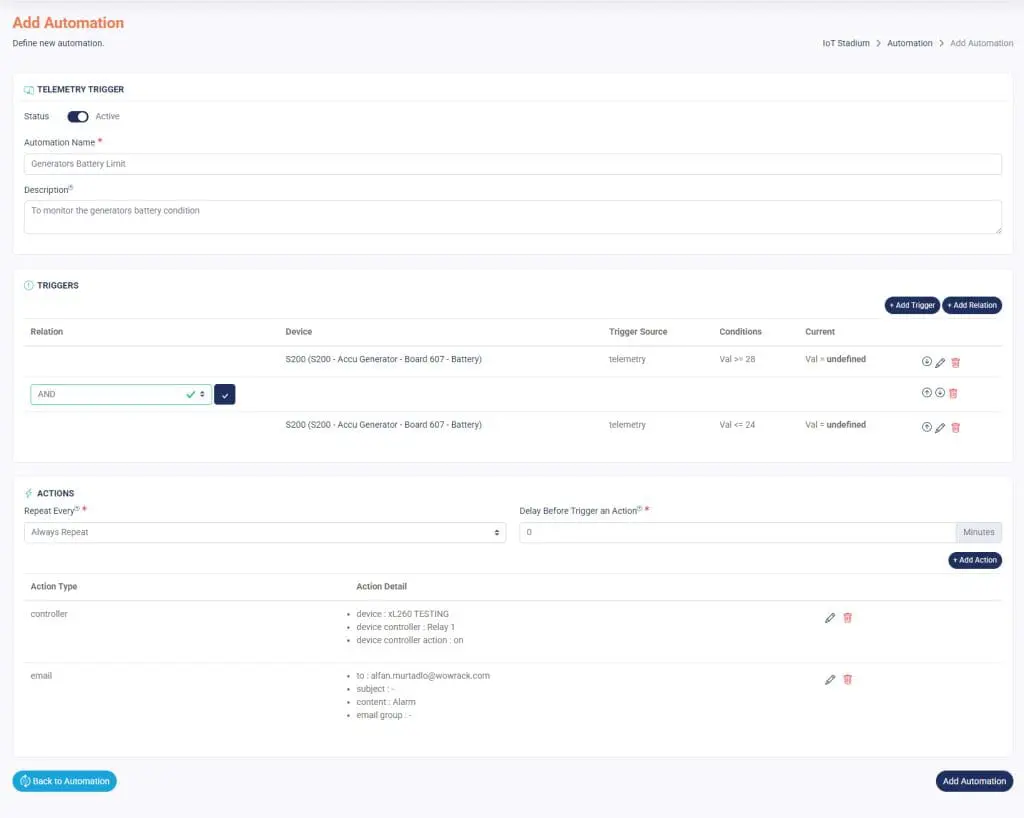
Set The Automation
After you choose your type of automation, you will go to this page:
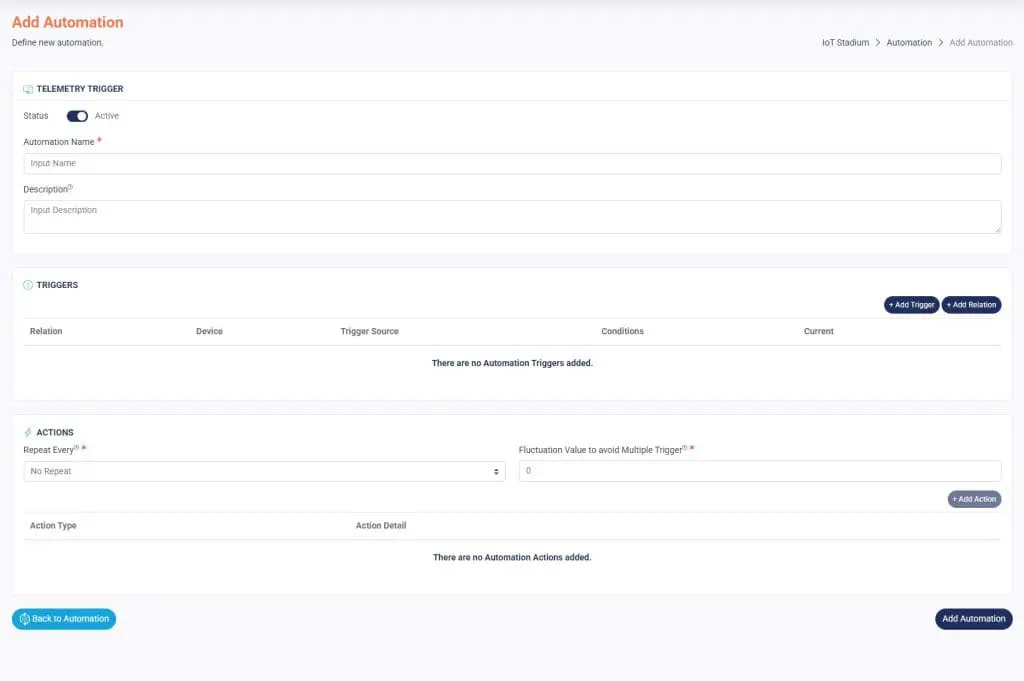
1. Make sure to slide the Active button to enable your automation.
2. Assign a name and description to the automation.
3. Click Add Trigger.
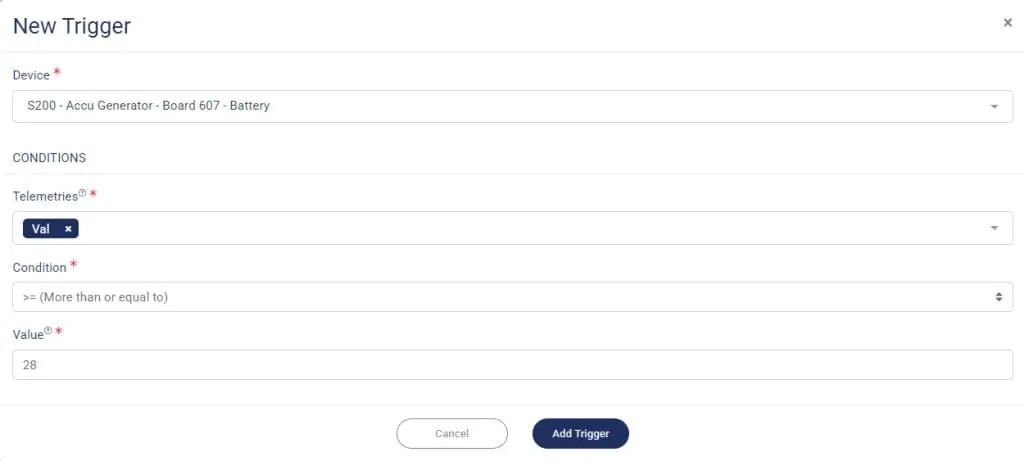
4. Select the Device you want to use, then click Add Trigger when finished.
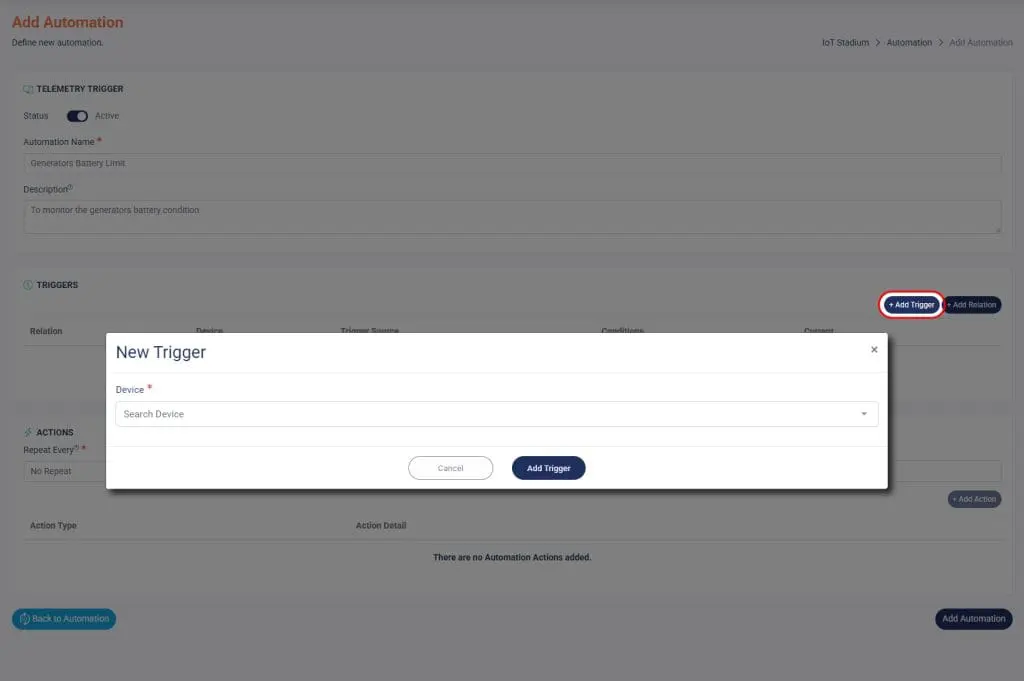
5. Choose the Telemetry you want to use for the trigger.

6. Set the Condition for the trigger.
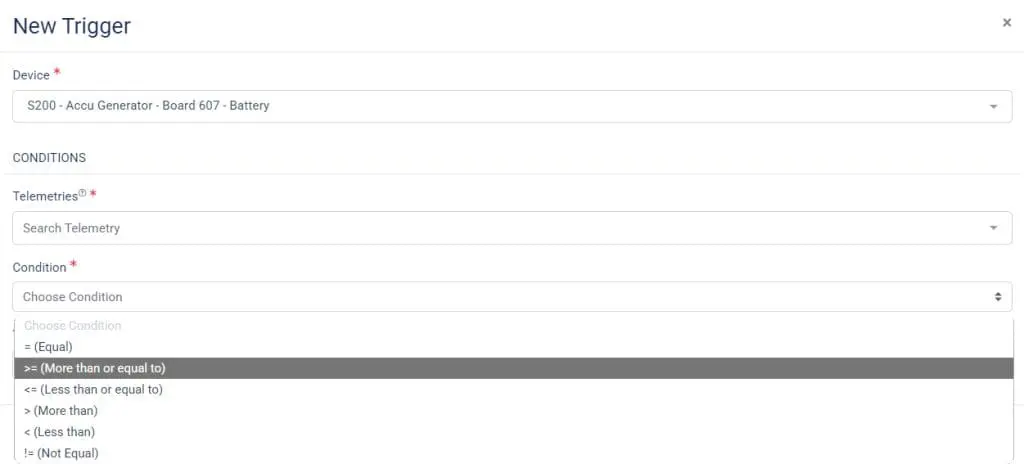
7. Set its Value.
*Note: Only numeric values, dashes (-), and dots (.) are allowed.
8. Click Add Trigger when done.
9. You can also repeat the process to add the new condition and value from the same telemetries.
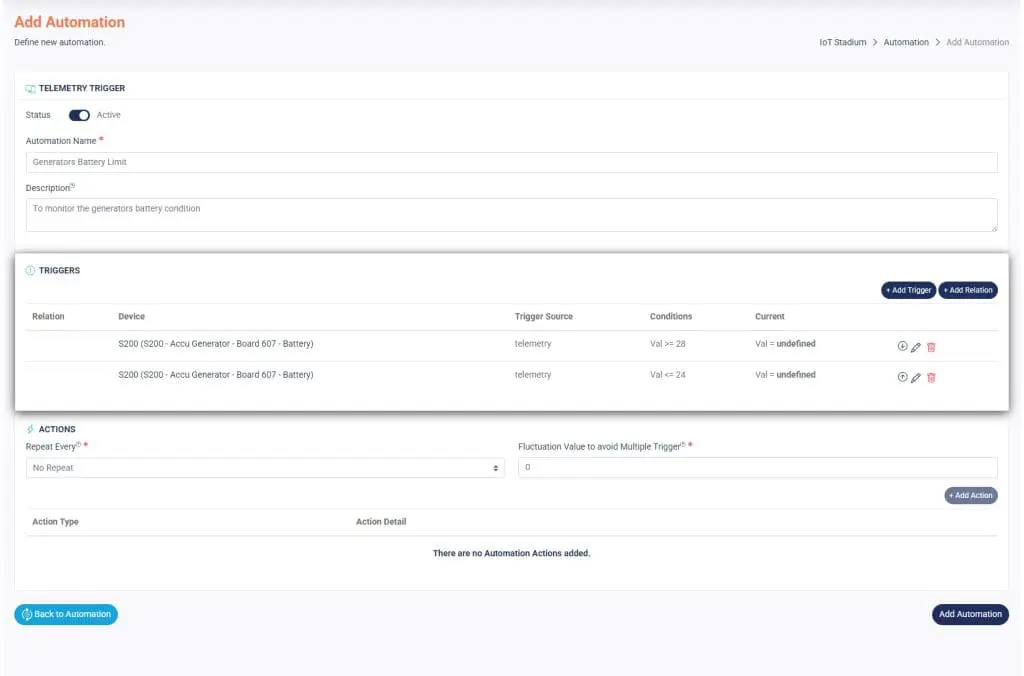
Add Relation
Suppose you have two triggers and want your action is activated when one of the triggers meets the preset conditions. This feature is best used when you have multiple triggers and need to set a condition between them.
1. Click Add Relation.
2. Set the relation.
3. Click check button when done.
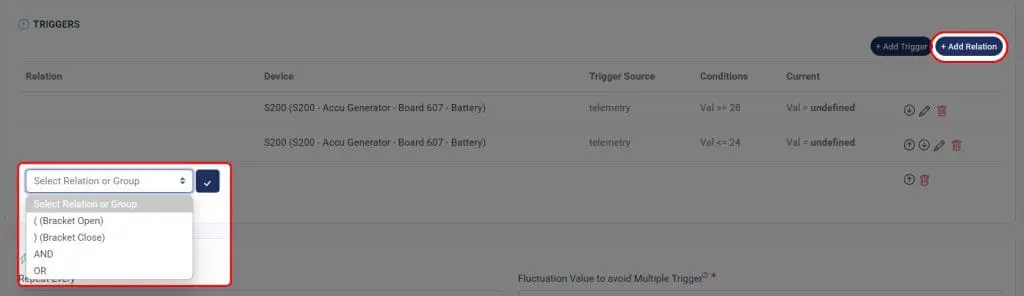
4. You can also move the triggers or relation using the arrow button.

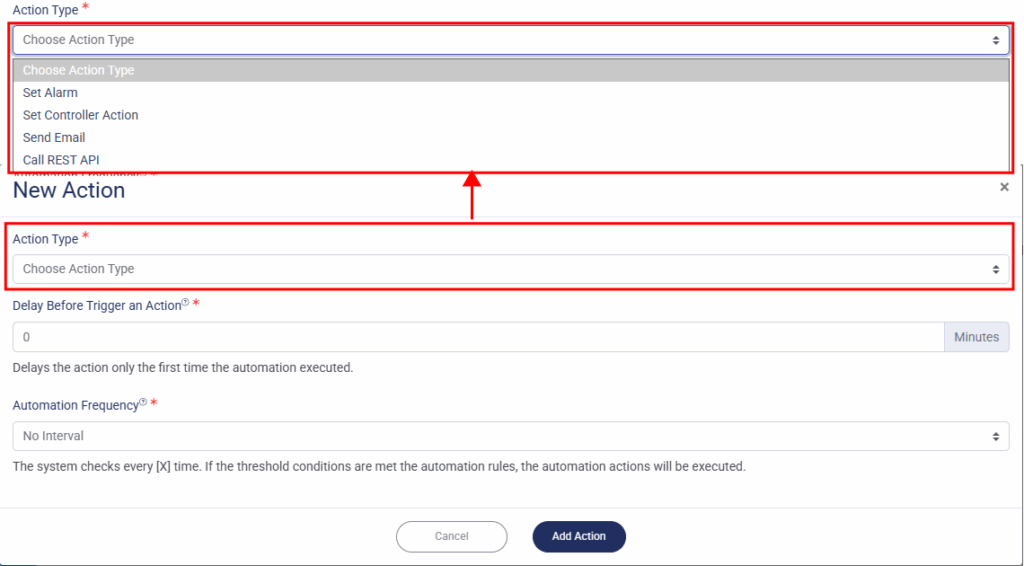
Add Action
Once you've done set the triggers and relation, you can set the action for your automation. There are 4 types of actions you may select:
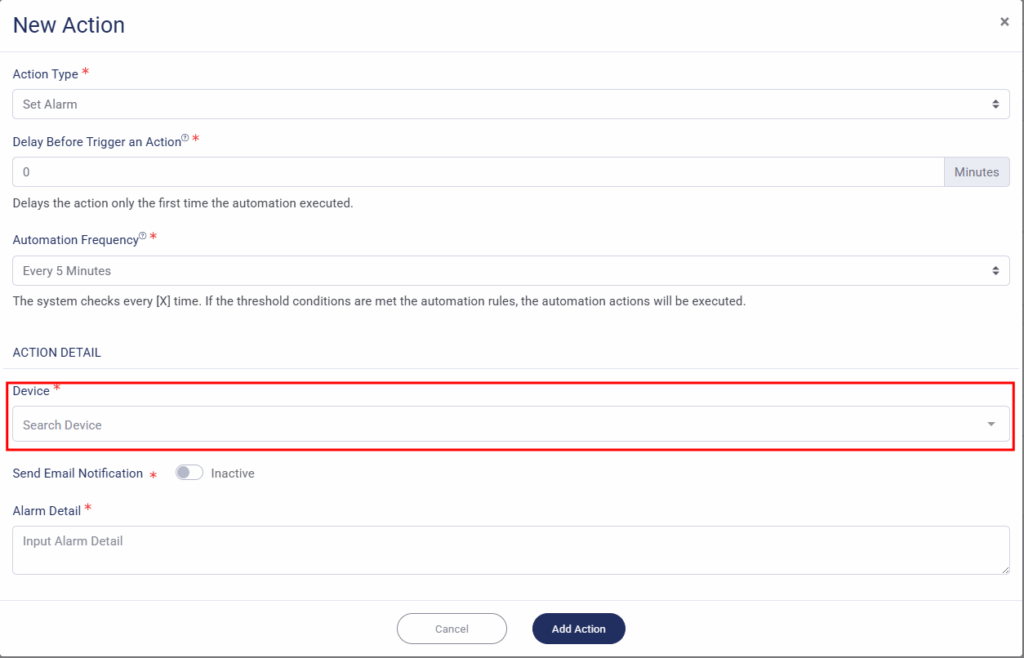
Set the Alarm
- Set the Delay, which could set the delay time before the action will be executed.
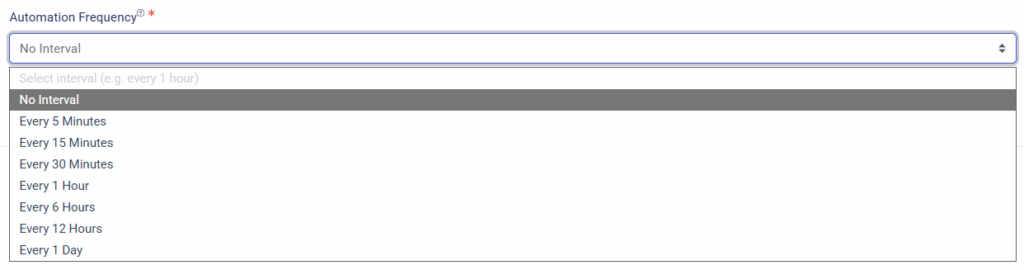
- Set the Automation Frequency, which the system checks every [X] time. If the threshold conditions are met the automation rules, the automation actions will be executed.

- Select which Device.
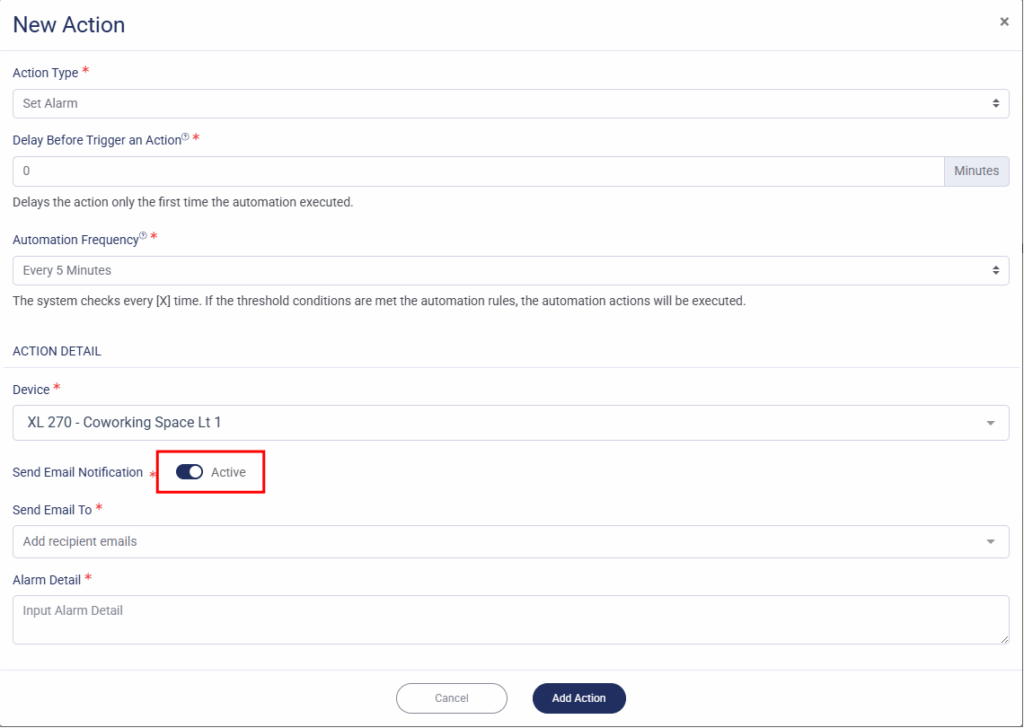
*Note: The Device dropdown only shows devices from the selected telemetry. - If you want the alarm send as email notification, slide the Inactive button to activate the function.
- Set the email recipient, and you can select multiple recipients.
- Fill out the Alarm Detail.
- Click Add Action when done.
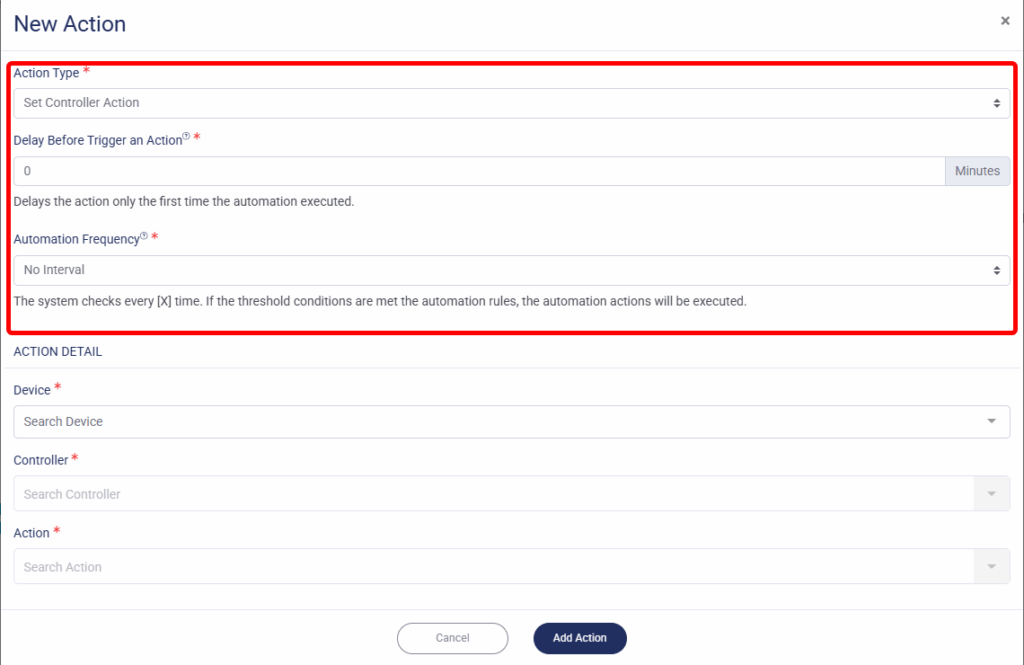
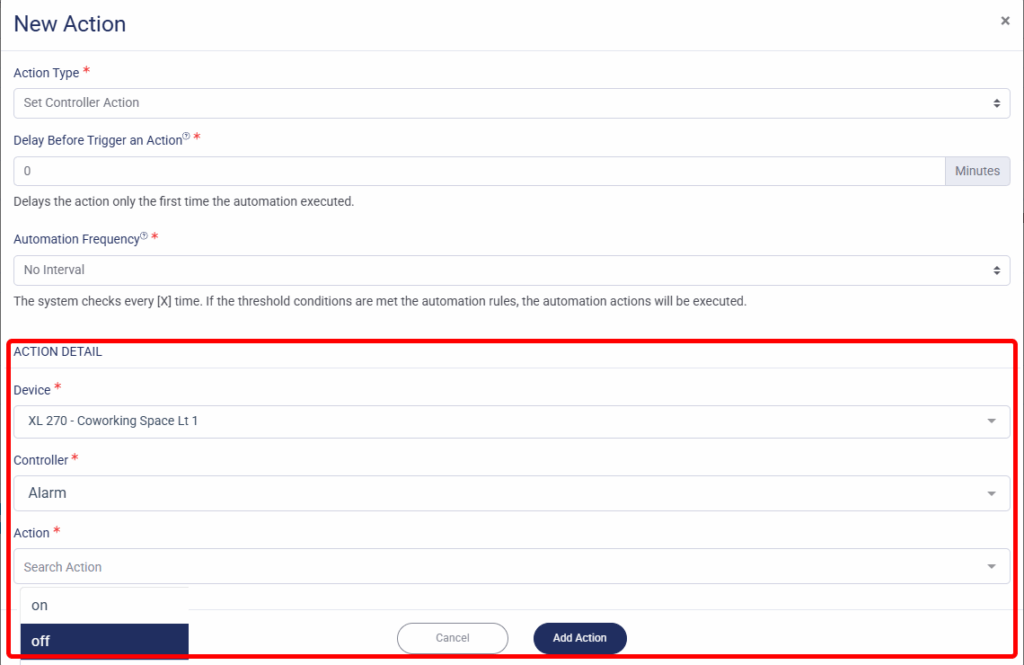
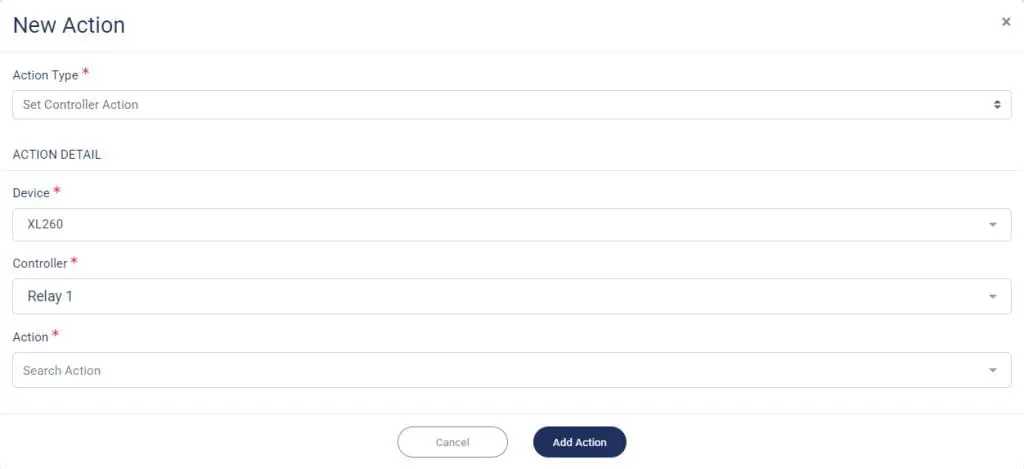
Set the Controller Action
This feature is used to activate the controller of another device when your preset trigger hit its threshold limit.
- Set the Delay, which could set the delay time before the action will be executed.
- Set the Automation Frequency, which the system checks every [X] time. If the threshold conditions are met the automation rules, the automation actions will be executed.
- Select which Device that would be activated. Make sure your selected device has controller
*Notes: You could select the same device as your trigger or select another device - Set the Controller of your selected device.
- Set the Action of your controller.
- Click Add Action when done.
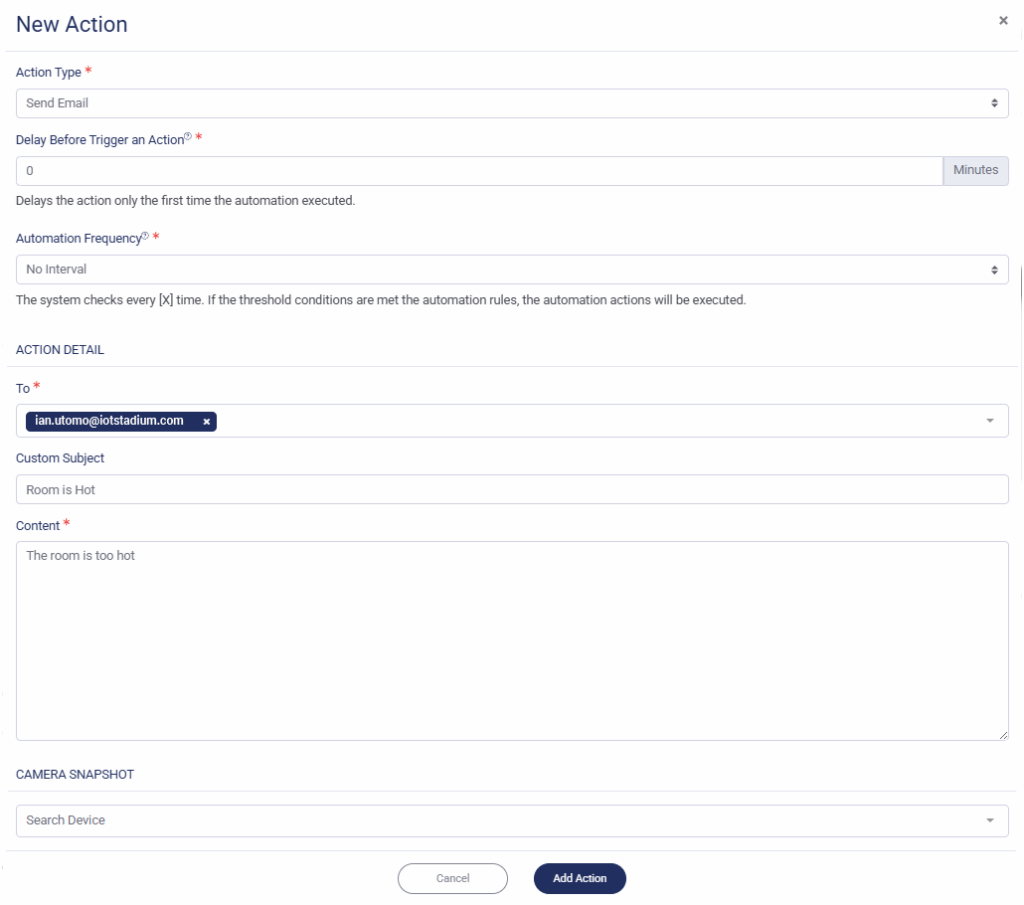
Set the Email
This feature will send an email with subject and content when your preset trigger hit its threshold limit.
- Set the Delay, which could set the delay time before the action will be executed.
- Set the Automation Frequency, which the system checks every [X] time. If the threshold conditions are met the automation rules, the automation actions will be executed.
- Set the email recipient, and you can select multiple recipients.
- Set the Subject.
- Don't forget to add the detail about your email.
- You may add the snapshot if you are already set the camera to monitor your environment
- Click Add Action when done.
Call Rest API
A RESTful API or REST API is an architectural style for an Application Program Interface (API) that accesses data via HTTP requests. When you want to access data or resources on a REST server, each resource or data is identified by a global ID or URI (Universal Resource Identifiers).
- Set the Delay, which could set the delay time before the action will be executed.
- Set the Automation Frequency, which the system checks every [X] time. If the threshold conditions are met the automation rules, the automation actions will be executed.
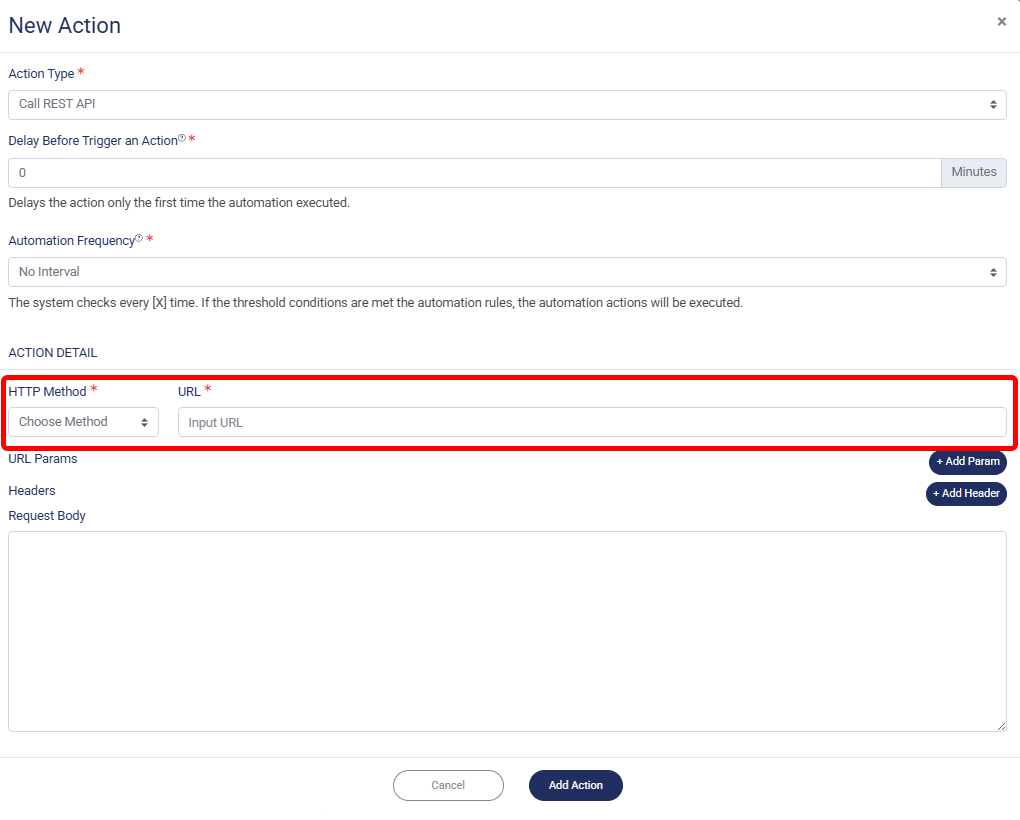
- Set your method to get data on HTTP Method dropdown menu.
- Input your URL
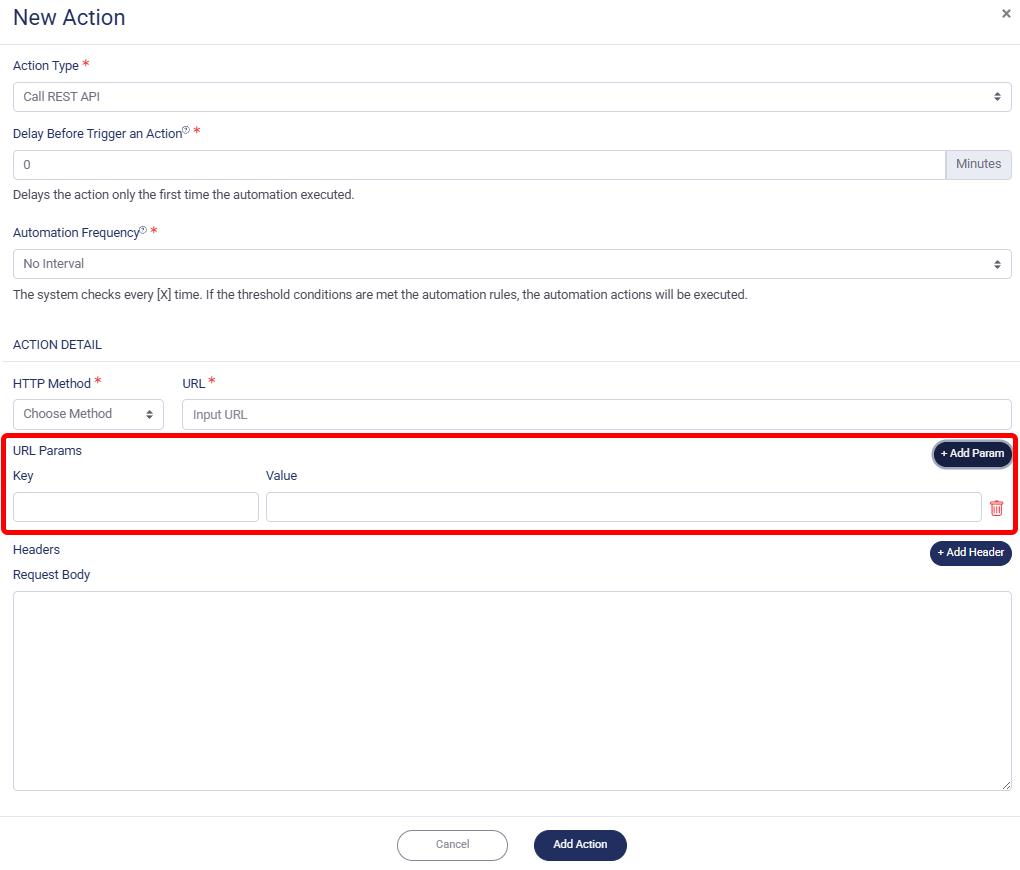
- If you want to add the parameter for your URL, click on Add Param. You could also add for more than one URL parameter. Then fill the Keyand the Valuefor your parameter.
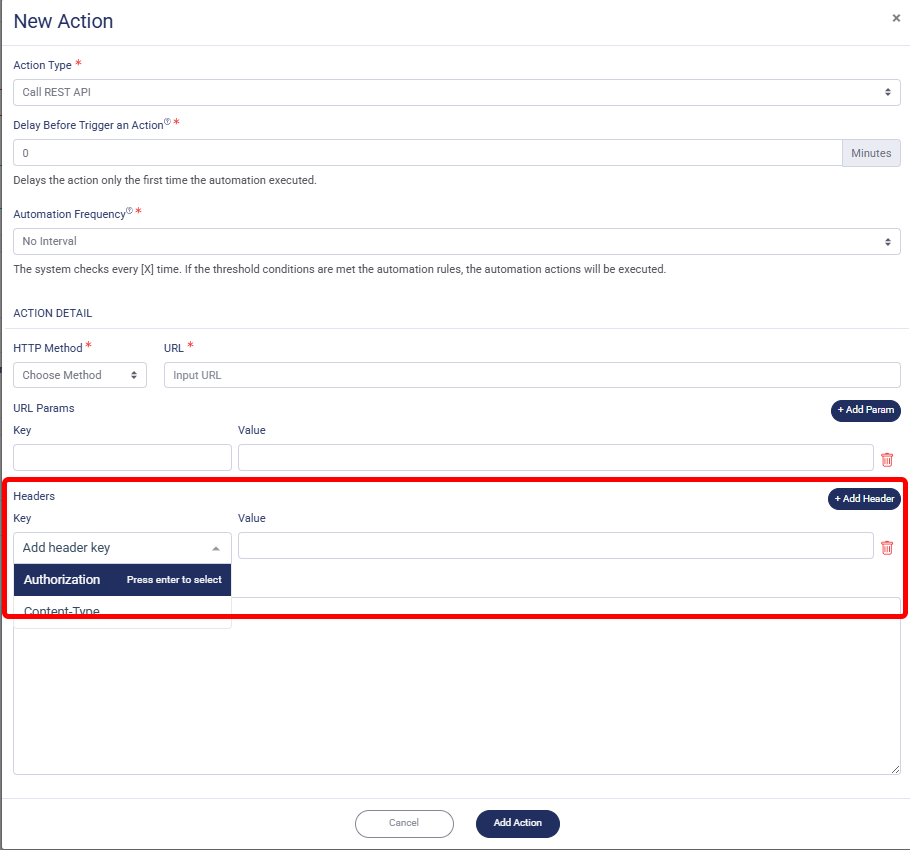
*Notes: You could also add more than one parameter. - Click Add Header if you want to add.
*Notes: You could also add for more than one. - Fill the Request Body
- Click Add Action when done.
You could also set more than one action.
When you're done setting the automation, click on Add Automation.