Once you choose MQTT as your type of connectivity, you just need to fill the rest of the empty field. 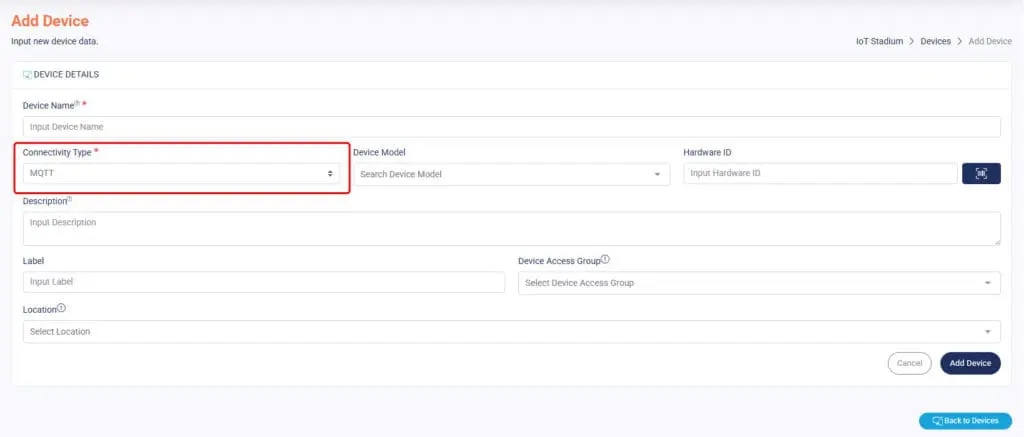 Click Add Device when done.
Provisioning via Web
Your new device is already added to the platform, but it still has no connection, and you can see the status is red. To make your device connected, you need to do the following provisioning:
1. Click on your newly created device.
2. Click on Access Token. 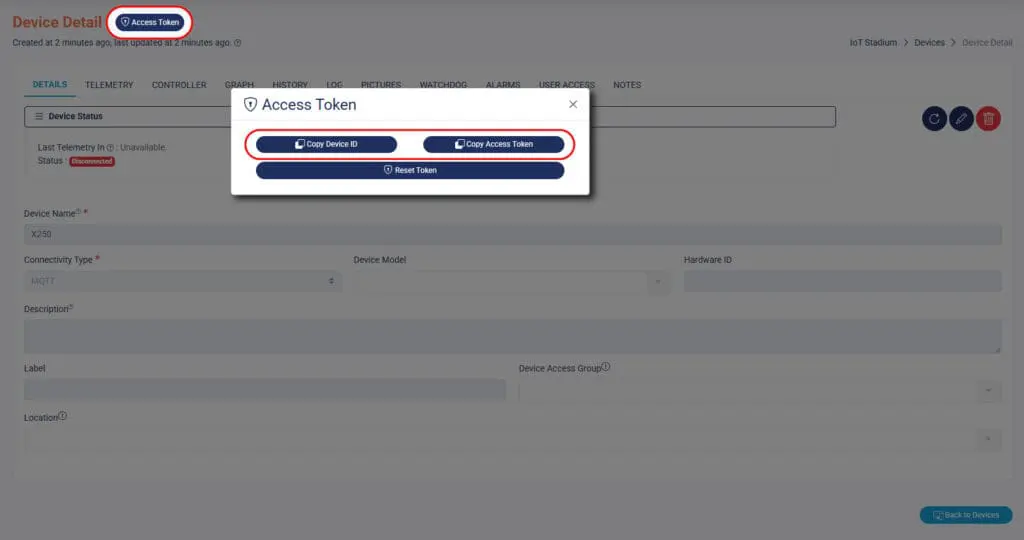
3. Copy Device ID, and Access Token to your MQTT broker or to your firmware.
*Note: This two are the tokens you need to copy on your firmware, to get connect to IoT Stadium. and each device has its own unique Device ID and Access Token
Here is the MQTT parameter that need to be set up on your device,
-
- MQTT username : Device ID
- MQTT password : Access Token
- MQTT topic : Device ID
- MQTT payload format : {"key": "value"}
- MQTT payload example : {"temperature1": 60}
Upload and compile your firmware with these tokens, then your device will automatically connect to the IoT Stadium. Connecting to IoT Stadium usually takes 5 minutes or less.
A quick note: If your device is already connected to IoT Stadium and you click Refresh Token, your device will remain connected to the platform. The new ID and Access Token will be updated, and if you want to update your Device ID and Access Token, you must copy both to your device's firmware. *Note: This is just the code example
#include <WiFi.h>// Depends on board's library
#include <PubSubClient.h>

const char* ssid = "your-wifi-ssid";
const char* password = "your-wifi-password";
const char* mqtt_server = "telemetry.iotstadium.com"; //MQTT Server IoT Stadium
const char* deviceId = "your-device-id";
const char* accessToken = "your-token-code";

WiFiClient espClient;
PubSubClient client(espClient);

void setup() {
  Serial.begin(9600);//Baudrate
  WiFi.begin(ssid, password);
  while (WiFi.status() != WL_CONNECTED) {
    delay(500);
    Serial.print(".");
  }
  Serial.println("Wifi Connected");
  client.setServer(mqtt_server, 1883); // set server at port 1883
  if (client.connect(deviceId, deviceId, accessToken)) { //Connect with IoTStadium Server
    client.subscribe(deviceId);
    Serial.println("Connect with IoTStadium");
  }
  else {
    Serial.println("Check your Device ID and Access Token");
  }
}

void loop() {
  client.loop();
  delay(1000);
}
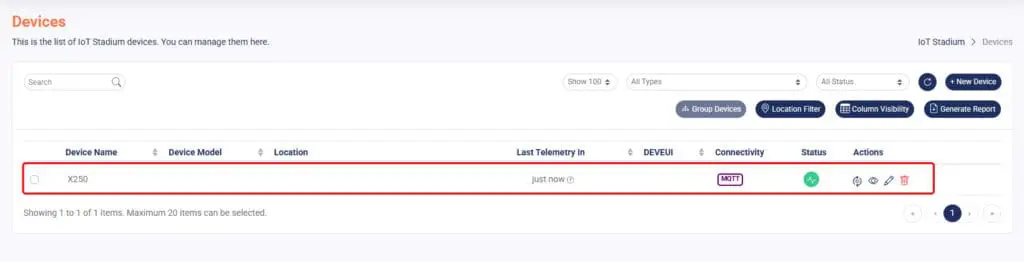
4. Once it is done, IoT Stadium can present the data from your device.
Provisioning via Mobile App
Theres is another way to provision your device, which is via IoT Stadium mobile app which you can download from here: https://play.google.com/store/apps/details?id=com.iotstadium.loraprovisioning
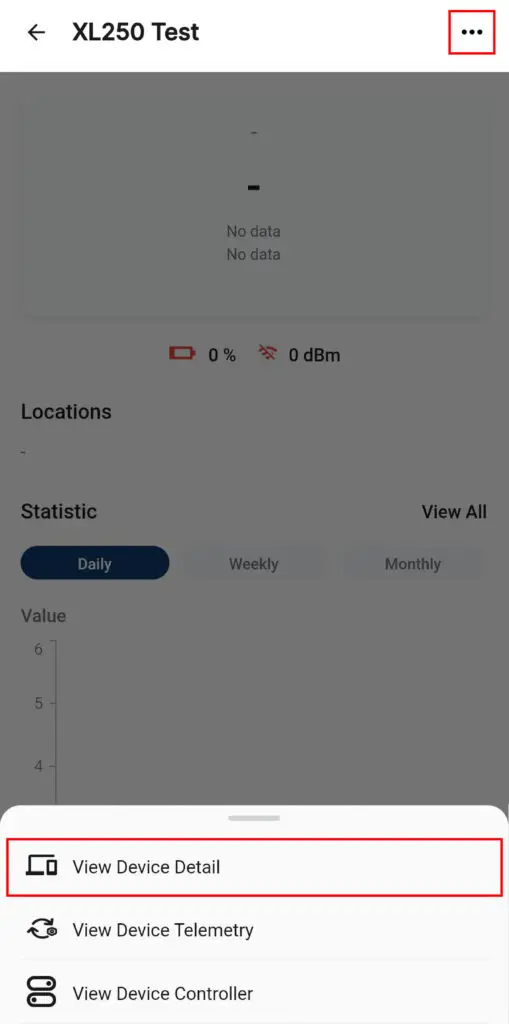
1. Select your device name.
2. Click on the three bars on the top right off your phone, then click View Device Detail.
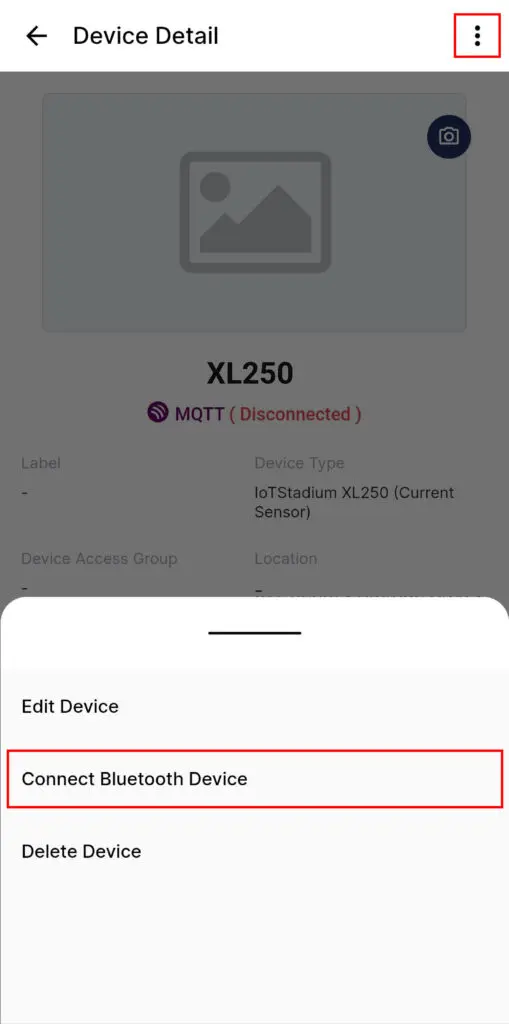
3. Click on the three bar again, then click on Connect Bluetooth Device.
*Note: Make sure to activate your phone’s bluetooth.
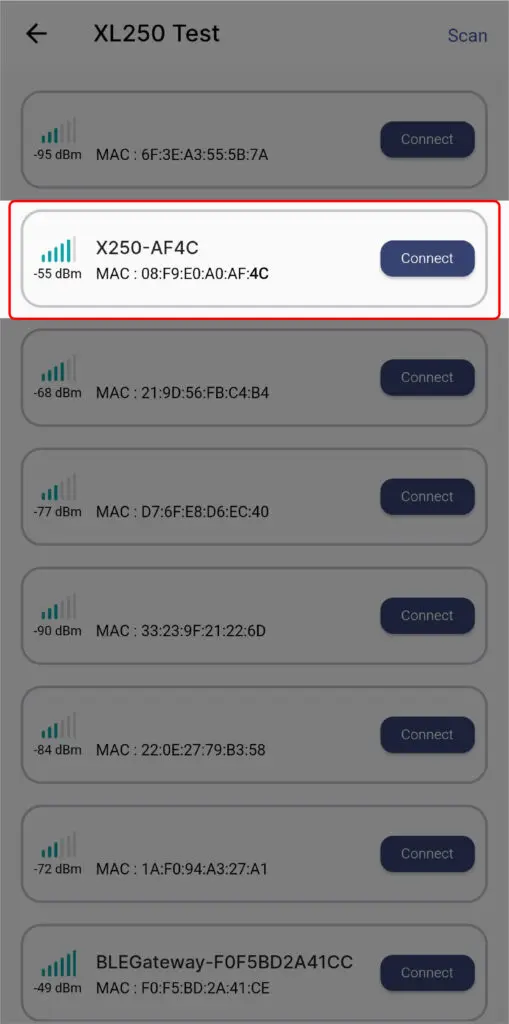
4. Click on Scan.
5. Click on your device name.
*Note: The name will match its MAC Address.
6. Set the SSID and Password with your selected SSID and Password.
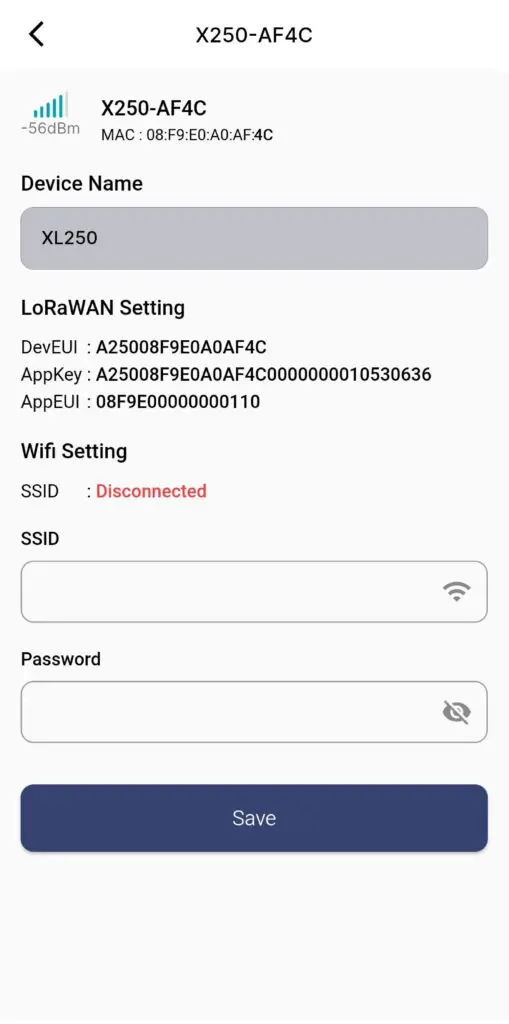
7. Click Save when done.