This type of automation is used to set the snapshot timer
*Note: Before we go further, to set this feature you need to add your camera to our platform. You can take a look at this step, — you may also need our SDK to complete the process.
Please click on the link down below for further information
Add New Automation
1. Click on New Automation.
2. Choose the Automation Type as Snapshot.
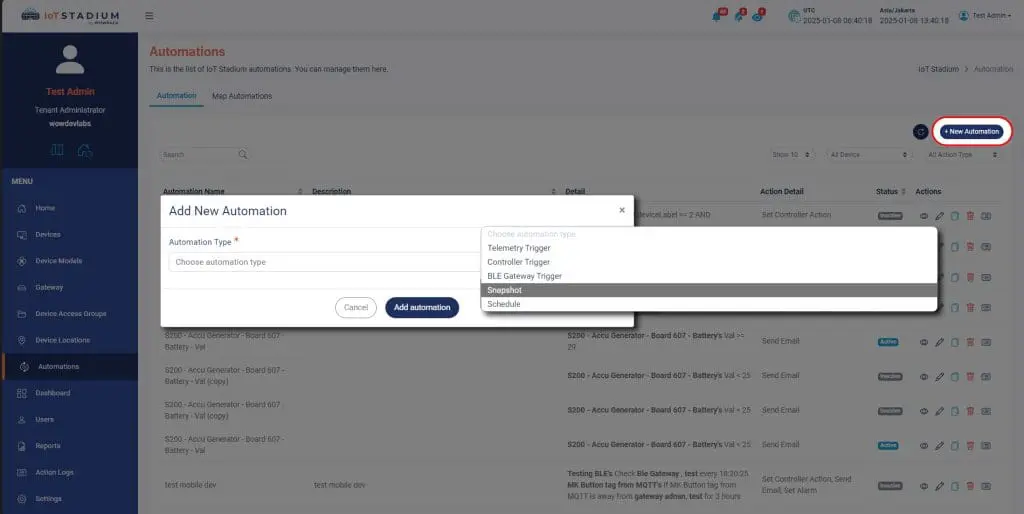
3. Click Add Automation to go to the next section.
Set The Automation
After you choose your type of automation, you will go to this page:
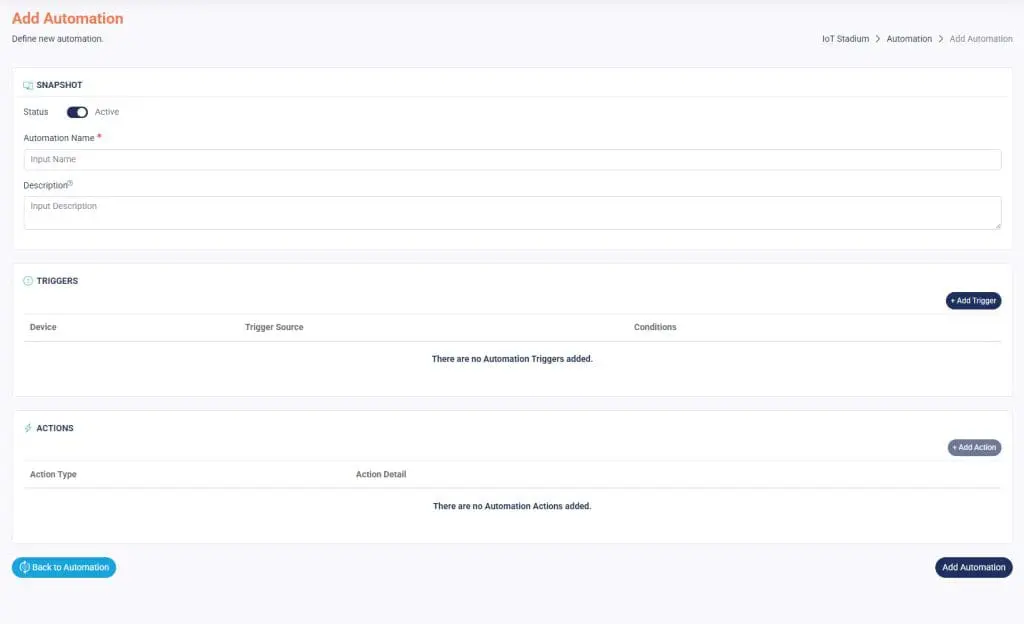
1. Make sure to slide the Active button to enable your automation.
2. Assign a name and description to the automation.
3. Click Add Trigger.
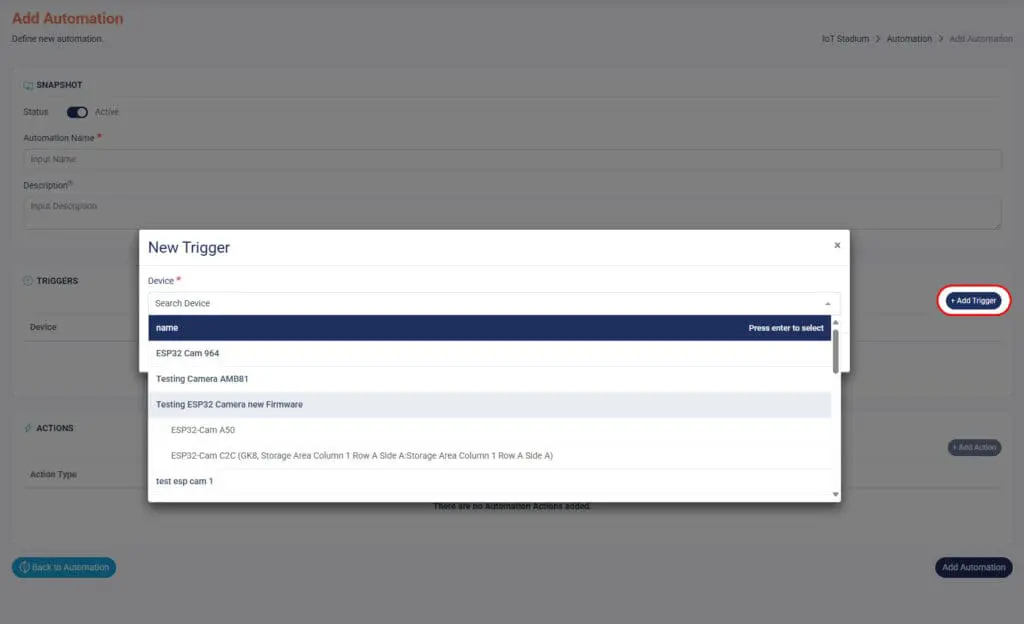
4. Select the Device you want to use, then click Add Trigger when finished.
*Note: You can only select device which have camera.
5. Set the Condition.
6a. Set Every X Hour, then set the camera to take snapshot at every specific hour.
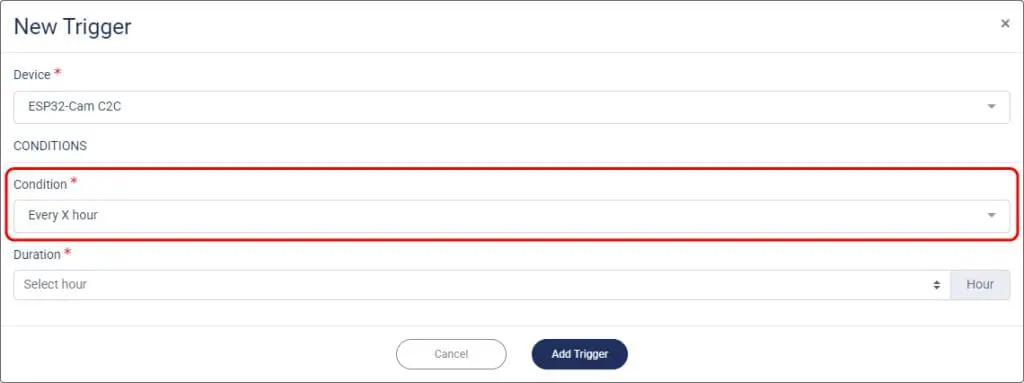
6b. Set At X Time, then set the camera to take snapshot at every specific time.

7. Click Add Trigger when done.
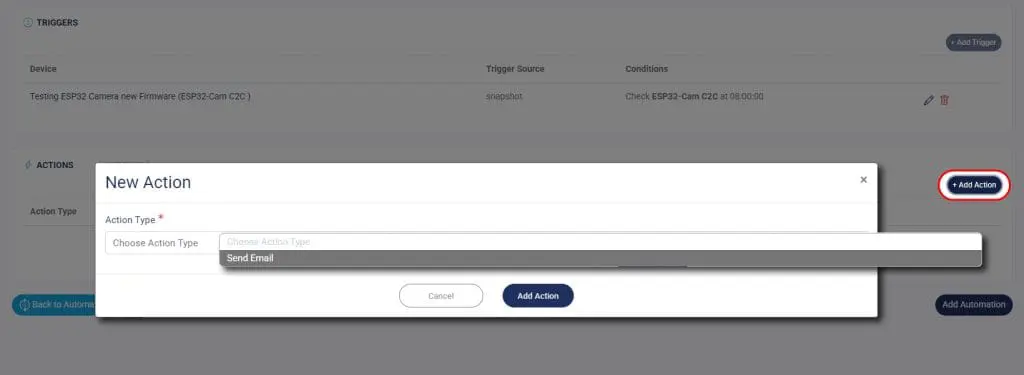
Set the Action
Once you've done set the schedule, you can set the action for your automation. But you are only able to set it for controller action
1. Click Add Action.
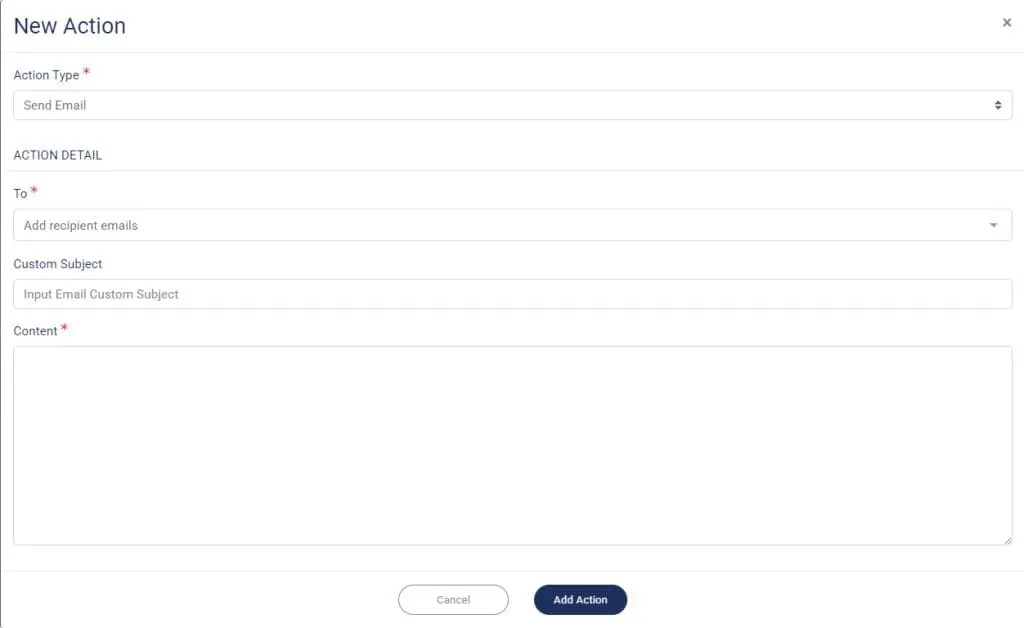
2. Choose Action Type as Send Email.
3. Set the email recipient, and you can select multiple recipients
5. Set the Subject.
6. Don't forget to add the detail about your email.
7. Click Add Action when done.
When you're done setting the automation, click on Add Automation. 